2006superjet's Hull Reinforcement/tubbie buildup

oxnard111

Creative RE Purchasing
ya misc stuff will be dialed in hey so how long for a full drivable cure for the fiberglass.

most epoxy resin's say 1 week for full cure. Don't know how long you want to give it before you ride it though.

I only sanded the edges that are easily touchable when all the components are installed (ie hood seal lip area), but for the areas like behind the gas tank and waterbox I just left un sanded.
 

oxnard111

Creative RE Purchasing
ya the install is going to go alot slower and more presice than the teardown. i may do all new cooling lines now wile its out and accesible.
while its out do cooling lines, check all your electrical connections (especially at the starter), check your motor mounts closely, and seal up around all the through hull fittings coming through the firewall (exhaust tube, steering cable, cooling lines, etc).
 

2006superjet

just one more part....
Location
costa mesa ca
well

i got my parts order and looked at the 07 catalog and there is an 08 product update with new thing one of them was Tubbie Destroyers sponsons. they have removable weights

now i read they will work on kawi sxr 91-07 and 08+ superjet

hope they suck price is tba. why didnt they recomnd them to me is kinda strage maybe to move inventory, makeing way for these that would be really gay. they are black and look thin. the pics is hard to tell.

they are also removable.
i think you would put in the base plate with glue and screws then the other peice goes on that prob with removable tabds of somsort. going to be interesting how they work or stay on?
 
Last edited:

2006superjet

just one more part....
Location
costa mesa ca
its avail for kawi sxr 91-07 and 08+
now that i think of it the 08 hull is protrudiung already having sponsons why would you need this. anyone else see the pic in the catalog.

i like the install idea and a lil tubb is all you need anyway i dont want to argue i cant have them now kinda way too late. why would they put 91-07 superjet item number
AWCO216
 
Last edited:

wydopen

onthepipe
personally i dont think the 08s need em..(yes ive ridden one)..they sell them for the sxr cause for racing you dont need as wide of a sponson so the nose dosnt ride too high
 

2006superjet

just one more part....
Location
costa mesa ca
new stuff new superjet blaster fake magnum pump cone

new stuff new superjet blaster fake magnum pump cone

--------------------------------------------------------------------------------

they also came out with white odi grips. 29.00

and blowsion b odi side covers. 24.95

d cut blaster ride plate carbon 238.00


and a new superjet afterburner pump cone kit part 02-05-007 no price
oem pump into high flow emulates magnum pump will increase pump hook up and rear end tract fits all years superjet waveblaster
 
Last edited:

2006superjet

just one more part....
Location
costa mesa ca
painted the bottom

today i painted the bottom and sides. i used gel coat that air dries and has and mek hardner and brushed it on it has hardend everywhere except the epoxy resined areas around the tubbies. i enclosed the part is saran wrap to see if that cures it. i research it a lil and fig it may not work in that area i will just rattle the area or use an oem sticker. i have to wet sand down the hull and then use a good cutting compound and then wax the bottom was all scratch and now its all smooth and flush and now its very bright new white will look nice. just still p o ed about the areas around tubbies maybe find a white paint simular. any tips on what will stick to the new resin around the glass and i think there is some 904 sealant bostik also i may have to sand it down to before the gelcoat in the areas and use a base coat or primer then do the gelcoat. or just rattle.

any sugg will help anyone do this is priming neccesary on non gel coated areas?
 

2006superjet

just one more part....
Location
costa mesa ca
ya so

The exception is when the repair will be finished with gelcoat. Epoxy adheres tenaciously to cured polyester but the reverse is not true. The bond between an epoxy repair and an overcoat of polyester gelcoat will not be strong. Use polyester for repairs that will be gelcoated.

so kida screwd also read somwhere that gelcoat wont last on smc due to flexing down the road oh well kinda over it lil late. rattle can
 

oxnard111

Creative RE Purchasing
i don't think that gel coast is going to hold up. get coat is not made to be used over epoxy. The hull comes painted on the bottom from the factory. not sure what it looks like, but i'd probably just leave it. but thats just me. also i read that you can spray a mold release over the gel coat to make it setup, so you might try that.
 
Last edited:

Ericfox

Do it twice?That's DooDoo
today i painted the bottom and sides. i used gel coat that air dries and has and mek hardner and brushed it on it has hardend everywhere except the epoxy resined areas around the tubbies. i enclosed the part is saran wrap to see if that cures it. i research it a lil and fig it may not work in that area i will just rattle the area or use an oem sticker. i have to wet sand down the hull and then use a good cutting compound and then wax the bottom was all scratch and now its all smooth and flush and now its very bright new white will look nice. just still p o ed about the areas around tubbies maybe find a white paint simular. any tips on what will stick to the new resin around the glass and i think there is some 904 sealant bostik also i may have to sand it down to before the gelcoat in the areas and use a base coat or primer then do the gelcoat. or just rattle.

any sugg will help anyone do this is priming neccesary on non gel coated areas?

Tip: proof-read :poke:
 

2006superjet

just one more part....
Location
costa mesa ca
all done

well except for the install part everything is drying i 5200 all the back areas near the incoming line area firwall and such also around my bilge oulet and pisser.

i ended up wet sanding the hull and it came out ok not as shinny as i liked but if it doesnt flake off then i will be more than happy. unfortunetly i ended up scuffing up round the tuibbies a lil and did a flush bead of 5200 it matches to is good to go. should have done this insted but hey whateveer the hull was all scratched up and all. i will post up pics when i get to my camera.
 

2006superjet

just one more part....
Location
costa mesa ca
Fin

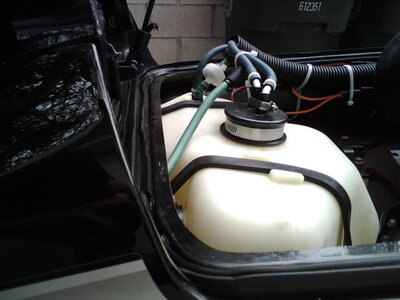
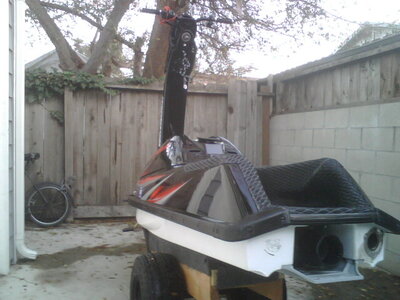
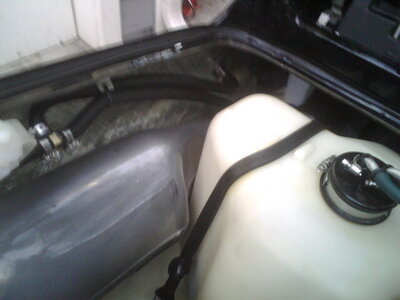
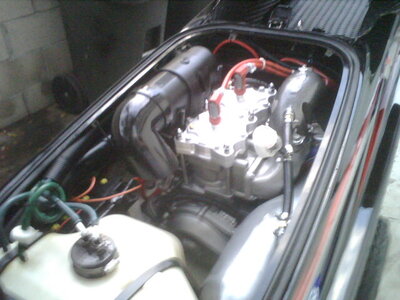
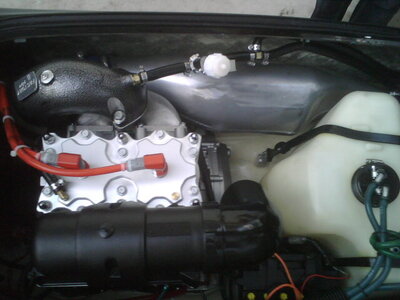
Well I made my deadline, everything worked fit great the gas tank was a pain since the hull doesn’t flex much anymore. I lubed it up and just forced it, figured if it broke from that better redo the whole thing. I took off the fcv and also did somthing new on the gas tank breather, got rid of the water separator also. All new hoses for cooling and also I got the gas tank in strait and flat notice on the old pic. The connection to the water box and stinger is spot and I am going to be ok clearance wise too. Pesky pipe. Anyways I just wanted to let you know that I am a lil rushed on the computer my mind is always thinking bout the next and I just type sorry again if it is hard to read. The pics are important so I took a few they helped me do this project. Again I was more worried about finishing this project in a few days then typing and spelling errors. My nose I good to go I am prob 80% healed and breathing is great I recommend the surgery you can test your self by plugging your nose with your fingers and blow out nose not letting air out and then let go and breath through nose only if you can breath clear and more than normal and 3 seconds later it gets clogged again maybe 1 side only then you may have to consult and ent. And go from there they will use and endoscope and check you out. Wish me luck tomorrow Oh ya my primer kit isn’t working could it be the fuel not filling all lines its tapped into the reserve. And is my new tank breather ok. Thanks again guys for tips all couldn’t have done it without you.
 

Attachments

  • IMG01243.jpg
    IMG01243.jpg
    51.8 KB · Views: 24
  • IMG01571.jpg
    IMG01571.jpg
    65.1 KB · Views: 28
  • IMG01573.jpg
    IMG01573.jpg
    66.3 KB · Views: 27
  • IMG01574.jpg
    IMG01574.jpg
    48.9 KB · Views: 22
  • IMG01578.jpg
    IMG01578.jpg
    43.4 KB · Views: 30
Last edited:
Top Bottom