You are using an out of date browser. It may not display this or other websites correctly.
You should upgrade or use an alternative browser.
You should upgrade or use an alternative browser.
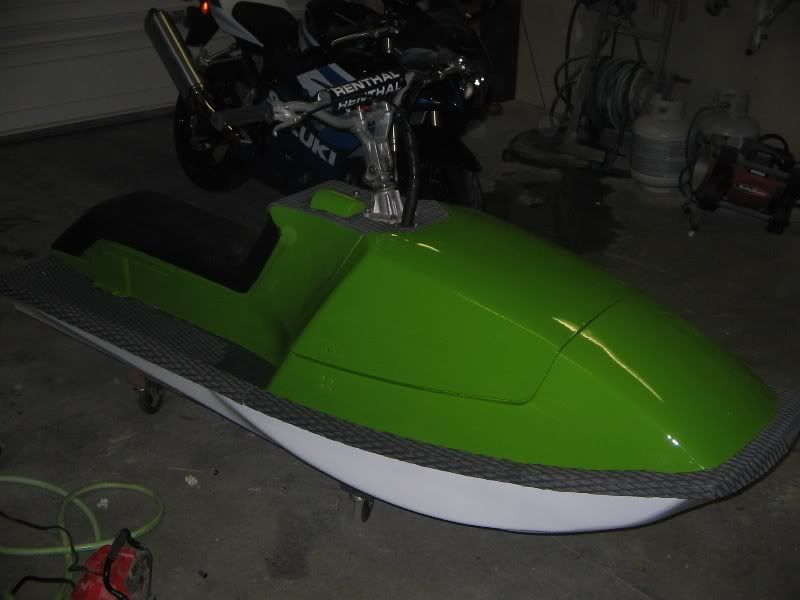
I started chopping my X2 and couldn't stop!
- Thread starter x2skier
- Start date


vitalikol
Jetski-Snowboard
- Location
- Pennington,NJ
Nice job. I want to do more/less same but don't have will/ patience/time. but still will try to do it.
kip us posted
kip us posted
shawn_NJ
Chasing waves.
- Location
- Daytona Beach
********ING BLASTER MOD IN AN X2!!! Sick dude, good job thinking outside the norm. I cant wait to see this ski. Great innovation here.
- Location
- Mechanicsburg, PA
I hope your air intake doesn't spit water into your carbs...I see how you have it and it looks like it will work the only thing it is pointed @ the carbs...maybe piont it back or something...I have 4 tubes that run forwart to the front of the hood and stop about 4 in. before the front and just dump...Mine will hopefully not swallow too much...Great job...
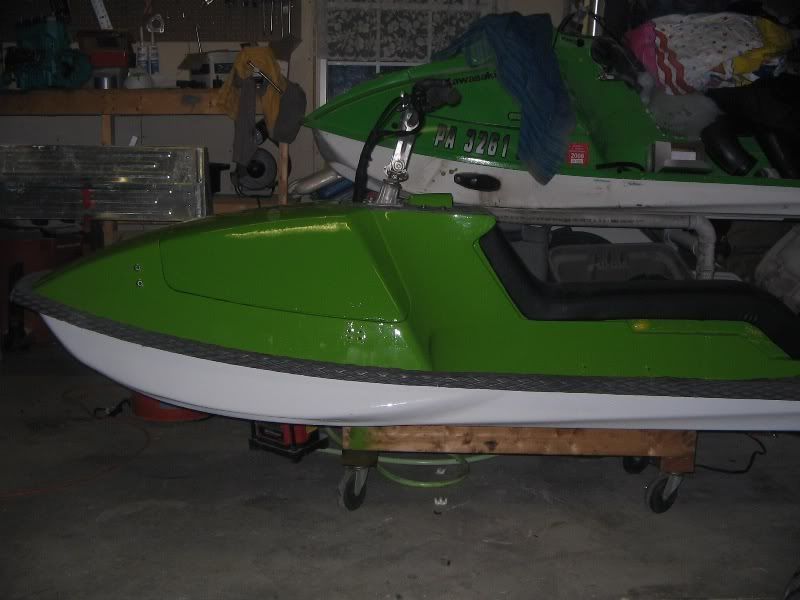
Ice, thanks for the pics. Unfortunately, by eliminating the lower hump in the hood, a lot of intake options were also eliminated. My suggestion to anyone who wants to do the totally smoothed over look would be to leave the lower hump in place and glass and fill the edges flush with the outer hood sides. This will leave more options open for a re-designed intake.
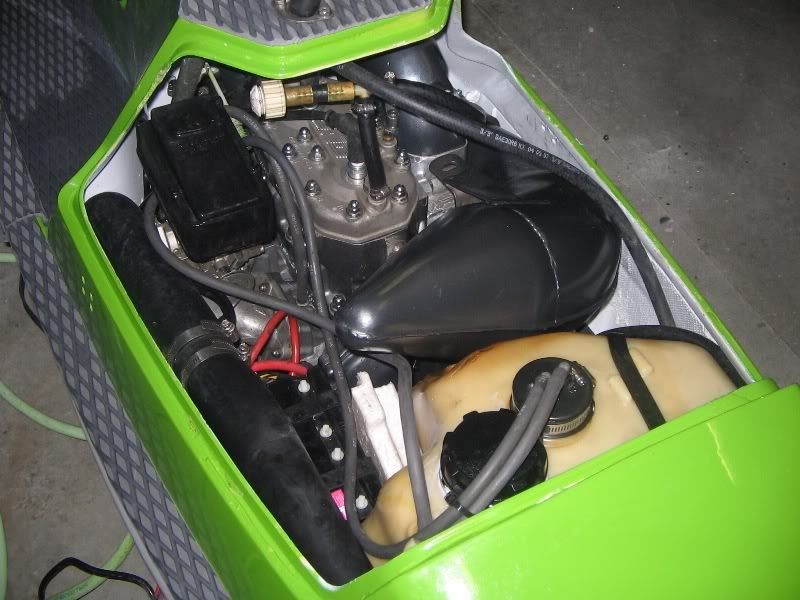
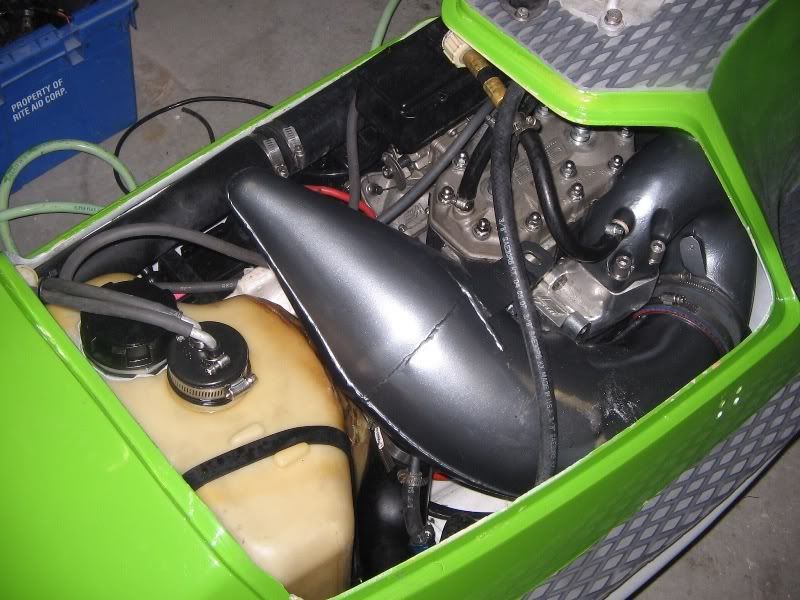
The intake (2" PVC) as shown is only partially complete. It's going to have a 2-1/2" flex hose coming off the tee and routed to the bottom of the carbs. Also, I have a 1-1/2" pipe at the bottom of the tee, which terminates in the under seat storage compartment for a drain (you can see this a few pics back).
As far as water ingestion, I think its going to work very well.......its the size that I'm a litle concerned about. 2" was the biggest I could fit without interfering with the steering linkage.
The 1-1/2" drain will also act as an intake when the storage compartment isn't full of water.
Last edited:
- Location
- Mechanicsburg, PA
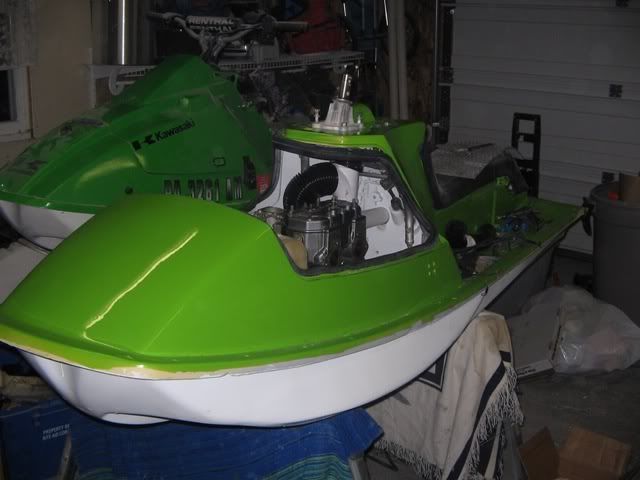
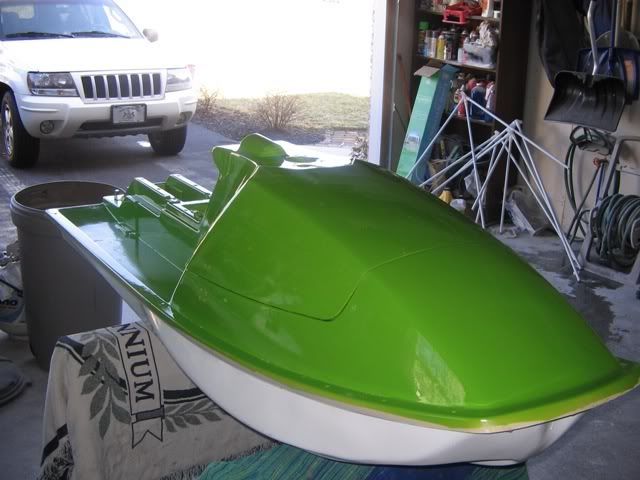
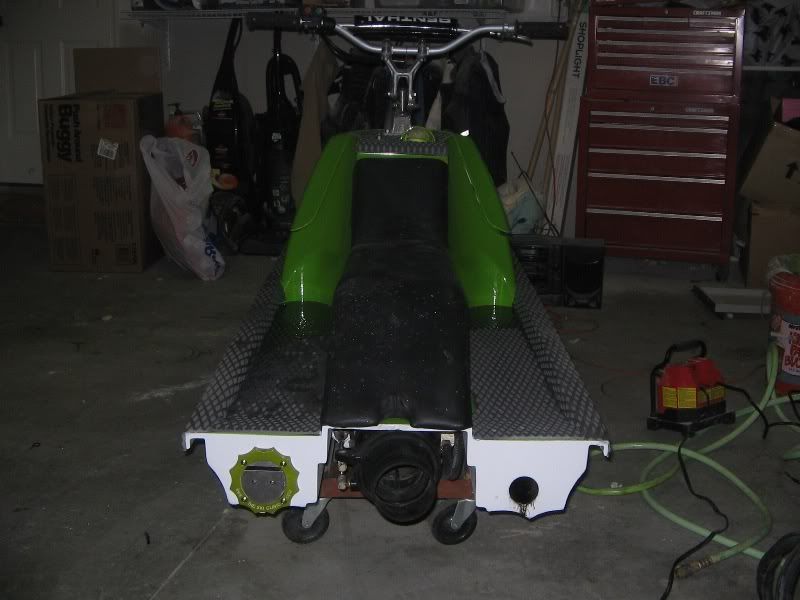
I've completed what should be a final mock up. Here are some pictures of everything in place under the hood and the internal trim system. I was able to mount the stock trim system upside down below the steering deck and reuse the existing cable. The cable bracket will need another bend to work right but I don't have the cable yet.
There's absolutelty no room for the CDI now so going to use an electrical box from an SX mounted down low between the battery and carb.
Oh yeah, I painted it too! Wasn't going to go with the Kawi green again but I wasn't too happy with the color of my last one. The new color has much more of a yellow tint to it, which is what I wanted the 1st time.
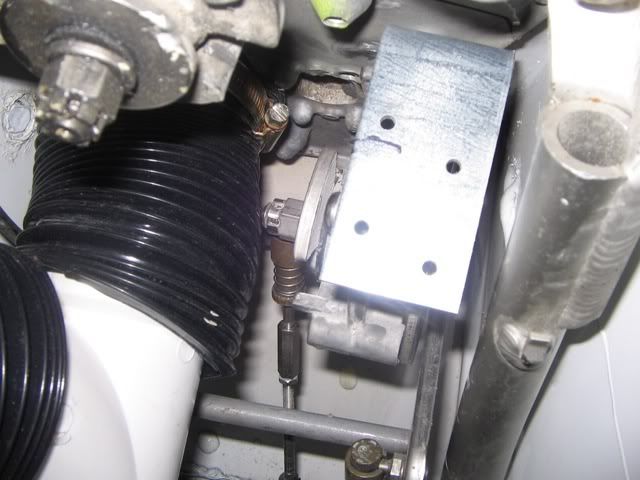
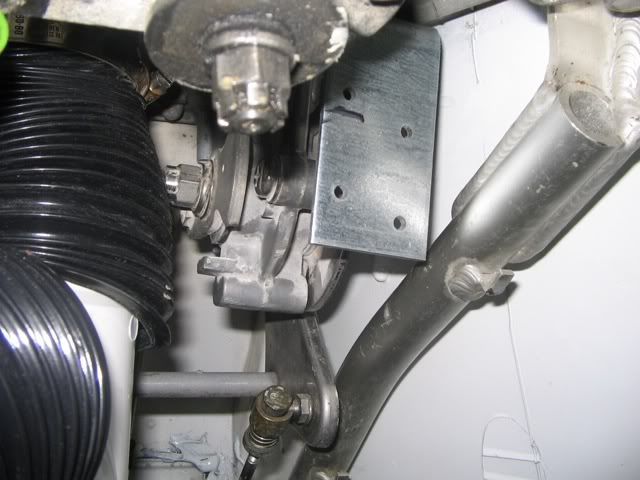
Etheraldreamer
Be there and be square.
- Location
- Spring Hill, FL
that thing looks sweet...you know...for an x2. j/k REALLY nice work.
Kawi 800
06' SXR
- Location
- Harveys Lake PA
Yo man that ski is looking bad a$$
Legdragger
Bringing it back
- Location
- New Hampshire
Nice work! I love originality :Banane35:
madscientist
chilling with these guys.
- Location
- good old p'cola
IGNORE DREAMER we both agreed each others skis felt awkward and left it at that.
- Location
- Mechanicsburg, PA
Still waiting on some miscellaneous parts and fab some brackets for the chamber but is FINALLY almost done. I started it up today and runs good on the hose with no leaks. I'll hopefully be able to do a trailer test within a week or two.

h2odesperado
Pin it to win it
- Location
- Charlotte, NC
dayum thats perty
waxhead
wannabe backflipper
- Location
- gold coast
Thats an awesome job
Well done
Well done
w-nut
x2 nut
- Location
- christchurch new zealand
man thats looking dam good :bigok:
Big Kahuna
Administrator
- Location
- Tuscaloosa, AL
looks good, now you need to find either a UMI or Accustear for it.
- Location
- Mechanicsburg, PA
looks good, now you need to find either a UMI or Accustear for it.
Yep, I've been waiting for one to pop up but no luck yet. I may have to break down and buy new.
X2Guy is working on a design so that's another option.
Mike W
Infidel
- Location
- North Florida
Looks damn good. Nice job!!!
#ZERO
Beach Bum
- Location
- Florida - U.S.A.
Nice job, those tubbies blend in with the hull contour real well.
I'm curious to hear how it's going to handle with all the mods.
I'm curious to hear how it's going to handle with all the mods.