FX1 Makeover

KR

www.krlines.com
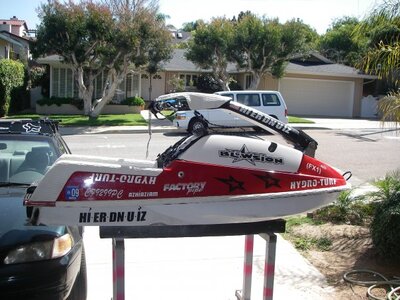
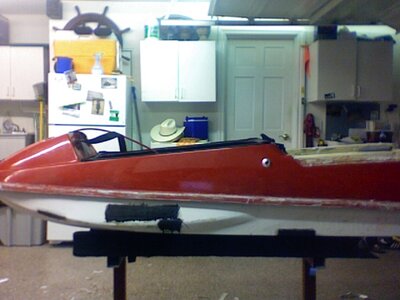
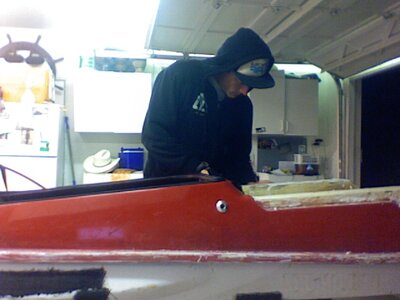
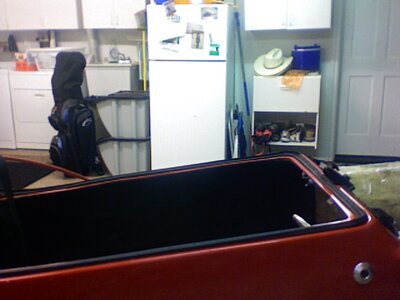
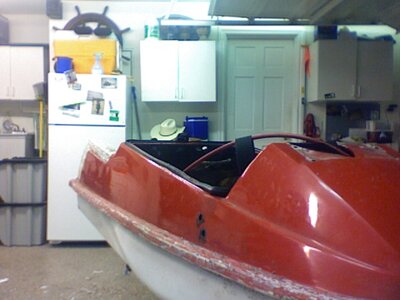
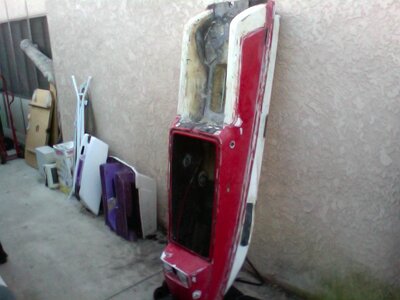
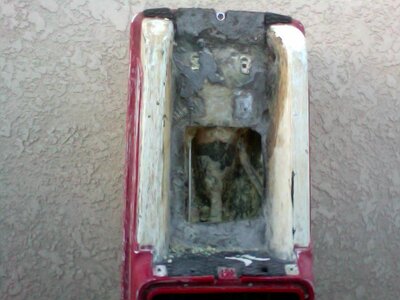
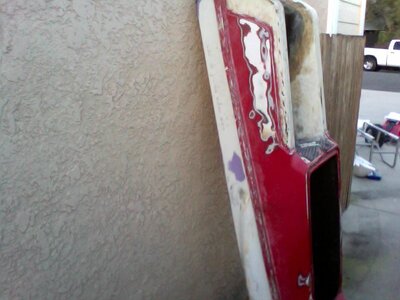
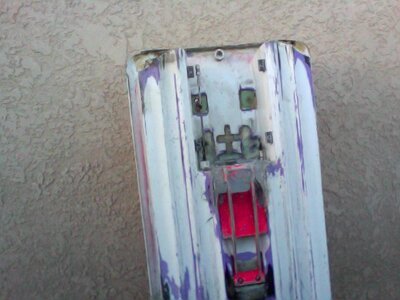
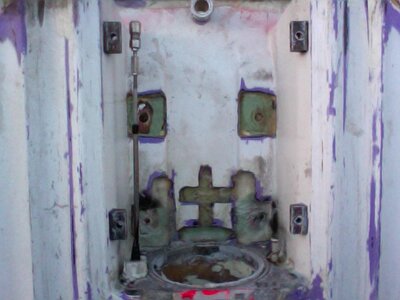
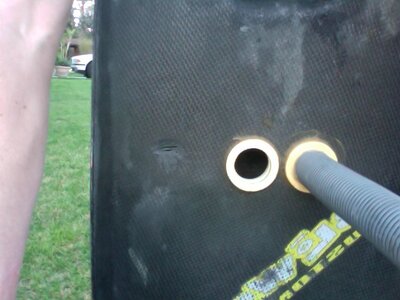
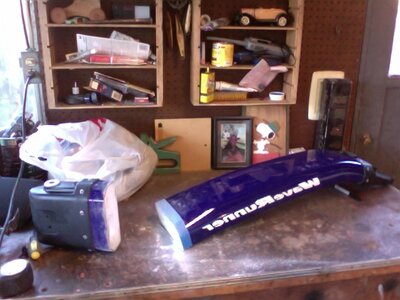
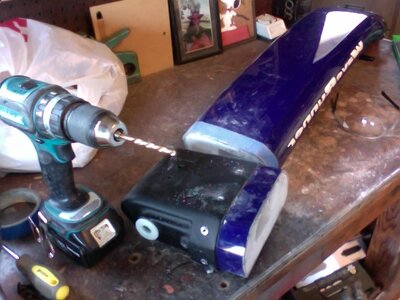
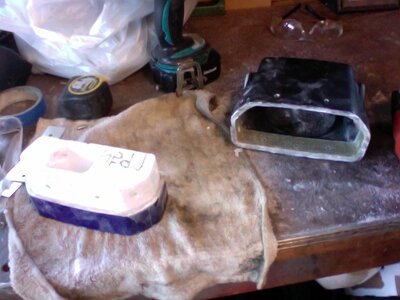
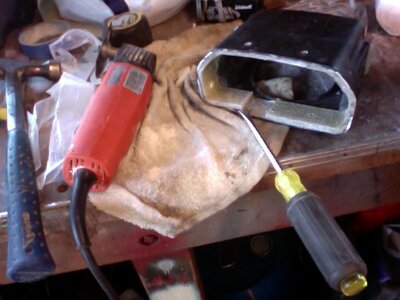
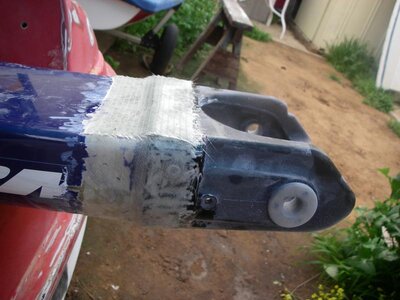
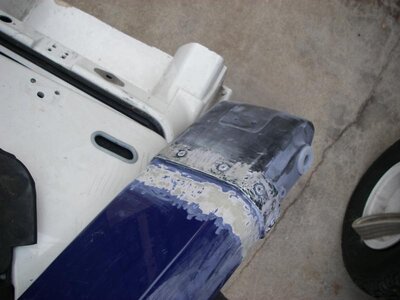
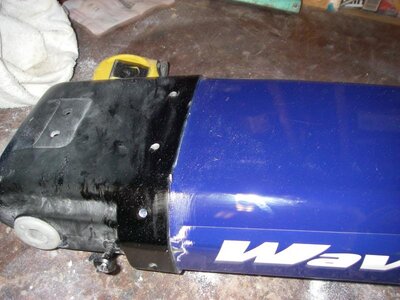
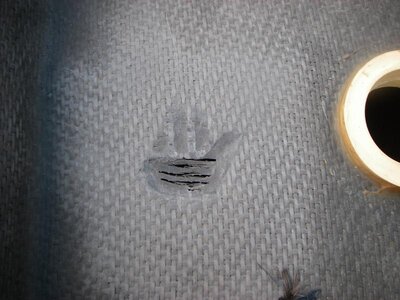
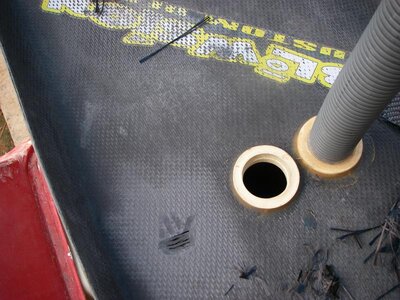
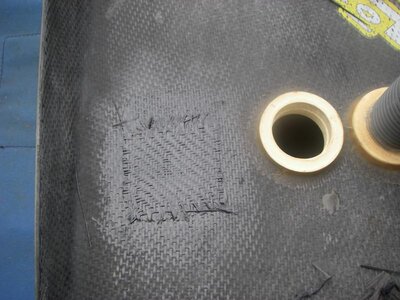
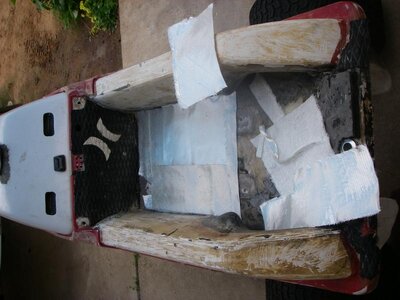
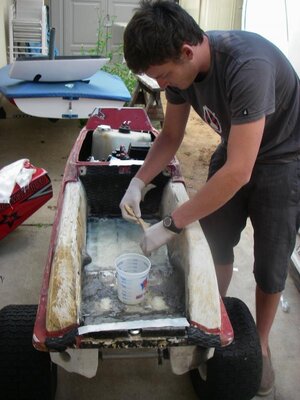
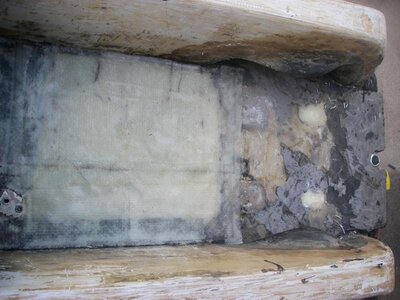
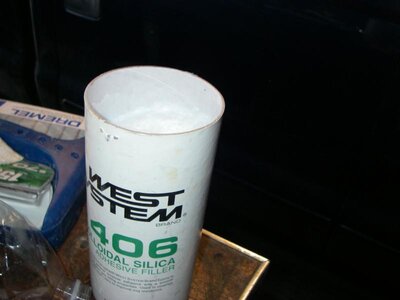
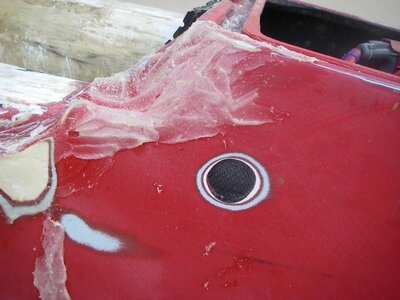
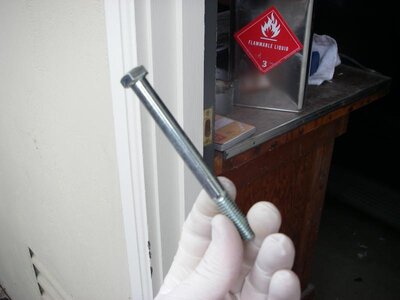
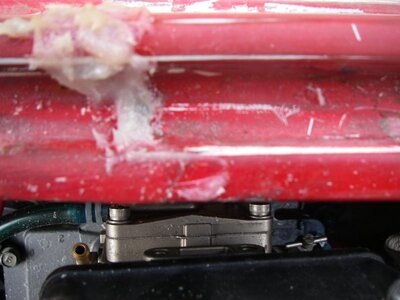
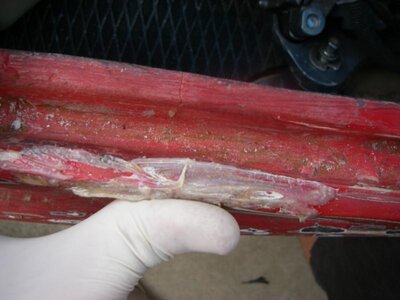
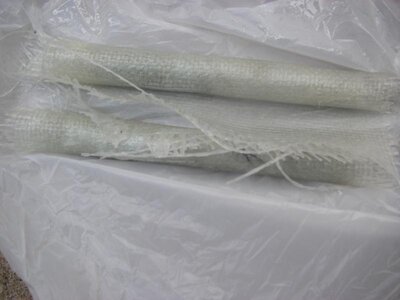
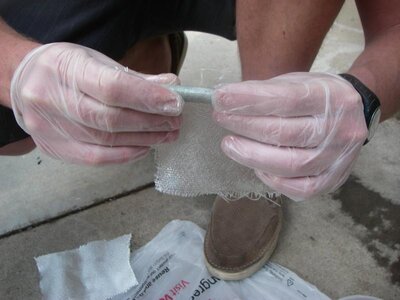
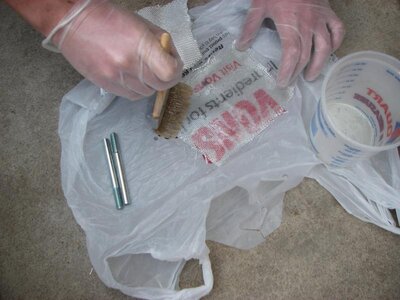
This FX is getting a makeover! This ski has been through a lot and it needs some help. The right tubbie split, there are stress cracks everywhere, needs a bit more reinforcement in a couple areas, the pump alignment is off, bearings need to be replaced, and it needs a new paint job! As far as motor goes, Art at Jet Works will be doing some minor adjustments to help keep this FX in check. Stay tuned!
 

Attachments

  • n1067250062_30148424_6620469.jpg
    n1067250062_30148424_6620469.jpg
    79.2 KB · Views: 299

KR

www.krlines.com
Bla bla bla...carbon!
 

Attachments

  • Photo 72.jpg
    Photo 72.jpg
    83.8 KB · Views: 140
  • Photo 75.jpg
    Photo 75.jpg
    77 KB · Views: 113
  • Photo 74.jpg
    Photo 74.jpg
    73.3 KB · Views: 103
  • Photo 73.jpg
    Photo 73.jpg
    83.7 KB · Views: 71

KR

www.krlines.com
Who is the nemesis that ruined this once beautiful red boat!?
 

Attachments

  • Photo 65.jpg
    Photo 65.jpg
    80.4 KB · Views: 82
  • Photo 66.jpg
    Photo 66.jpg
    93.9 KB · Views: 105
  • Photo 67.jpg
    Photo 67.jpg
    85.9 KB · Views: 56
  • Photo 68.jpg
    Photo 68.jpg
    89.7 KB · Views: 86
  • Photo 69.jpg
    Photo 69.jpg
    81.7 KB · Views: 96
  • Photo 74.jpg
    Photo 74.jpg
    80.9 KB · Views: 72
Last edited:

KR

www.krlines.com
A wee bit too much foam but it gets the job done. Started to modify my 08' Superjet handlepole.
 

Attachments

  • Photo 76.jpg
    Photo 76.jpg
    94.8 KB · Views: 74
  • Photo 77.jpg
    Photo 77.jpg
    95.4 KB · Views: 51
  • Photo 78.jpg
    Photo 78.jpg
    96.5 KB · Views: 59
  • Photo 79.jpg
    Photo 79.jpg
    87.8 KB · Views: 60
  • Photo 80.jpg
    Photo 80.jpg
    82.8 KB · Views: 62
  • Photo 81.jpg
    Photo 81.jpg
    95.7 KB · Views: 112

KR

www.krlines.com
So I decided to shorten my handlepole 3". I cut the pole at the base and used epoxy filler in between the cast part and the bottom of the cut pole. I then used a chizzle and hammer and gently tapped the aluminum piece inside. I let it cure for a day so everything would get nice and secure. I then re-drilled the holes and put in aluminum rivets.

I am going to carbon wrap this handlepole but I decided to add some good strength under that carbon beauty. I didn't waste time so I dremeled the bottom of the pole cast piece and glass, just to scuff everything up so the glass would have something to grab onto. Unfortunately, even epoxy biaxial won't bond to metal but I did my best to make sure it made good contact.
 

Attachments

  • IMGP0968.jpg
    IMGP0968.jpg
    59.3 KB · Views: 73
  • IMGP0949.jpg
    IMGP0949.jpg
    48.3 KB · Views: 51
  • IMGP0934.jpg
    IMGP0934.jpg
    70 KB · Views: 41
Last edited:

KR

www.krlines.com
I let my best friend borrow my carbon hood and unfortunately he had a little accident, nothing that would require more then 5 minutes of work though! I thought to myself, there are two ways to fix this hood liner. 1. Take it all apart and patch it for strength, or 2. I could just put in 30 seconds of elbow and put a couple layers of carbon on.......Yeah, I am lazy and decided to just go with #2 and patch the hole with carbon. In fact my little brother just had his first experience with composites and put it on himself. :fing02:
 

Attachments

  • IMGP0950.jpg
    IMGP0950.jpg
    65.9 KB · Views: 54
  • IMGP0951.jpg
    IMGP0951.jpg
    86.8 KB · Views: 38
  • IMGP0972.jpg
    IMGP0972.jpg
    67.2 KB · Views: 49
Last edited:

KR

www.krlines.com
In my previous post you can see that I had a huge "muffin top" coming out of the tray. I was deciding between 6 ounces of foam and 12 ounces. Apparently, 6 ounces is the right one :slap: .

I cut it all down with a fine tool which was a lot of fun. I then used 100grit sand paper on a block to make it nice and flat all the way through. I sanded around the cut tray for the glass to lay on.

I am very poor and cannot afford a $10 sheet of cloth (I treated my girlfriend to a turkey sandwich instead.) I just used what I had on hand. All I had was big strips of biaxial and I think it worked out okay...

Anyways, here is the finished product. Nice and water tight!
 

Attachments

  • IMGP0945.jpg
    IMGP0945.jpg
    61.7 KB · Views: 60
  • IMGP0958.jpg
    IMGP0958.jpg
    62 KB · Views: 99
  • IMGP0973.jpg
    IMGP0973.jpg
    68.4 KB · Views: 63

KR

www.krlines.com
These FX1's are old hulls and I don't think the engineers took into account that guys would be flipping these skis in the surf and landing on their sides. The previous owner and I have done some nice damage to this hull and unfortunately its very noticeable. If I were to paint without taking care of the massive stress fractures and cracks they would just further deepen and of course, reoccur.

I tried the West Systems 406 microballoons. I have never used this product for a finish but there is no fun in not trying something new! I made a relatively thick batch and caked the micro balloons on every crack, stress fracture, hole, dent, anything that wasn't perfect.
 

Attachments

  • IMGP0935.jpg
    IMGP0935.jpg
    33.5 KB · Views: 35
  • IMGP0970.jpg
    IMGP0970.jpg
    62.8 KB · Views: 73

KR

www.krlines.com
Out of the factory, the FX1 top deck was relatively thin. And anyone that knows me will tell you that I haven't exactly mastered my barrel rolls yet. Many times I flat land on the side of my ski. Only God knows how high Eddie Bettencourt went in the air and experienced failed roll attempts over his career. In any case this FX1 didn't like the stress and decided to crack straight down the middle. Dangerboy (Carl of Cold Fusion) explained to me that this was a serious issue and needed to be dealt with before any more barrel roll attempts were to be made.

Dangerboy told me in short that I would need a 1/4" fiberglass tube and glass it underneath the bond rail. This would completely suppress the cracking and add additional strength to the hull. This part was only sold in hobby shops (as far as I know.) Even in the heart of San Diego, the closest hobby shop to me was about 45 miles away. I looked around the garage for something on hand.

I found (2) 4" bolts. I cut the heads off and wrapped them in epoxy/4oz. cloth.

Now, I have NO IDEA if this is going to work or not, but it can't hurt to try something out of the ordinary. Depending on how it cures and looks tomorrow afternoon I will either glass it in, or make an hour long drive out to the boonies.


In the pictures you can see a small crack, the micro balloons pretty much covered everything else. At least you get an idea of what is going on...
 

Attachments

  • IMGP0952.jpg
    IMGP0952.jpg
    35.7 KB · Views: 37
  • IMGP0954.jpg
    IMGP0954.jpg
    50 KB · Views: 59
  • IMGP0953.jpg
    IMGP0953.jpg
    48.3 KB · Views: 65
  • IMGP0971.jpg
    IMGP0971.jpg
    36.2 KB · Views: 53
  • IMGP0965.jpg
    IMGP0965.jpg
    51.3 KB · Views: 34
  • IMGP0961.jpg
    IMGP0961.jpg
    61 KB · Views: 34
  • IMGP0955.jpg
    IMGP0955.jpg
    104.2 KB · Views: 34
Last edited:

KR

www.krlines.com
IF ANY ONE IS INTRESTED ABOUT INSTALLING CARBON TUBBIES CONTACT BJS PERFORMANCE
951-310-8390 ask for jason.

here are some pictures of one of are riders superjet..
View attachment 112901

View attachment 112902


These are really great tubbies and I highly recommend them to anyone that wants something totally trick and bomb proof. If I didn't already have Blowsion tubbies, my ski would be in your shop right now!
 

KR

www.krlines.com
Continued to sand the hull last night and this morning. Jason of BJ's Performance is coming down from Riverside to paint. :woot:
 
Top Bottom