Zeon
WNY Crew
- Location
- Buffalo, NY/ Crystal beach, Ontario
Now, For the 4th and final time of building my 2003 Superjet I think I finally have figured out how to build a ski to my needs.
This year around I plan to have little to no wrenching, Especially on the beach.
As for a motor platform I went to Jetmaniac and his engine builder Blue for some reliable brap. If this motor runs as good as it looks I will be stoked. It looks awesome. Top notch quality

My main concern this year was to create a superjet, not a submarine. Last year by 10 minutes into my ride the ski filled up with water in both the tray and the engine bay due to cracks, hull seperation, and a broken nose. This year shes 100% watertight and hopefully bulletproof.
I decided not to do the blue foam again this year. I wanted some real tray support so i went with the 4lbs foam
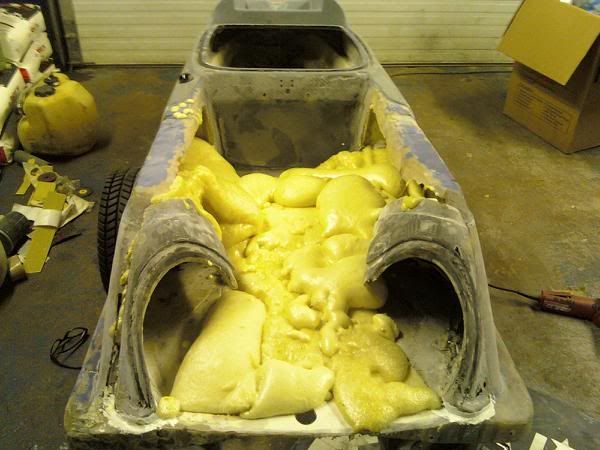
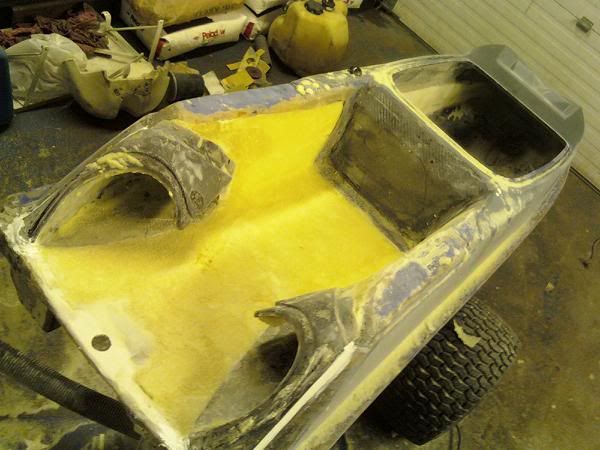
My tray was reinforced all the way around the inside fron to back with 11oz carbonfiber. This was after fiberglassing all the cracks and breaks. Same thing with my engine bay.
Another change this year is NO SCUPPER! god i hate that thing when my ski landed upsidedown. And especially since I guess i am a slow swimmer.
I ended up using WAYYY to much 5200 on every through hull fitting. Better safe then sorry.
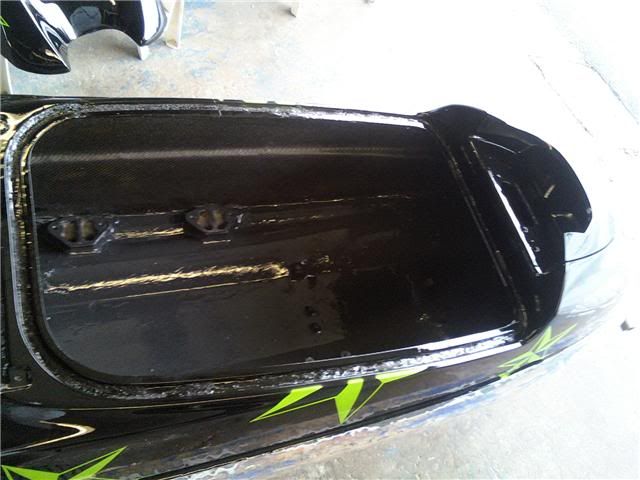
I fixed the body front to back. The nose was so messed up as well as the tail, Just look at old pictures if you dont understand how bad it was.
Since i went to school for paint and collision this is my time to work up some credentials.
My computer crashed so phone pics have to do on my parents computer.
Here goes for the paint proscess.
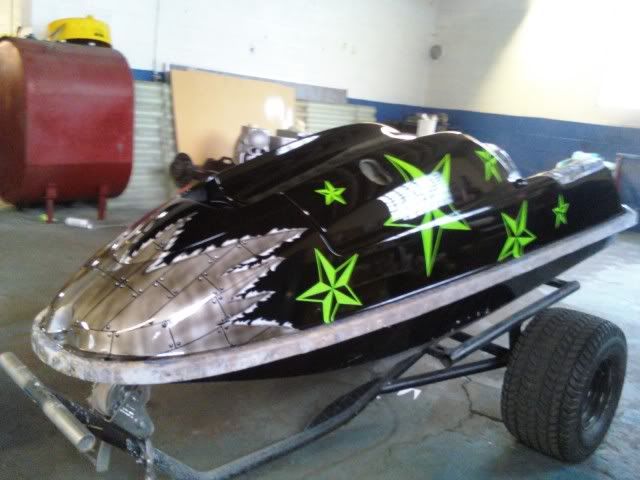
100% ALL DONE BY HAND. NO VINYL. NO STENCILS. ALL PAINT
This gives away my secrets but we are a jetski family so i guess i can share
STep one was to get the ski into a black basecoat.
Next i cut out a bunch of different sized stars on paper and layed them out how i thought may look good
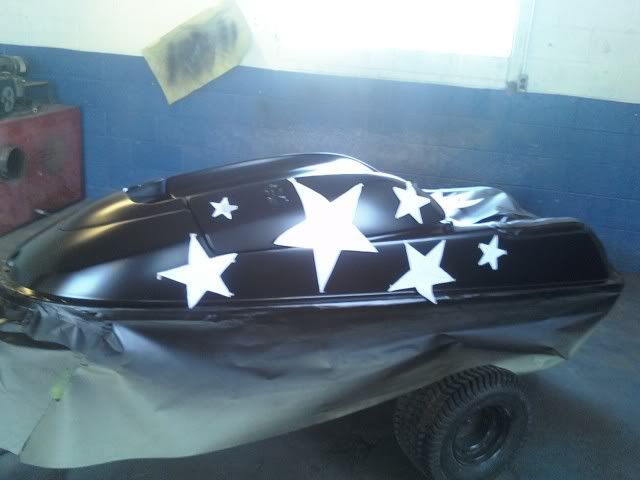
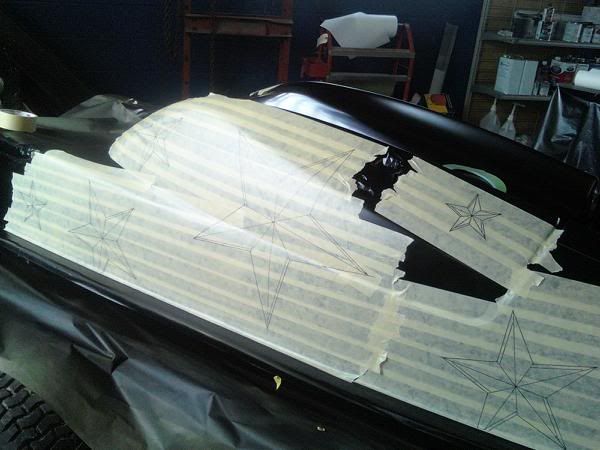
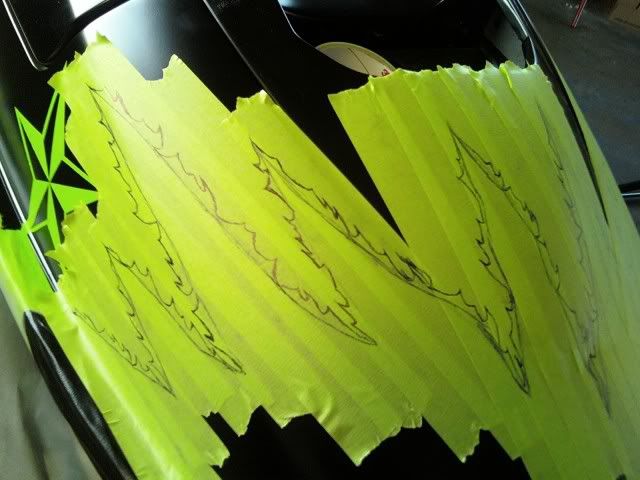
Next I put masking tape layers all where i wanted the stars and drew the stars out on the tape
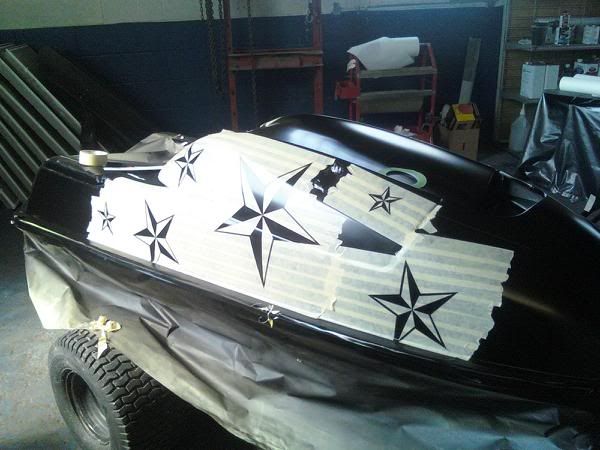
Using an exacto knife i carfully cut out all the areas i wanted Lime green (go figure haha)
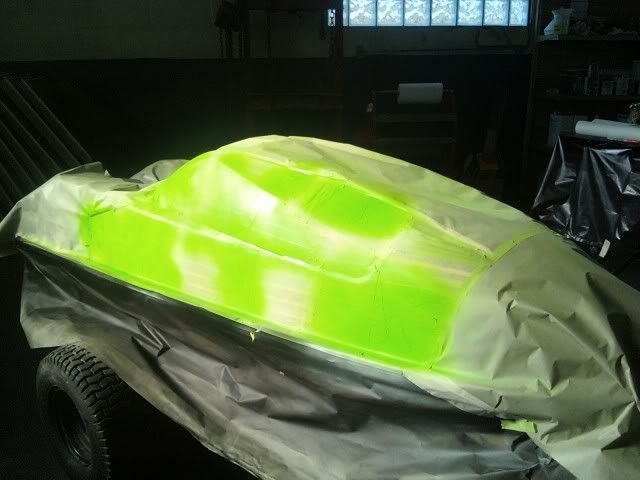
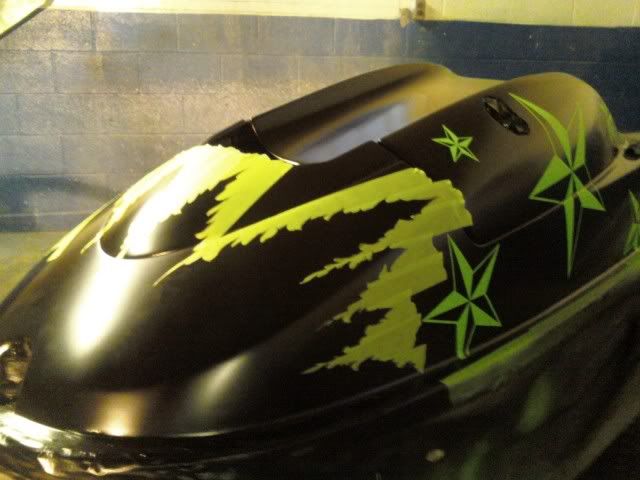
Next, Clearly some paint after masking everyting off i didnt want green
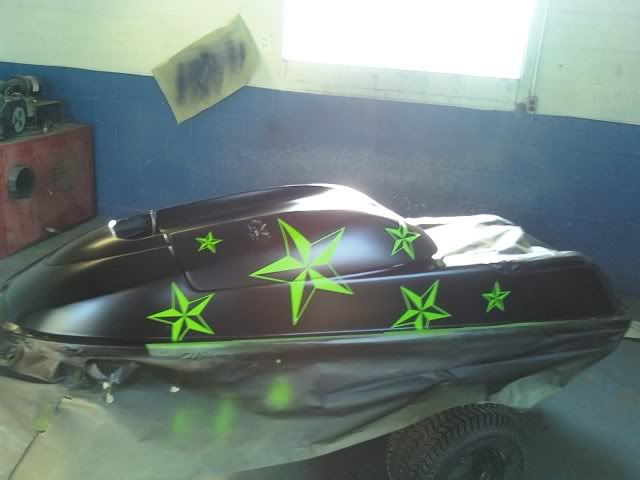
Peeled off the tape and....
Not done yet! I really wanted it to pop and be an eye catcher so what better then tearing up paint with panels (yes overdone but tasteful in this case)
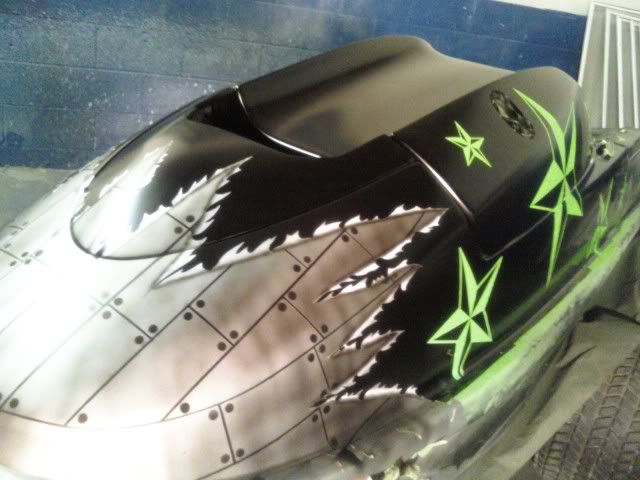
More masking tape, time, Drawing, and the airbrush came out
Cut out what i needed to be silver
AIR BRUSH AIR BRUSH AIR BRUSH untill all my beer was gone and i was ready to pass out
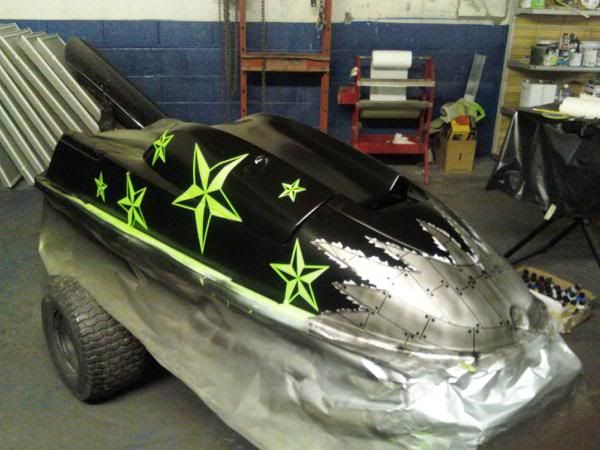
Add some more highlights, Clear coat the hell out of it .

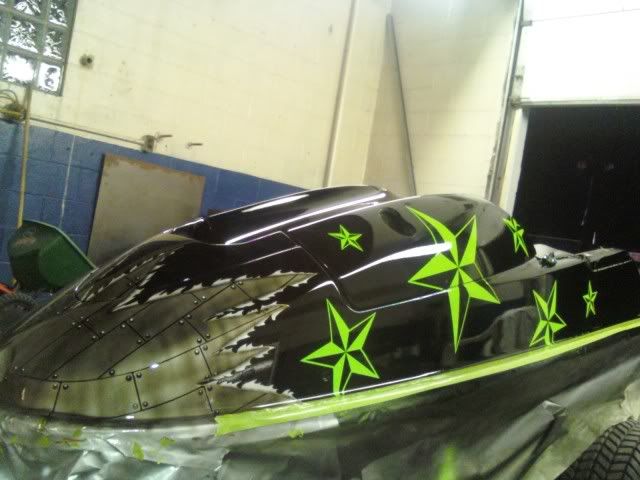
READY FOR ASSEMBLY AND TURF
Ill have more pics up as i go, And hopefully some real ones with my camera once my computer is debugged.
This year around I plan to have little to no wrenching, Especially on the beach.
As for a motor platform I went to Jetmaniac and his engine builder Blue for some reliable brap. If this motor runs as good as it looks I will be stoked. It looks awesome. Top notch quality
My main concern this year was to create a superjet, not a submarine. Last year by 10 minutes into my ride the ski filled up with water in both the tray and the engine bay due to cracks, hull seperation, and a broken nose. This year shes 100% watertight and hopefully bulletproof.
I decided not to do the blue foam again this year. I wanted some real tray support so i went with the 4lbs foam
My tray was reinforced all the way around the inside fron to back with 11oz carbonfiber. This was after fiberglassing all the cracks and breaks. Same thing with my engine bay.
Another change this year is NO SCUPPER! god i hate that thing when my ski landed upsidedown. And especially since I guess i am a slow swimmer.
I ended up using WAYYY to much 5200 on every through hull fitting. Better safe then sorry.
I fixed the body front to back. The nose was so messed up as well as the tail, Just look at old pictures if you dont understand how bad it was.
Since i went to school for paint and collision this is my time to work up some credentials.
My computer crashed so phone pics have to do on my parents computer.
Here goes for the paint proscess.
100% ALL DONE BY HAND. NO VINYL. NO STENCILS. ALL PAINT
This gives away my secrets but we are a jetski family so i guess i can share
STep one was to get the ski into a black basecoat.
Next i cut out a bunch of different sized stars on paper and layed them out how i thought may look good
Next I put masking tape layers all where i wanted the stars and drew the stars out on the tape
Using an exacto knife i carfully cut out all the areas i wanted Lime green (go figure haha)
Next, Clearly some paint after masking everyting off i didnt want green
Peeled off the tape and....
Not done yet! I really wanted it to pop and be an eye catcher so what better then tearing up paint with panels (yes overdone but tasteful in this case)
More masking tape, time, Drawing, and the airbrush came out
Cut out what i needed to be silver
AIR BRUSH AIR BRUSH AIR BRUSH untill all my beer was gone and i was ready to pass out
Add some more highlights, Clear coat the hell out of it .
READY FOR ASSEMBLY AND TURF
Ill have more pics up as i go, And hopefully some real ones with my camera once my computer is debugged.