well ..... at least you have a bulk head pattern to go by . I think I would leave the liner outing just use it for alignment . Always wondered how he bedded that much surface area evenly . Give me a shout later today need to make an order ..... you want in .
You are using an out of date browser. It may not display this or other websites correctly.
You should upgrade or use an alternative browser.
You should upgrade or use an alternative browser.
Custom/Hybrid WDK REV bottom with WDK RN topdeck(For my wife) is done!
- Thread starter McDog
- Start date
That's when my Harbor Freight multitool took a dump.
That stainless steel bitch took about 8 dremel cutting discs. Three of which were the expensive reinforced ones.
Somtimes God gives you a few signs and friends give you subtle hints in the right direction... Although, it might just be your hulls because my Ingersoll Rand dual action sander crapped out when I was sanding your hull on Sunday. It's still under warranty but gotta find someplace to swap it or get parts.
http://www.lowes.com/pd_221565-1498..._prd_lis_ord_nbr|0||p_product_quantity_sold|1
Attachments
Big Kahuna
Administrator
- Location
- Tuscaloosa, AL
uh, why not go ahead and split the hull at this point and really seal it up correct...........
- Location
- South Florida
LOL. You hang out with Brande too much."Won't cost that much...won't take too long."
-S. McDonald circa 2004-present
- Location
- South Florida
uh, why not go ahead and split the hull at this point and really seal it up correct...........
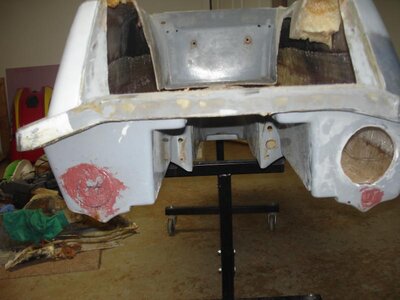
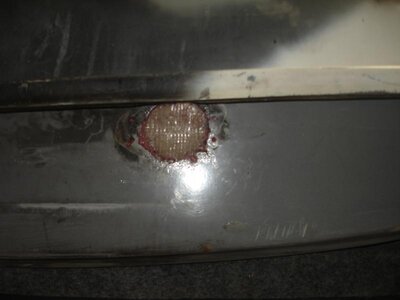
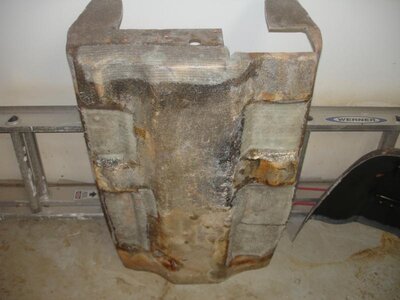
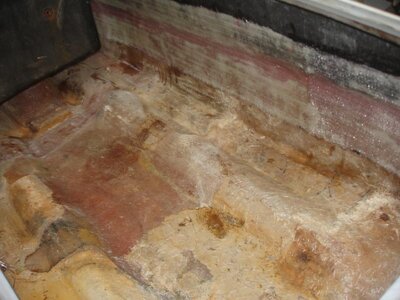
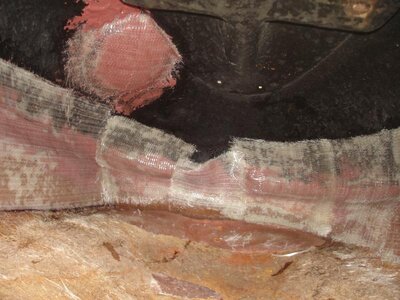
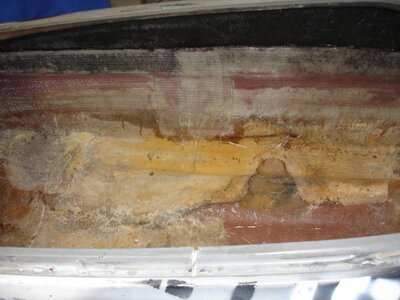
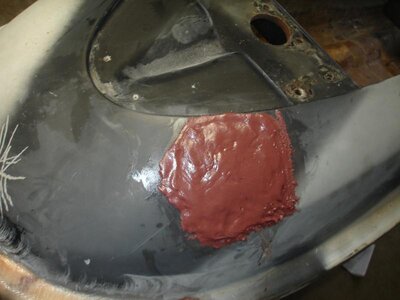
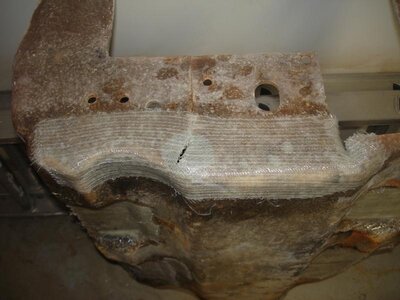
It's actually bonded together fine except the glue wasn't uniform enough and there are some areas where water is getting in. I think the microballoons and epoxy filling the bondline with 12oz biax over that should finish the job that the 5200 started just fine. Then the layer of carbon that goes over that to lock the motor mount tray back in should be overkill.
- Location
- South Florida
Somtimes God gives you a few signs and friends give you subtle hints in the right direction... Although, it might just be your hulls because my Ingersoll Rand dual action sander crapped out when I was sanding your hull on Sunday. It's still under warranty but gotta find someplace to swap it or get parts.
http://www.lowes.com/pd_221565-14989-LLA3706056_4294795218_4294937087_?productId=3115863&Ns=p_product_prd_lis_ord_nbr|0||p_product_quantity_sold|1&pl=1¤tURL=%2Fpl_Air%2BCompressors_4294795218_4294937087_%3FNs%3Dp_product_prd_lis_ord_nbr%7C0%7C%7Cp_product_quantity_sold%7C1
God knows I want one! He must not be ready for me to have it yet since He keeps piling expensive home repairs on me.
God knows I want one! He must not be ready for me to have it yet since He keeps piling expensive jetski projects on me.
There fixed it for you...lol
- Location
- South Florida
I think I can take the blame for those.
- Location
- South Florida
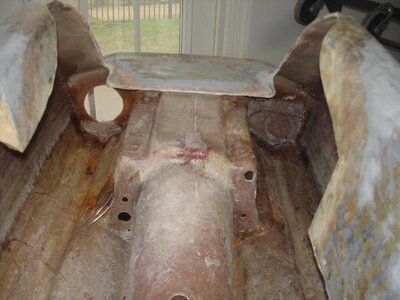
I plan to trim the liner a bit but most of it is going back in. It's the easiest solution to do the rigging for motor mounts. At this point I just want the damn thing together and I don't care if that means it's a couple of pounds heavier than it could be.
- Location
- South Florida
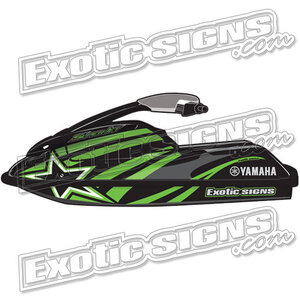
Brande picked out her graphics and I just ordered it. It's going to be hot pink for most of it with white accent on the star. The ski is going to be black. I decided that this was easier than trying to do a wrap and didn't cost that much more. Anything to save time at this point.
Attachments
- Location
- South Florida
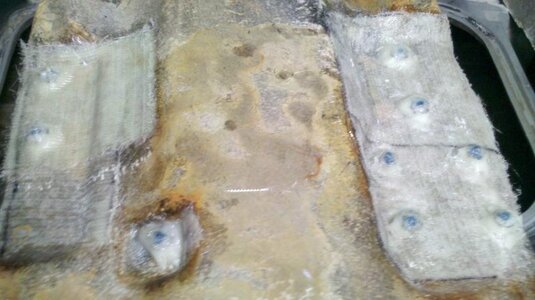
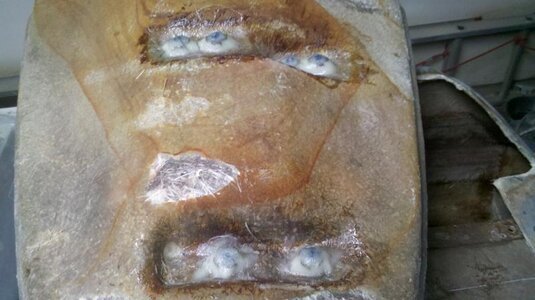
Fiberglassed today. Reinforced the cracked tray. Filled the bondline with microballoons and epoxy and fiberglassed over it. Repaired the nose. Filled the external gas fill. Filled the side exhaust hole. Enclosed the scupper hole in the rear so I can move it higher to make room for a drain. Enclosed the hole for the drain in the other side of the rear so I ca make it a little smaller.
Attachments
-
 DSC00489.jpg51.9 KB · Views: 60
 -
 DSC00484.jpg31.7 KB · Views: 57
 -
 DSC00480.jpg53.3 KB · Views: 59
 -
 DSC00486.jpg65.2 KB · Views: 55
 -
 DSC00485.jpg76.9 KB · Views: 56
 -
 DSC00488.jpg56.5 KB · Views: 57
 -
 DSC00487.jpg63.6 KB · Views: 52
 -
 DSC00483.jpg46.1 KB · Views: 67
 -
 DSC00482.jpg40.6 KB · Views: 57
 -
 DSC00481.jpg59.3 KB · Views: 56
- Location
- South Florida
$100 for the stainless tee nuts and bolts to fit all the inserts.
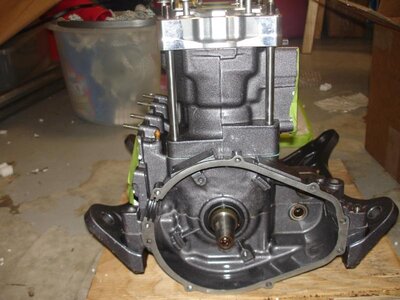
xs 771 big bore
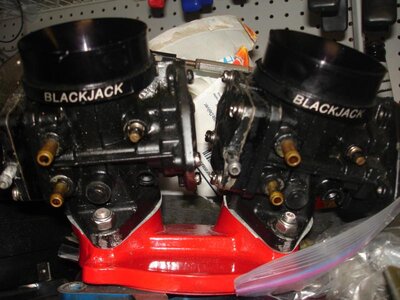
44 blackjacks
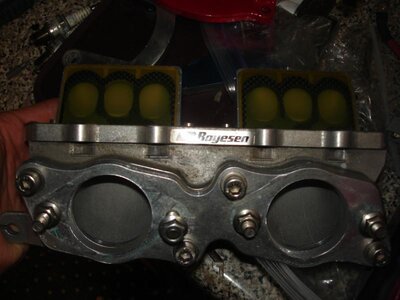
boyesen intake system
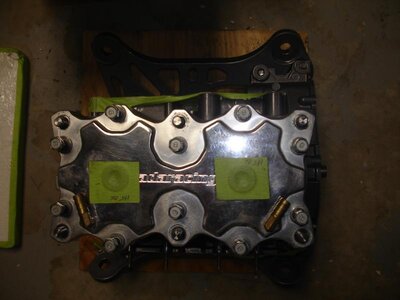
bit the bullet and got a wdk bracket since I couldn't make the springs I have work with the wamiltons bracket I bought
xs 771 big bore
44 blackjacks
boyesen intake system
bit the bullet and got a wdk bracket since I couldn't make the springs I have work with the wamiltons bracket I bought
Attachments
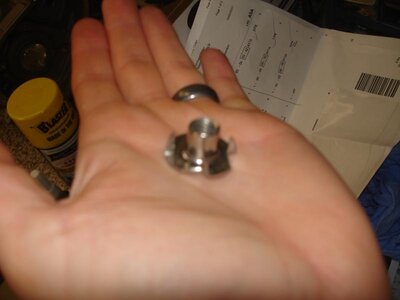
$100 for the stainless tee nuts and bolts to fit all the inserts.
Ouch!!
Boyesen intake ......... now that says LOVE. Be carful not to gaul your inserts ( does not take much). Stainless on stainless
Last edited:
- Location
- Cheney lake Kansas
nice!
- Location
- South Florida
Idok
F1pro
- Location
- Nations oldest muthaF+++kin city
inserts are fine.....WDI inserts may SEEM crappy, but never given any issues........
shan youre the man, johns going to be jealous now that you are getting it right and tight
shan youre the man, johns going to be jealous now that you are getting it right and tight
- Location
- South Florida
Sat down at work with a calculator yesterday and figured I have spent $4000 out of pocket trading pinky in on this setup and I'm not finished. Building a ski is expensive and time consuming. I should have just bought a complete ski. Today I try to finish the rigging and do a lot more fiberglassing.