The "Where do all these parts go" DVX build

Before I begin, a little history. I have spent 20+ years owning and riding standup jet ski's but never tried to put one together from scratch. Most of my experience has been on Kawis. I spent a year on a -7 Superfreak Badass, but that was built for me by Zack with PHP.

That was a fun hull but once the freestyle bug got its teeth into me, I knew I needed to do some upgrades over the winter. Starting with a PHP 900 and after a lot of time on the X, the plan came together. A DVX hull, upgrade to a 155 pump, full race domes, and total loss.

I am about 1/2 way through the build but figured better late than never on starting a build thread. There are some things that I had to figure out along the way that I will try to point out so it might save the next novice some time. Also, no one on here is very shy and if I am doing something stupid, I am confident that someone will point it out.

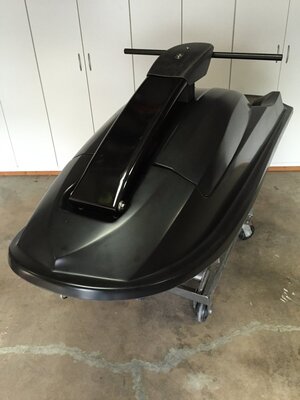
I guess I will start at the beginning when the ski showed up. The ski was so clean. Almost no prep work required.IMG_1624.JPG
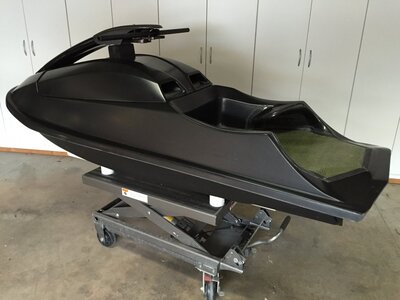
From the Front
IMG_1627.JPG

Love the X in the engine bay that only shows up in pictures.
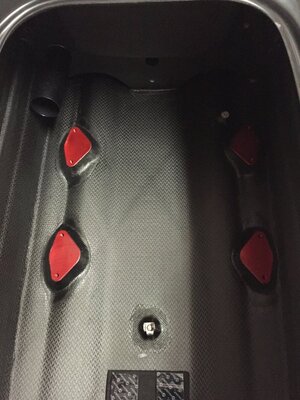
IMG_1628.JPG

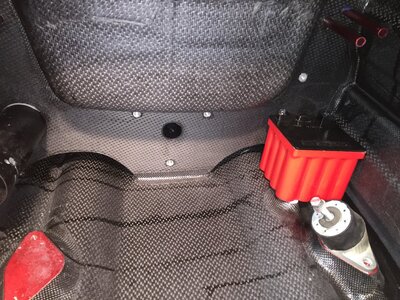
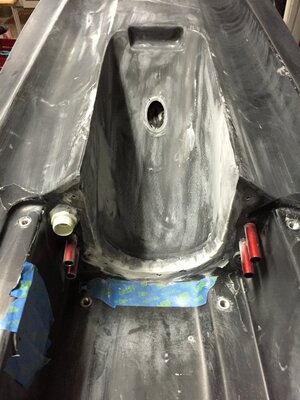
Interesting part was the carbon/Kevlar on the tray. It was thinner and more flexible than I would have expected.I suspect that is for weight savings. I trust Xscream knows what they are doing and that it will be strong enough. If not, I will find out soon enough. Its just turf, carbon, and epoxy to fix it.
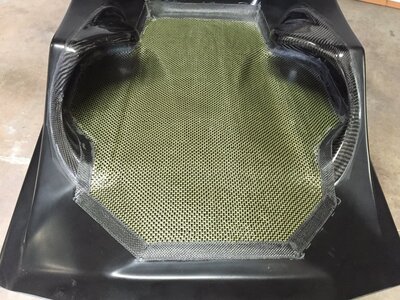
IMG_1626.JPG

Since someone is going to ask, Weight as it showed up for the hull, hood, pole, shoe, steering, bars, and ride plate was 73lbs. According to my bathroom scale.
 
First puzzle to solve was where to put the battery. Xscream uses Antigravity batteries which have a different cell configuration so they are taller and thinner than the more cube shaped 16 cell PHP Ballistic that I have.
IMG_1685.JPG

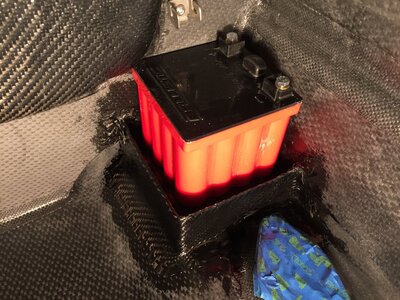
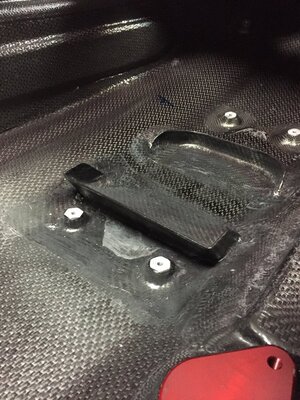
As much as I hated to grind on a brand new hull, that battery strap mount had to go. I needed to build a custom battery box. So with some pink foam as a form, I started making a new box. It needed sides so the battery could not slide around. It needed room for padding. And it needed to be hollow underneath so water can get out. Simple enough right? And did I mention that this is my first experience working with carbon? Very similar and very different that fiberglass.

Here is the finished product.
IMG_1741.JPG
 
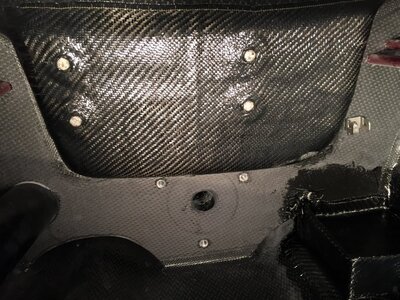
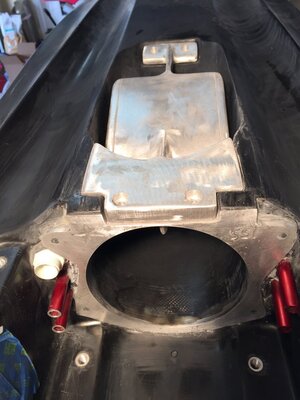
Step 2 - Mounting the total loss system. This was a little more straight forward. I did not want to use bolts through the firewall. I don't like the bolt heads showing and I don't like burying the bolt heads under turf either. So, I used some of the standard stainless anchors from Jetmaniac.

To make sure that everything was going to be lined up, I used the TL plate as a template. Basically I bolted everything to the plate and then (using quick set epox) stuck the whole assembly to the firewall. After that set, I covered the whole thing in a piece of carbon. Yes, probably overkill but it gave it a nice clean look.

IMG_1743.JPG

I don't remember who the original author was but the trick of using clay in the threads worked great. I could epoxy over the whole thing and then simply dig out the clay later.
 

clouse22

BDB Kustomz
Site Supporter
Location
Lake Orion, MI
We have the same exact combo except I am running the AV gas domes instead of full race....you are going to love it, the thing flips itself!!

My buddy and I ran into the same issue as you on the battery, I just used some hard foam (cutup powerfactor block) to move the battery above the mount, then used industrial strength velcro, along with a strap to secure. After 4 rides, the thing is still solid with no movement.

Are you running the jetmanic 2 piece pump or a XS one piece pump??

Looking awesome! PM me if you have any questions...my nozzle and prop specs from Zack were spot on

With these DVX hulls...i dont consider it a build, but more of an assembly, haha
 
We have the same exact combo except I am running the AV gas domes instead of full race....you are going to love it, the thing flips itself!!

Glad to hear about your setup and that you are so happy with it. I am really looking forward to getting it on the water. Should be there soon.

My buddy and I ran into the same issue as you on the battery, I just used some hard foam (cutup powerfactor block) to move the battery above the mount, then used industrial strength velcro, along with a strap to secure. After 4 rides, the thing is still solid with no movement.

I thought about building up turf or foam under the battery but neither seemed solid enough. I didn't have any extra PF blocks around but that would work great. Much stiffer than the material I was playing with. In the end, I knew I could build something that would cradle the battery. And it gave me an excuse to play with laying up some carbon.

For anyone who has not tried it, the guys on here that are doing all the crazy visual stuff deserve mad props. It might not be that hard to slap some stuff together but way tougher to get it to look nice and not need a lot of sanding.

Are you running the jetmanic 2 piece pump or a XS one piece pump??

Looking awesome! PM me if you have any questions...my nozzle and prop specs from Zack were spot on

Pump specs are from Zack: skat set back 155, smallest xmetal cone, 5 degree upturn nozzle bored to 88 with the fins removed, 8/16 impeller. Zack has been great and knows his stuff.
 
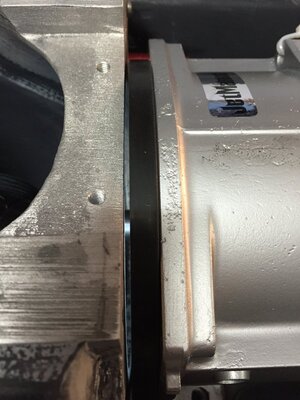
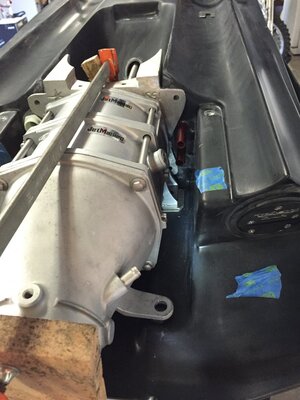
As the boxes of parts arrived from jetmaniac I decided to tackle aligning the pump. There is a lot of information on the X about how to do it so I was pretty confident that I should be able to just nock it out. Wrong! No matter what I tired I could not get the pump aligned and sealed to the shoe. After fighting with this for hours, I discovered that the pump shoe was not square. It was probably out 3/32" diagonally between 5 and 11 o'clock.
IMG_1688.JPG

I probably could have caulked it up with some 5200 but that seemed like a hack. Instead I tried grinding the back of the shoe to make it square with the shaft. Turns out there was just not enough material and it got pretty thin at the bottom. I guess it is time for plan B, take out the shoe. A lot of careful grinding later I had an empty tunnel.
IMG_1695.JPG

Keep in mind this all happens on Saturday and I have no idea what Xscream is going to say when I tell them that I just tore the shoe out of this beautiful brand new hull. After one quick phone call on monday, there is a new shoe in the mail complements of Xscream. No questions asked. No doubting. No judgment. No "you should have called us first". Just great customer service. Remember, it is easy to be good when things are going well. A true measure of a company is how they react when things don't go well. And they stepped up.

A few days later when I was test fitting the new shoe, I could not figure out how to get it in and everything lined up. Again, one quick phone call to Rick and within an hour he has Jason calling me with info on how to put the shoe in. Cannot say enough good things about them.

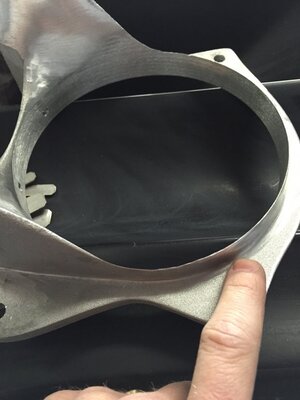
OK, back on track. Putting the shoe in. The key to getting the shoe to fit is removing part of the flange that is in the tunnel.
IMG_1716.JPG

After the flange is removed, it allows everything to line up very nicely.
IMG_1717.JPG

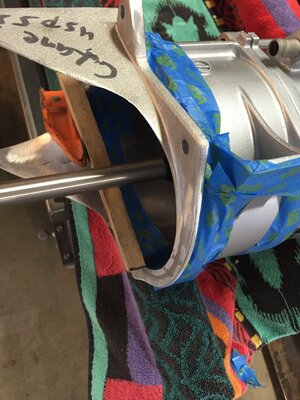
As for installing the shoe itself, I used my pump and midshaft housing as guides. I installed the midshaft housing. I clamped the shoe to the pump. Add your favorite shoe adhesive and install. Just be careful that the adhesive does not get on anything it is not supposed to.
Front Shim Stack.JPG

By clamping the shoe to the pump, I solved all my alignment in one shot. Midshaft is aligned in housing, the pump and shoe have nice concentricity. The pump seal is perfect. And the front shims are minimal. Just some back shims and I am done.

Lots of epoxy and sanding later, everything looks like it was meant to be together.
IMG_1737.JPG
 

clouse22

BDB Kustomz
Site Supporter
Location
Lake Orion, MI
Wow, kudos to you to have the balls to rip that pump shoe out. I had a similar issue with the pump. On mine I could get it lined up but when I put a bright light in the pump I could see it coming through the pump seal (i was told to use a ton of silicone, no thanks) I just got rid of that R&D pump seal and bought the one from Thurst. It is a lot more like an oem seal...much more forgiving and seals so much better, solving my issue. I would highly suggest getting one if I were you.

Good work!

Have fun getting those cooling lines on =]
 
Wow, kudos to you to have the balls to rip that pump shoe out. I had a similar issue with the pump. On mine I could get it lined up but when I put a bright light in the pump I could see it coming through the pump seal (i was told to use a ton of silicone, no thanks) I just got rid of that R&D pump seal and bought the one from Thurst. It is a lot more like an oem seal...much more forgiving and seals so much better, solving my issue. I would highly suggest getting one if I were you.

A different pump seal? I assumed that there was only one, or that they were all the same. Well you know what happens when you assume. That surely could have saved a bunch of time and energy. If it had enough squish to fill my gap. Probably not worth switching now since my shoe was aligned with the pump. I guess I will find out during final assembly. Good to know I have an alternative. Thanks.

Have fun getting those cooling lines on =]
Yeah. Really tight in there. I predict lots of bloody knuckles and swearing going on.
 

Byeai

"Cheetos-Man"
Location
Melbourne FL
Yea I had the Rd seal on my kdx and it sucked I had to use silicone I just bought a thrust pump seal and I can tell it's already better just waiting on my dvx
 
A couple of other mods to the hull to post while I wait for it to come back from paint.

First was a tank pod. I didn't want the tank to have the option to move. Xscream sends the DVX with a foam and Velcro pad on the bottom for this purpose but it seemed too far forward. Also, the back of the Jaz tank is curved so it can roll back really easily. Instead, I figured I could build a tank pod that would add support and hold it in place. Below is the end result. It started as a full pod but evolved into just front and back pieces.

IMG_1880.JPG

I also moved the tank strap mounts so I could run two longer straps over each side of the tank. It shouldn't go anywhere now.

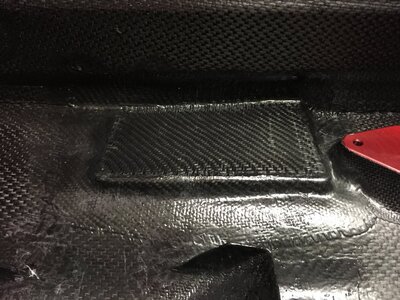
When I mocked up the pipe location, I noticed that the waterbox did not sit flat on the bottom of the hull. Rather it would hit at the front first. This was also the case in my superfreak, where it started to wear the turf pad it was sitting on unevenly. Rather than dealing with that, I wanted to build a flat spot for it to sit on. Nothing complicated but enough for even support.

IMG_1878.JPG
 
One of my favorite hulls from a manufacturing/composites stand point. Thank you for all of the pictures!

As for the Kevlar in the tray, I would assume it is more for resilience than weight savings. Kevlar is more forgiving to impacts and less likely to crack or delaminate. Kevlar will flex more on hard landing, where straight carbon is more rigid.

Anyway, beautiful ski. In for this build.


Sent from my iPhone using Tapatalk
 
Last edited:
Good info about the Kevlar. There is definitely flex in the front of the tray. Lets hope it is strong enough when accidentally try to put a knee or heel through it.

I have not made much progress on the build. I am waiting on a painter that just cannot seem to get it right. I will be sure to loose his business card after he finishes.

I did start the pump assembly and ran into some questions about getting more range of motion out of the trim. It is in a separate thread (http://www.x-h2o.com/index.php?threads/thrust-trim-questions.162251/) but I will post what I find out here.
 

clouse22

BDB Kustomz
Site Supporter
Location
Lake Orion, MI
Good info about the Kevlar. There is definitely flex in the front of the tray. Lets hope it is strong enough when accidentally try to put a knee or heel through it.

I have not made much progress on the build. I am waiting on a painter that just cannot seem to get it right. I will be sure to loose his business card after he finishes.

I did start the pump assembly and ran into some questions about getting more range of motion out of the trim. It is in a separate thread (http://www.x-h2o.com/index.php?threads/thrust-trim-questions.162251/) but I will post what I find out here.

I have the XS trim system...but grind, grind, then grind some more. Remember though, if you are running that nozzle with the 5 degrees of trim you already have some pre trim built in. I thought the same thing as you when i put mine together.

As far as the ring around the end of the nozzle...you can grind it, but just remember to grind only the top (side to create room for the trim ring to move up when you pull the lever)
 

JetManiac

Stoked
Site Supporter
Vendor Account
Location
orlando
Wow, kudos to you to have the balls to rip that pump shoe out. I had a similar issue with the pump. On mine I could get it lined up but when I put a bright light in the pump I could see it coming through the pump seal (i was told to use a ton of silicone, no thanks) I just got rid of that R&D pump seal and bought the one from Thurst. It is a lot more like an oem seal...much more forgiving and seals so much better, solving my issue. I would highly suggest getting one if I were you.

Good work!

Have fun getting those cooling lines on =]

That was the only option available when he bought it, the new 155 pump seal came out later. We stock both now.

You wont even need trim with that motor, nozzle, and hull combo.
 
Last edited:

clouse22

BDB Kustomz
Site Supporter
Location
Lake Orion, MI
That was the only option available when he bought it, the new 155 pump seal came out later. We stock both now.

You wont even need trim with that motor, nozzle, and hull combo.

I apologize @JetManiac , reading my post over again now, I should have been more clear when I wrote it and I meant no offense towards you or the others that made the suggestion to get the r&d to work

I should have noted that I would have had to use silicone in addition to get the r&d to work correctly, but fortunately thrust came out with the new seal before installing the pump. For me, the $40 for the new seal was worth the piece of mind

-Bobby
 

JetManiac

Stoked
Site Supporter
Vendor Account
Location
orlando
I apologize @JetManiac , reading my post over again now, I should have been more clear when I wrote it and I meant no offense towards you or the others that made the suggestion to get the r&d to work

I should have noted that I would have had to use silicone in addition to get the r&d to work correctly, but fortunately thrust came out with the new seal before installing the pump. For me, the $40 for the new seal was worth the piece of mind

-Bobby

No offense taken at all. I just noted that we provided the only seal that was on the market at the time. We carry the new style seal now that it is available (I actually approached the manufacturer and asked them start making it.).
 
As I am waiting for the paint to finish up, I turn my attention to the pump and running the cooling lines since that will probably be the first thing to install.

The puzzle is that the motor/pipe has 3 water lines, the hull has 4 water lines, and the pump has 2. My plan is to tap the nozzle for an additional water line. Then I can run triple lines from the pump to the motor. And the 4th line in the hull will just get plugged.

Also thinking about pulling the pins and flipping my stator so the side scupper does not hit the bulky water outlet on the pump. Not sure if there is any downside to doing this.

I would love to hear what others have done for both. Thanks.
 
Top Bottom