pablo's sn luv affair

Pablo

sqeez bth levrs & lean bk
Site Supporter
Location
georgia
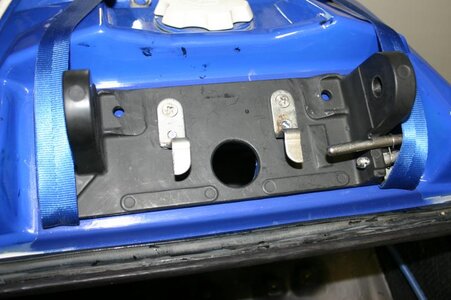
I spent alot of time with the old gal today...just not alot accomplished. I killed about 2 hours trying to locate my hood hooks in other areas, but with the stock brackets coming so close to fitting the inside diameter of the RN pole I decided to grind about 1/3 -1/2 the bracket width off and see if that will hold it. I hope, but it if it doesn't, there's always Blowsion.
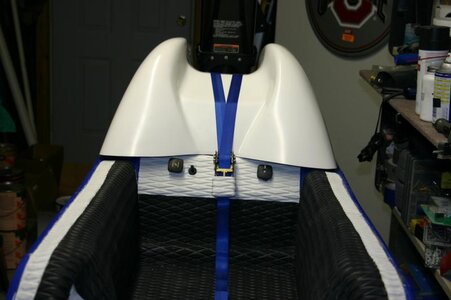
Got the hood straps mounted...ran 'em under the pole bracket. I've got a pretty basic ratchet i used and turfed. I've seen some nice ones with molded plastic around them, just don't know where to find them. That ratchet kind scares me. Looks like a carnage pic waiting to happen if u ask me. Ima try it anyway.
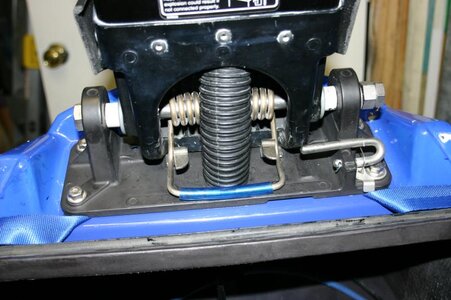
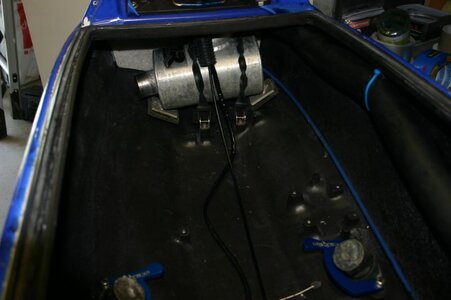
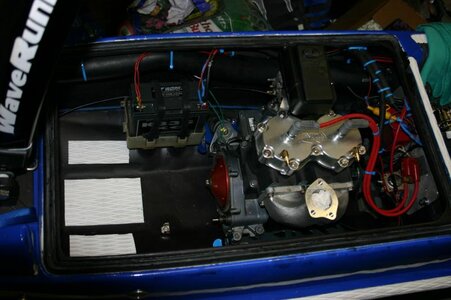
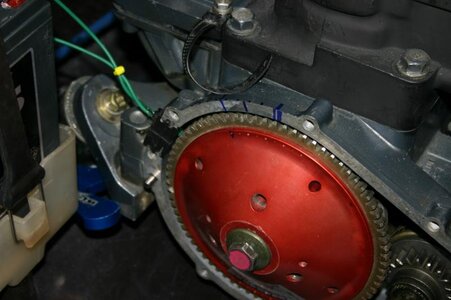
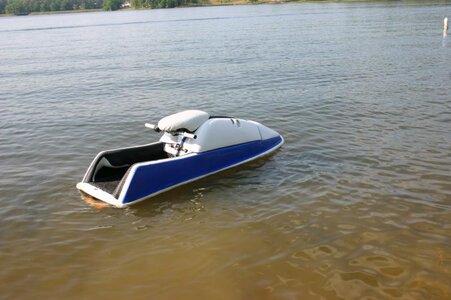
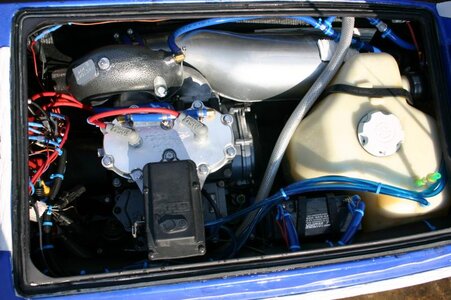
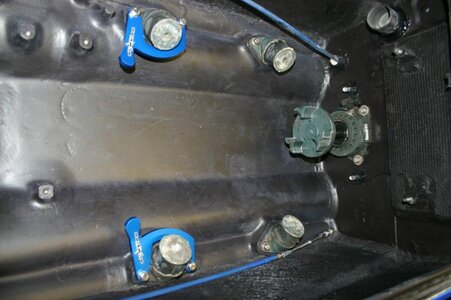
Installed the pump, midshaft and ride plate (sort of on the ride plate). I managed to loose my ride plate bolts!!! Anybody got some? Had a few minutes before quiting time so i put the motor mounts in and the kenney keepers.
 

Attachments

  • IMG_0056.jpg
    IMG_0056.jpg
    56.9 KB · Views: 127
  • IMG_0059.jpg
    IMG_0059.jpg
    42.3 KB · Views: 160
  • IMG_0057.jpg
    IMG_0057.jpg
    52.6 KB · Views: 168
Last edited:

D-Roc

I forgot!
those look a little shady but with that ratchet strap binding down the hood it will probably work. man i just love the turf on your ski. white turf is tits
 

Pablo

sqeez bth levrs & lean bk
Site Supporter
Location
georgia
those look a little shady but with that ratchet strap binding down the hood it will probably work. man i just love the turf on your ski. white turf is tits

yeah they're awful narrow now. $70 smackers for the blowsion ones makes me sputter a little at this point. Too much money already in the ski. Fingers crossed. Thanks on the turf.
 

Pablo

sqeez bth levrs & lean bk
Site Supporter
Location
georgia
was there any room beside the pole bracket to put those hood hooks? thats where i had mine on my sn, with a different bracket though.

not really...the brackets were going to have to be ground there too (maybe a 1/4 of total size), but i didn't want to have to drill the bracket when i already had the holes. if this doesn't hold and the aftermarkets won't work here then I'll have to move 'em. I got a Rn bracket and could have used it, but had redrilled my reinforcement under the bracket for the SN bracket. Hinde sight is always 20/20.
 

Pablo

sqeez bth levrs & lean bk
Site Supporter
Location
georgia
Man you're almost ready to hit the water...

John...i'm trying. It feels like I make a step or two forward and i run into something i forgot about or needs some kind of mod that requires half a day to get right. i'm praying the engine fires and i get the timing and carb right without too much hassle. Launch date is planned for first weekend in May.:Banane01:
 

Pablo

sqeez bth levrs & lean bk
Site Supporter
Location
georgia
Pretty much tinkered all day today. I got the pole 99.99% done today. I managed to get the SN pole springs to work with the RN pole/Sn bracket it took a little wiggling, but it all seems to fit and work o.k. The SN kickstand is about 1 cm too short to reach the narrow RN pole. I'm gonna pull the old kickstand peice and hit a local metal shop and see if they can fab me one the length i need with a s bend in it.

Got my internal fuel fill tank done. That was pretty easy. I took the dremel with a cutting wheel to the original fuel-line orifice. I sawed it off flush with the tank top. Next I used a flap sander to widen the inner bore about 5mm. The oem gas cap and filler neck fit perfect in the bore. I lightly sanded the rim w/ 120 and used a bead of "Seal All" on the tank, gasket (top and bottom) and bottom side of filler neck. Directions said let it dry 10" then press to fit. I let it setup 2 hours with pressure and it seems to be solid. Directions say it's resistant to petroleum products, h2o and lots of other crap. We'll see. They say you can use it to repair cracked gas tanks.

Started to work on putting in the exhaust tubing, TDR water box. I had grand plans of throwing the engine in today, but got sidetracked with "kid-patrol." My 3 yr old doesn't seem as interested as me in the ski? Go figure. I cleaned up the rest of my TL connections with insulated connectors and heatshrink tubing.

Any more advice for the engine install? Things to do before the engine is in the bay? Things not to do before it's in? OHH, and big props to Virgin (SE throttle lever) and Surfjetlouie(fuel selector)...bought parts off them early this week and got 'em today(Thursday). Great sellers and fantastic shippers. Thanks guys.
 

Attachments

  • IMG_0061.jpg
    IMG_0061.jpg
    53.2 KB · Views: 60
  • IMG_0064.jpg
    IMG_0064.jpg
    40 KB · Views: 60
  • IMG_0065.jpg
    IMG_0065.jpg
    37.4 KB · Views: 63
  • IMG_0060.jpg
    IMG_0060.jpg
    63 KB · Views: 89
  • IMG_0063.jpg
    IMG_0063.jpg
    37.9 KB · Views: 86
Last edited:

Pablo

sqeez bth levrs & lean bk
Site Supporter
Location
georgia
My build was getting lonely down there on the second page, so...up she comes.

I spent almost all of Saturday getting the engine installed. I didn't have any shims on the mounts when I deconstructed the ski, but during the tear down phase I had a major lapse in brain function and did not mark which mounts went to what boss on the hull:261:. That being said I had a hell of a time getting the couplers to line up correctly. I was forced into fashioning my own shims out of sheet aluminum (.025" thickness). A single shim on two mounts was enough to get the couplers within tolerance. I hope. I didn't have a feeler gauge, but the rock in my straight edge between the two was scant.

Sunday was only a half day. Between church, kids, and yard duty my time was limited. I did manage to get the TL wired. Got the static timing set. From my "weak-arse" degree wheel, that I printed off a google search and taped to my flywheel, I advanced the timing to between 21-23 degrees(add 5 degrees), so 21-28 degrees of advance. From what I've been able to read on searches and from a few of y'all this seems to be a safe range. I could go less say 18-20 if u guys think that's safer. I need to err on reliability at this point. Too much $ invested already and a engine rebuild is NOT in the budget. I marked the cases for a dynamic timing when I get the fuel and cooling lines run this week:fingersx:. Gonna be out of town all next weekend and first of the week after that, so the projected launch will be May 3/4.
 

Attachments

  • IMG_0044.jpg
    IMG_0044.jpg
    67.1 KB · Views: 62
  • IMG_0045.jpg
    IMG_0045.jpg
    56.1 KB · Views: 112
  • IMG_0046.jpg
    IMG_0046.jpg
    47.8 KB · Views: 63

D-Roc

I forgot!
yeah matt's right you should set your static to be the highest you want to run then you can take off 7 degrees with the brain and the 5 degrees that the instructions tell ya to remove. on my dual channel i didn't remove the 5 because i didn't see it in the instructions anywhere. i set it at 33 and yanked 3 to be at 30
 
Last edited:

Pablo

sqeez bth levrs & lean bk
Site Supporter
Location
georgia
If you measured 21-25, it's not "add 5 degrees", it's subtract 5.

Doooolp...o.k. Sounds like i need to advance it sum mo. Goose ran this thing b4 on his ski and set it around 23 and said it ran great. I'll double check with him on whether it was 23 actual or 28 w/ -5 for 23. I'm chikn' to push any more than the 26-28 area. I gotta have this thing be reliable for the summer. not alot of free time to turn wrenches. U guys think static at 30 for 25 or 33 for 28? No porting or bore work done on the engine. Just 35ccdomes, b-pipe and solas13/16.
 

Pablo

sqeez bth levrs & lean bk
Site Supporter
Location
georgia
It's been a few weeks since I worked on her. I had alot going on with the family, friends, travel and work. Busy! Kept me away from my baby. Aside from some mental errors (no ground on starter for one) on my part I got the ski together, engine installed and it runs pretty well for my first carb rebuild too. I got in a little bit of a hurry towards the end and forgot to take more pics of my engine quandries. It all came together though. Thanks to X-peeps for ur help. Mcdog came over and helped me check timing w/ timing light (30* advance...too much??) and drop it in the H20. I wanted pics of engine while ski was in my shop so it looked it's best. These will have to do for now. Still need to:
1. paint hood w/ white, appliance paint (nose is done)
2. 5200 hood hoses
3. adjust carb...lots of mid and top end sputter
4. modify cooling lines
5. pad pipe from sides of hull, jammed hydroturf in there for first rides
6. get SS ratchet strap from EJ...mine now is a Lowe's special

Does anyone silicone/5200 the ride plate edge to hull? When I bought the ski the old owner had done that and I forgot until today. It's been a long winter and I'm ready for LOTS-O-:brap::barrel::splatt::headbang:!!!!

Whadyathink?
 

Attachments

  • IMG_0061.jpg
    IMG_0061.jpg
    50 KB · Views: 159
  • IMG_0062.jpg
    IMG_0062.jpg
    48.5 KB · Views: 202
  • IMG_0063.jpg
    IMG_0063.jpg
    56.1 KB · Views: 499
  • IMG_0066.jpg
    IMG_0066.jpg
    77.1 KB · Views: 167
  • IMG_0068.jpg
    IMG_0068.jpg
    75.8 KB · Views: 146
Last edited:

Waternut

Customizing addict
Location
Macon, GA
I've used and heard of running RTV on the edges of the ride plate and intake grate to smooth the edges out. Seems like 5200 would be a lot harder to remove.

Looks good. If you got to ride it, I'm sure it'll be done in no time...
 
Top Bottom