Tonight, I started on my 1st project. I am going to attempt to make a mold from a ride plate, then lift a new ride plate from it. My goal is to get familar with the materials. I chose the materials that were the cheapest, and not neccessarly the best for the job.
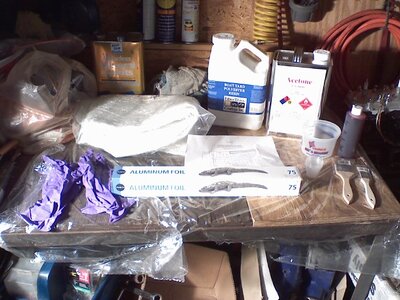
Picture #1 is my materials. I have a yard of 10 oz (iirc) fiberglass mat, a gallon of poly resin, a couple ounces of hardener, a mixing cup that includes measuring for the resin, small measuring cups for the hardener, a 2" brush, a pair of scissors, a pair of gloves, safety goggles, a radio with some jamage playing, a working space covered with plastic, some acetone nearby for emergencies, an extra wide roll of tin foil (not the best option but it's easy and I already had it), an old 4" paint roller (the dried paint had hardened so I used it as my squeege in the absence of a better item)
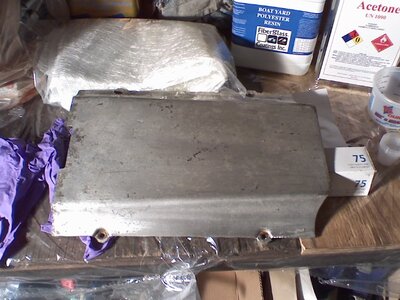
Picture #2 is my plug. My plug is a X2 ride plate by PJS. I chose this because it is a very simple plug. It has some curves but it is mostly flat. It should provide a simple 1st project. In addition, it is something I can use on my ski, so I can test the results of my work. I also don't want to cut a good ride plate, so if this works, i can go d-cut without cutting.
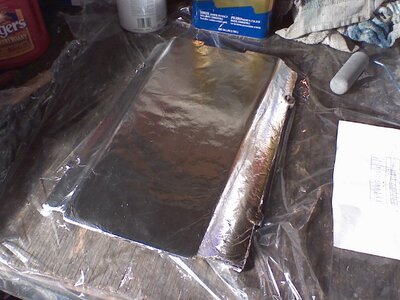
Picture #3 is my plug covered with aluminum foil. Yes, I know, this is the halfassed way to pull a plug. I should use a wax and a releasing compound, but frankly, that's too much work. I don't need a perfect finished product. I'm not attempting to win a beauty pagent with this thing. I just want to end up with a useable final product.
So, from here on, I was the only person arround and I couldn't risk getting my phone dirty by taking pictures. So, no more pictures...
I cut a piece of fiberglass to slightly larger than what I needed. I then mixed 8 ounces of resin with 3cc of hardener (somewhere in the middle of the two desired amounts of hardener, 1% and 1.25%). I removed my safety glasses after I was done mixing the resin. I used my 2" brush and put a thin layer of resin on the plug. Thin enough that it wasn't runny, but thick enough that there was something to absorb into the mat when I put it down. Then I layed the mat onto the plug and used my roller to push the mat down onto the plug. This made it stick to the plug, and started forcing the resin into the cloth. I then used my 2" brush and dabbed the mat lightly. I was told that stroking the mat pulls the fibers, and dabbing is the reccomended method. I used a little resin at a time on my brush, covering the whole plug. Then I used my roller to make sure the resin soaked in. I repeated this process until all dry areas were covered and the layer of mat became transparent. I realized at this point I had only used half of my resin, so I cut another piece of cloth and put on a second layer. I just did the same thing for the second layer as the 1st, except for adding the inital resin onto the plug, because the 1st layer was still wet and I didn't need to put more onto the plug.
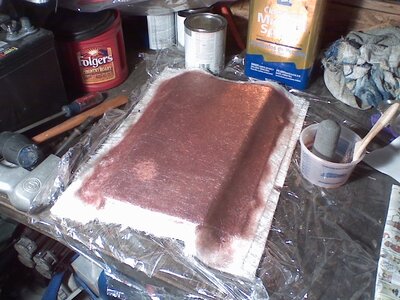
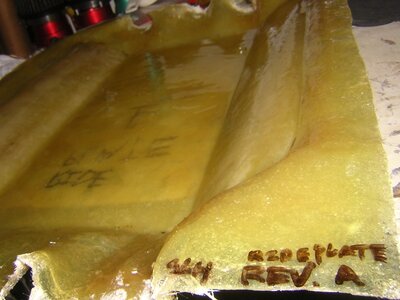
Pic #4 is my finished result. I only did two layers tonight. I understand you shouldn't lay more than 1/8" at a time to prevent heat warpage. I could probably have laid 4 layers following this rule, but I want to see how well it dries before I throw more materials at it.
Until tomorrow...
PS. It was 62 degress outside. Not ideal temperature for resin to dry. This gave me a very long pot life which was nice for my 1st go arround.