805 Wave Paver Freestyle Build Up: Surf Edition

oxnard111

Creative RE Purchasing
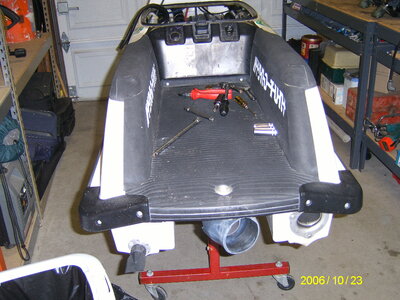
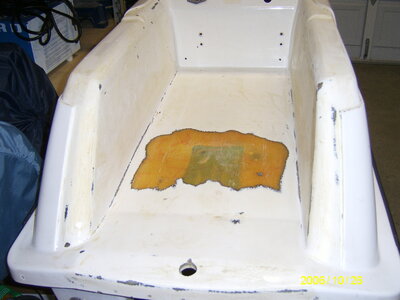
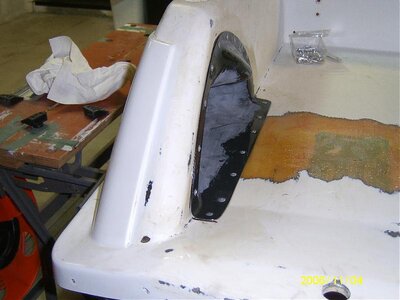
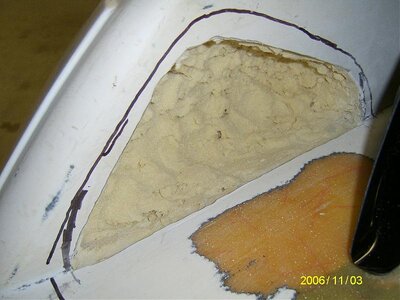
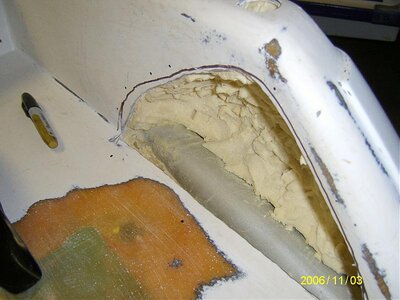
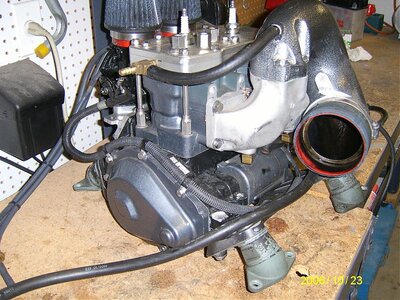
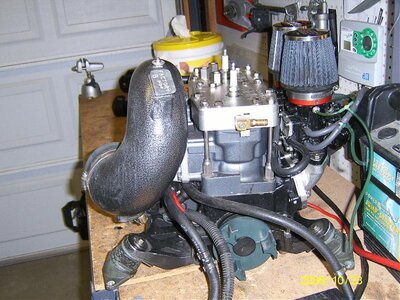
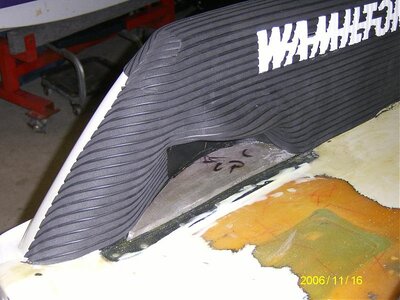
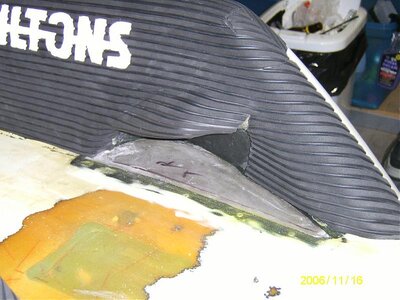
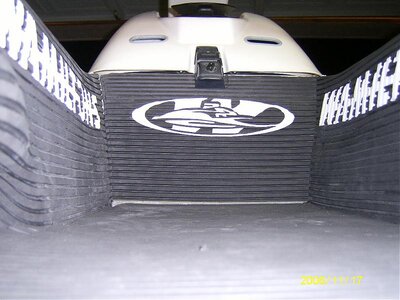
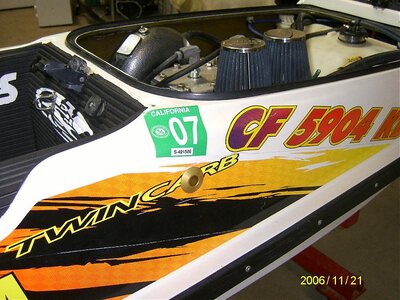
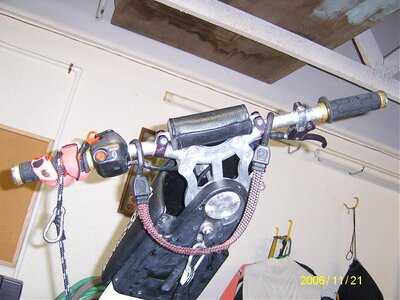
So I picked this puppy up to start working on. Its a 98. This is an ex race boat. Used to have a dry pipe of some sort on it b/c the lip where the hood seal is kinda cracked and will need to be repaired. The ski has Tubbie II's, I believe from what other have told me. The ski has no cracks or deep guages. My plan is to make a good surf boat. I am not pro or have huge balls so this boat wont get crazy trashed but never the less I want to atleast do some light reinforcing while she is still emtpy. I am planning on doing everything I want to boat except for paint, but we'll see if I don't paint it this winter; when I get finished I'll take everything out of my 97 SJ and then I'll re-sell the 97 hull. Here is a tentative list of what I want to do with the boat.

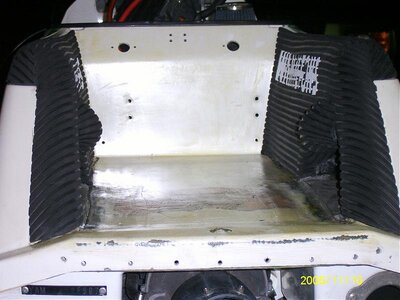
- Light Reinforcment (handlepole bracket, nose, side walls, bulk head and bottom)
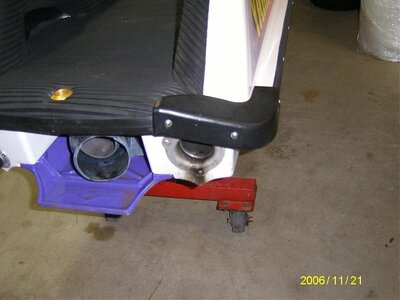
- Take off the hull extensions that came on the ski and clean up those areas
- Cut down the long ass screws that are holding on the tubbies
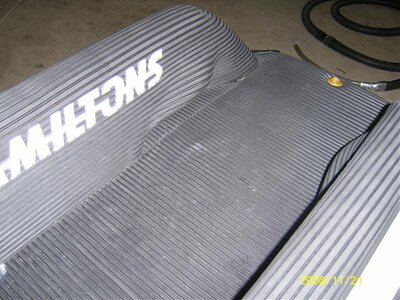
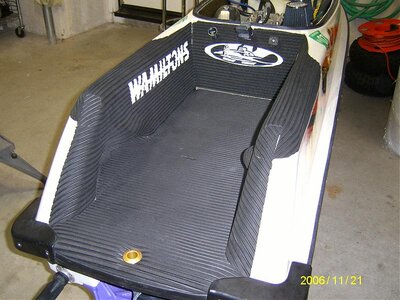
- Install the Wamilton Rickters I already have
- D-Cut/Half Moon the stock ride plate I picked up off ebay for $4
- Possibly cut down the pole and inch or two
- Purchase and install a stubby pump come of one brand or another
- This list will continue

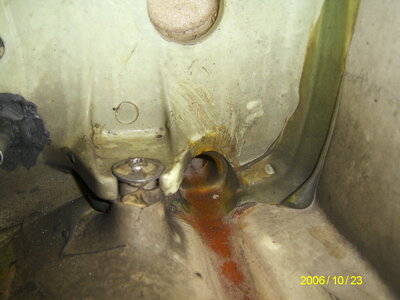
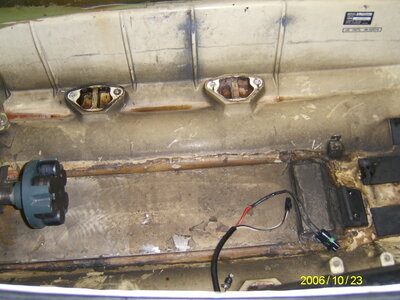
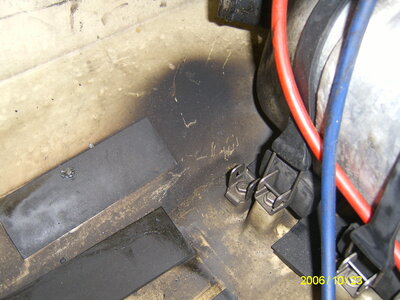
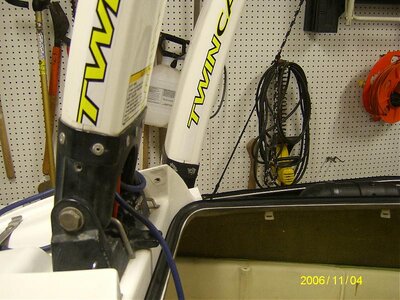
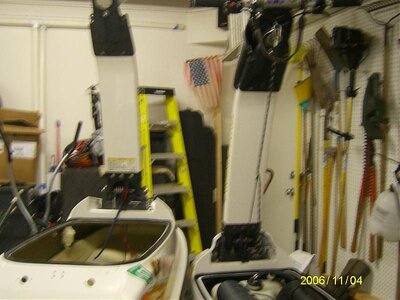
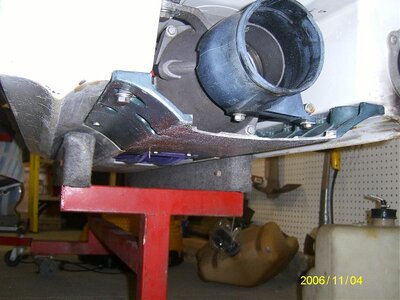
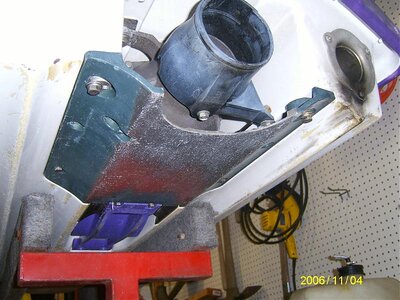
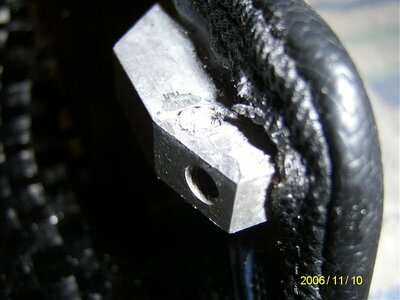
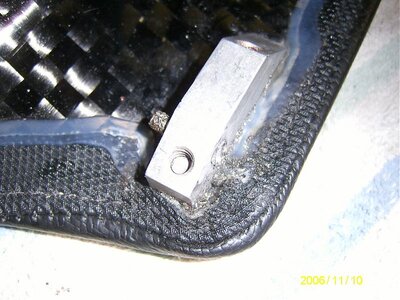
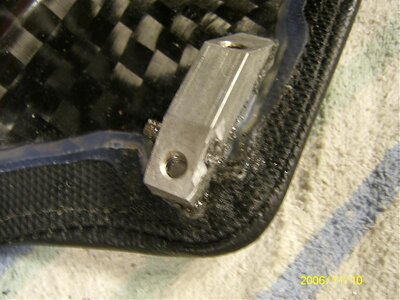
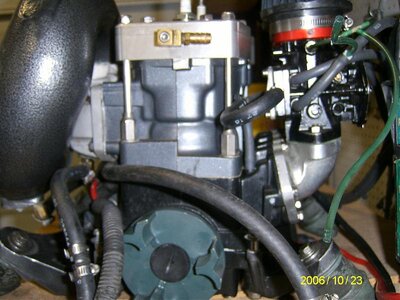
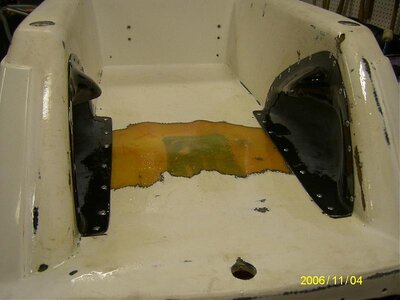
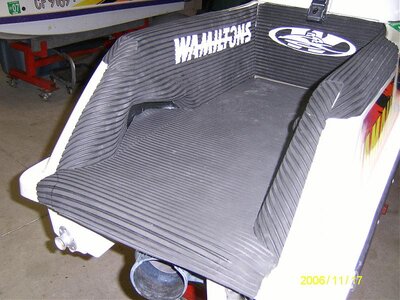
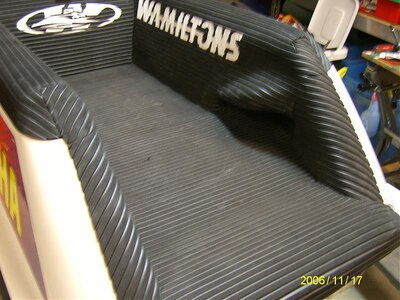
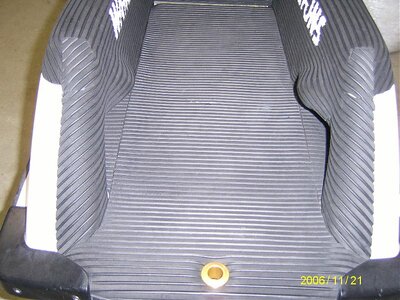
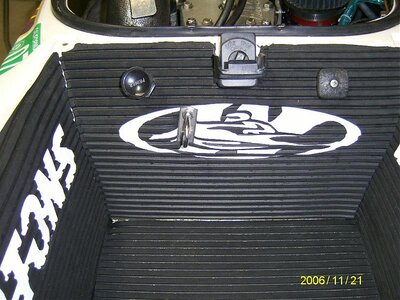
Here are some pictures of the ski the day after I picked it up. There are couple other random pictures. The picture of the pump area is showing the 5 different holes. Two cooling lines, stock bilge, steering cable, and drop nozzle.


oxnard111

Creative RE Purchasing
De-Turfing Nasty Gator Grip

This gator grip mat sucks to take off. The previous owner that installed it didn't use a pad underdeath and all the little circles want stay when pulling it off. I used a long screw diver to lift the mat as best I could while pulling with the other hand. It looks like in some of the stuburon areas where he couldn't get the edges to lay down he used 5200 and that is really sucking to take off. I am gonna go somwhere and purchase one of the adhesive removing wheel thingys that you put on the end of a drill. I need to finish scrapping off the areas with a lot of gator grip left.


oxnard111

Creative RE Purchasing
Old adhesive removal...

So I finally finished taking off all of that nasty old adhesive. On some of the stubborn edges of mat the last person used a really thick and sticky adhesive. I have never worked with 5200 before but that seems like what it might have been. I first attempted to use a paint removal wheel, but all that did was spread around the adhesive and left over mat and pushed it deeper into the paint. So I then started using some "Goof-Off". This technique worked much better. I used a old paint scrapper and about a half a roll of paper towels to finish it off. I went through about 3/4 of an aresol can. Probably went through alot of brain cells too. That stuff is strong. I used it in my garage with all the doors open, but I didn't have a fan and I had to keep taking breaks from that smell.

So how do you all remove that stubborn silicone sealer that I have pictured bellow? Goof off sure dosen't work on that stuff.

 
Last edited:

oxnard111

Creative RE Purchasing
Cleaning the inside of the hull

I cleaned the inside of the hull a little while ago. I borrowed my neighbors pressure washer but it wouldn't touch any of those stubborn old oil stains. So I then tried it with some 409, but that didn't do anything either. So I went down to the AutoZone near my house and bought some engine degreaser. That stuff worked great. I used an old dish washing brush and scrubbed most of the caked on spots. One thing I did not anticipate was the de-greaser eating away some of the slicone that was sealing one of lines tapped through the bulkhead/rear wall of ths ski. I think a little water probably soaked into the foam of the ski, but what are you gonna do? Re-foam it? :17: haha.

The person I purchased it from was nor cal ex. He said it weighed about 115lbs with the hood, handlepole and handlepole bracket; so I'm not too worried about it being water logged.


You can see in the picture bellow the small stress cracks I found in the bottom of the engine compartment where the gas tank is located. Are these common?


Last edited:

oxnard111

Creative RE Purchasing
So I sold the 98 blue hull after stripping the mat area. I picked up a clean 97 with a B pipe w/ mod chamber, dual 44's with taper bore, and a Riva head with 35cc domes setup for pump gas. I'm gonna work on this hull instead. I'll post some pictures up later.
 

oxnard111

Creative RE Purchasing
So this thread has been idle for a while, but I'm back to fill 'er up. Got rid of the 98 hull and picked up a 97 when I was at Pismo. Been pretty busy. Here are some pics after I picked it up.
 

Attachments

  • SA700594.JPG
    SA700594.JPG
    277.7 KB · Views: 52
  • SA700592.JPG
    SA700592.JPG
    311.4 KB · Views: 43
  • SA700593.JPG
    SA700593.JPG
    330.8 KB · Views: 38
  • SA700615.JPG
    SA700615.JPG
    262.9 KB · Views: 36
  • SA700591.JPG
    SA700591.JPG
    358.6 KB · Views: 42

oxnard111

Creative RE Purchasing
Cleaned the inside of the hull. Pulled the race weights out of the bottom of the engine compartment. Next I started pulling off the mats to install the foot holds.
 

Attachments

  • SA700614.JPG
    SA700614.JPG
    379.3 KB · Views: 56
Last edited:

oxnard111

Creative RE Purchasing
After stripping down the turf we cut into the sides of the ski. This is my first foot well install so there are definatly things i would do different next dime. One this is I cut the holes a little bigger than necessary. Near the top of the right well it got pretty thin between the foot well and the existing fiberglass.
 

Attachments

  • SA700627.jpg
    SA700627.jpg
    56.2 KB · Views: 29
  • SA700628.jpg
    SA700628.jpg
    54.4 KB · Views: 38
  • SA700625.jpg
    SA700625.jpg
    65.6 KB · Views: 27
  • SA700624.jpg
    SA700624.jpg
    65.7 KB · Views: 33

oxnard111

Creative RE Purchasing
I got a stock square ride plate from fleabay for $8 shipped. Cut it down using a dremil then used a regular ginder to clean up the edges. I actually used this plate on my old SJ before putting it on my new ski and it rips. Helps keep the nose up compared to the ProTec rideplate I had been riding. The D helps to "stick to the wave" better. Kinda hard to explain how it felt, but it did feel oh so good.
 

Attachments

  • SA700637.jpg
    SA700637.jpg
    71.9 KB · Views: 43
  • SA700638.jpg
    SA700638.jpg
    89 KB · Views: 48

oxnard111

Creative RE Purchasing
I had a my blowsion carbon chin pad on my old ski for about 6 months. I didn't use any anti sieze and the stainless rounded allen head bolts got stuck. The corrosion from the aluminum mouting blocks completely siezed the bolts in. I drill off the heads to get the the chinpad off the ski so I could work on it. I got one of the bolts out with a pair of vice grips, but the other wouldn't budge. I actually twisted so hard I gulled the stainless and snapped the bolt clean at the level of the mounting block. I tried drilling deeper into the bolt but it was like drilling into a diamond. The stainless was so compressed inside of the aluminum no drill bit would touch it.
I was about to give up hope when after I conversation with Scott at Blowsion on what my options might be, he suggested to drill between the stainless and the alumninum to relieve the pressure on the bolt. It worked. After dirlling I was able to twisted to bolt free with the little bit of bolt that was left coming out the bottom side of the aluminum mounting block.

To mount this pad onto my new ski, I drilled out bolt holes larger eliminating the threads and am now using I nut and bolt system instead of having the bolts thread into the aluminum. I would recommend this to anyone with this chinpad. Oh yeah I bought myself a nice tube on anti sieze.
 

Attachments

  • SA700642.jpg
    SA700642.jpg
    51.7 KB · Views: 28
  • SA700648.jpg
    SA700648.jpg
    82.4 KB · Views: 52
  • SA700649.jpg
    SA700649.jpg
    67.7 KB · Views: 45

oxnard111

Creative RE Purchasing
Foot wells continued...

Glued them puppies in there and rivited them in. This was my first time ever working with epoxy and glass. I then layed two layers of 4 inch wide mat around the seams. I forgot the build up the transistion between the foot wells and their mating surfaces before laying the glass and I got a bunch of air bubbles on my first layer. I sanded them out, used a thick epoxy mix to build up the transition like you would use caulking and then layed the second layer. The second layed down very nicely. I used a two part foam at my local marine shop. It didn't have a weight rating, but it did the trick. Lesson learned from pouring the first batch compared to the second, the more you mix the better it will expand.
 

Attachments

  • SA700639.jpg
    SA700639.jpg
    47.9 KB · Views: 43

oxnard111

Creative RE Purchasing
Foot wells continued...

This was also my first time turfing anything other than the bottom tray on a ski. The wells I installed were Wamilton Rickters and I purchased the precut kit. Instead of cutting along the ridge of the footwell I decided to heat it up and wrap it around. With two sets of hands it was pretty easy. We just took our time to make sure everything was going to look good.
 

Attachments

  • SA700650.jpg
    SA700650.jpg
    63.3 KB · Views: 41
  • SA700651.jpg
    SA700651.jpg
    80.2 KB · Views: 36
  • SA700652.jpg
    SA700652.jpg
    76.9 KB · Views: 33
  • SA700656.jpg
    SA700656.jpg
    89.1 KB · Views: 43
  • SA700658.jpg
    SA700658.jpg
    87.3 KB · Views: 51

oxnard111

Creative RE Purchasing
Here are some pics of the turf job once I had all the molding and the whole ski put back together. I haven't filled in the inside wall of the well yet, I want to ride the ski to see whether that extra amount of padding will effect the how much I can stuff my foot inside first.

Oh yeah. We turfed the right side first and it dosent look as good as the left up close but oh well. I used atleast two coats of conatct cement on everything. Most surfaces I let the cement dry over night and then came back and stuck the turf on after applying a second or third coat.
 

Attachments

  • SA700661.jpg
    SA700661.jpg
    74.1 KB · Views: 28
  • SA700663.jpg
    SA700663.jpg
    111.2 KB · Views: 26
  • SA700664.jpg
    SA700664.jpg
    101.8 KB · Views: 28
  • SA700665.jpg
    SA700665.jpg
    91.3 KB · Views: 35

oxnard111

Creative RE Purchasing
Here are some pics of my bling bling gold accesories. The one pics also shows that used stainless hardware to fasten the rear corner caps instead of using rivets. In the last pic you can see the "U" bolt I put in the dash to connect my limiting rope
 

Attachments

  • SA700669.jpg
    SA700669.jpg
    100.1 KB · Views: 34
  • SA700667.jpg
    SA700667.jpg
    80.5 KB · Views: 44
  • SA700668.jpg
    SA700668.jpg
    53.2 KB · Views: 33
  • SA700666.jpg
    SA700666.jpg
    103 KB · Views: 46
Last edited:

oxnard111

Creative RE Purchasing
So here is a full list of the mods that have been completed thus far.


Driveline:
- Stock short block
- Riva Griddle head, 35 cc domes, running about 176lbs of compression
- MSD enhancer
- Dual 44 taper bored
- Riva flame arrestors
- Riva pre filters (not pictured)
- B pipe with mod chamber, head pipe only approximately one year old (port matched)
- True dual cooling. Pump has been tapped
- Dual primer kit

Hull:
- One inch bilge tube with duckbill
- Tubbie II's (received, just haven't installed them yet)

Handling/Steering:
- Stock D cut ride plate
- Protec intake grate
- negative - 3 3/4 stock handlepole
- 0 degree bars with ODI rouge grips
- UMI angled finger throttle
- UMI Bearing system
- UMI Standard Length turnplate
- Solas Concord 13/16 cutback prop prepard by IMPROS
- Wamilton Ricketers footholds

Accesories:
- Rule 360 GPH bilge with Blowsion Bling Bling gold outlet fitting
- Blowsion bling bling gold ODI lock rings
- Blowision Anodized thug plugs
- Bling Bling gold bow and stern bushings
- Blowsion Carbon Chinpad
- Possibly a lightend handlepole spring
- Handlepole limiting rope

Future Plans (in no specific order)
- Aftermarket handlepole and bracket
- Bored stock nozzle
- Handlebar bilge switch
- Add a second bilge pump
- Swtich out to a limited chamber
- Reinforcment
- Modify stock hood to block off front breather holes
- Billet Fuel selector knob
- Diddy Bolts
- Pardaddy's FPP Tuning screws
- Light port job (way in the future)
- Hood Straps
-
 
Last edited:
Top Bottom