650SX/X2 build

Vumad

Super Hero, with a cape!
Location
St. Pete, FL
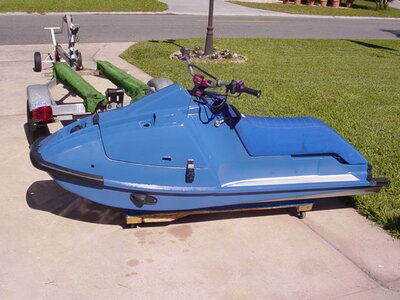
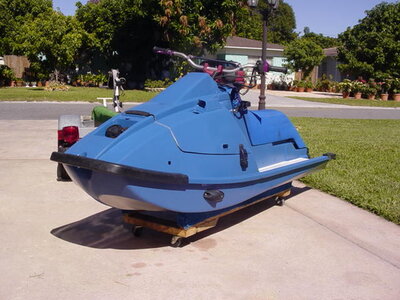
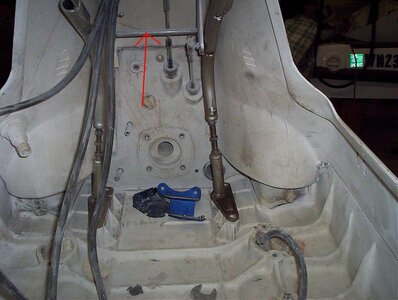
Ok guys, try not to moisten your pants.

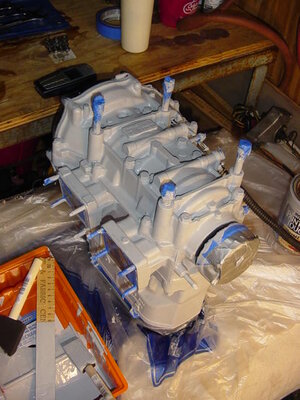
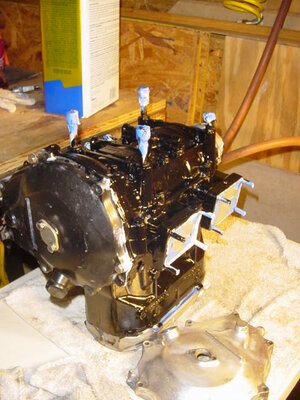
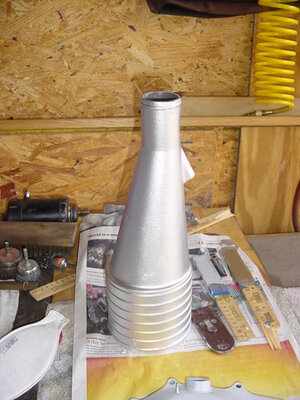
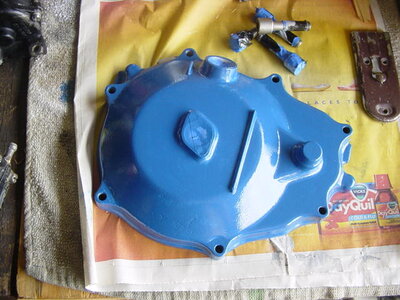
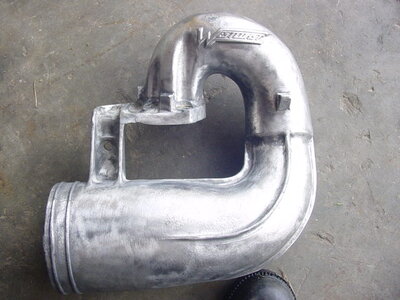
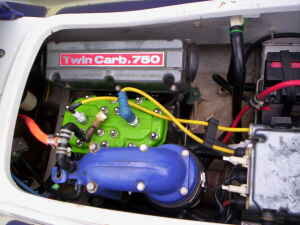
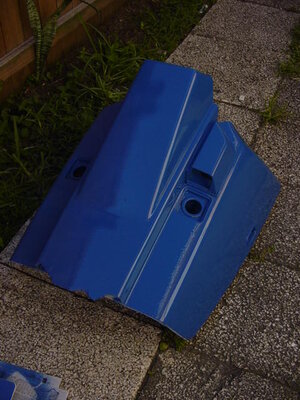
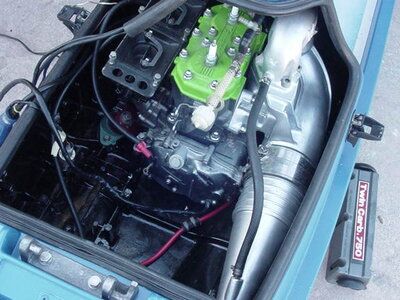
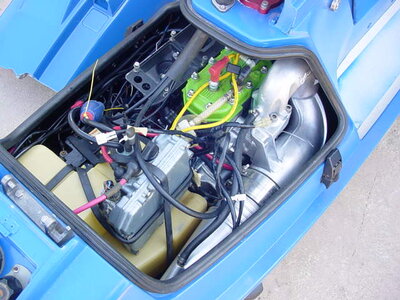
Here's the engine with the primer coat. Ya, I decided to do a primer. There's lots of pluses for using primer and no negitives. I used grey instead of black so I didn't have to buy a second can for lighter colors. One can should take care of the entire project. That means using a primer only costs $8 more, and should significantly increase the longevity of the top coat. Most importantly, primer helps smooth the surface, meaning you can do less work sanding a surface smooth, and at the same time, get better adhesion.

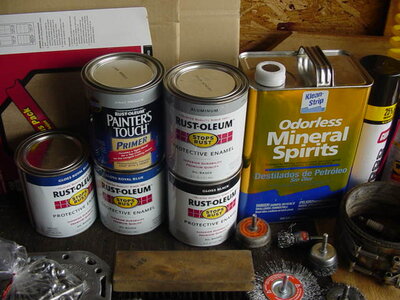
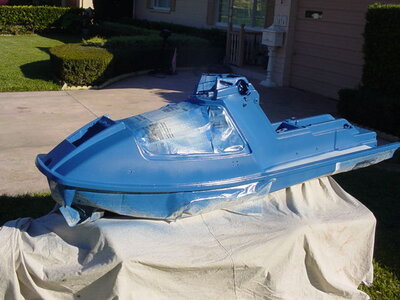
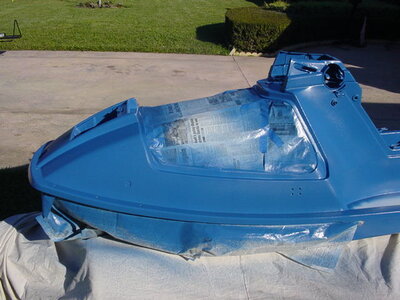
Also, a picture of my arsonal of paint supplies to do this project. You're probably thinking "That's too much paint to do just an engine". Yup, too much for just and engine.

Here's a few painting tips...

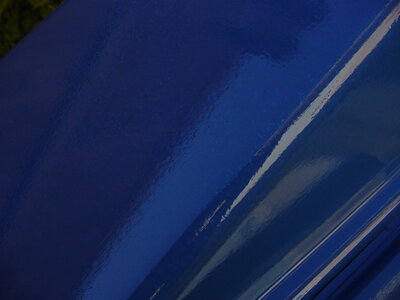
-For the small areas involved in the engine block, the best brush to use was the 1" foam brush. The 2" and 4" brushes were too big. They held too much paint, couldn't fit into the spots and made a runny mess.
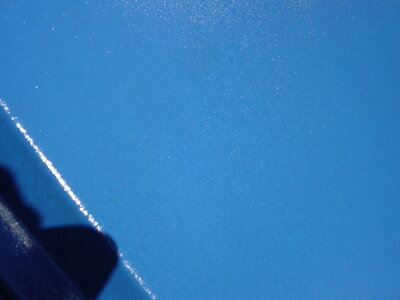
-When using a foam brush for this, pat with the brush, do not stroke. stroking with the brush smears the paint. Patting the brush makes the paint textury. The texture will smooth (the paint was very runny) into a flat finish, but the smeared strokes will not.
-It takes a lot less primer than you think it does. I probably poured 6 ounces, used 3, poured 2 back.
-LOTS of stiring.
-$$ tip --> They sell paint trays in the paint section that are round to set your can in. These trays are nice to minimize the mess, but they are $1.50. In the garden section, there is something almost identical, but clear instead of orange for $.50. Save a buck, buy Tom a coke.

My grandma is so cool too. She's like a cheerleader. Everytime she sees my work she makes a big deal about it. Makes me feal fuzzy inside.
 

Attachments

  • DSC01637.JPG
    DSC01637.JPG
    59.3 KB · Views: 114
  • DSC01640.JPG
    DSC01640.JPG
    60.1 KB · Views: 149
Last edited:

Vumad

Super Hero, with a cape!
Location
St. Pete, FL
The primer on my engine is taking forever to harden. It's been a few days and it's finally not a rubber any more. It still needs a bit more drying time.

I was bored of polishing metal parts, so I strayed away from working on my pipe.

So, I got a little carried away...

Pic 1 - Before
Pic 2 - Preped for paint
Pics 3-4 - Primed bottom
 

Attachments

  • DSC01620.JPG
    DSC01620.JPG
    60.6 KB · Views: 99
  • DSC01642.JPG
    DSC01642.JPG
    57.4 KB · Views: 128
  • DSC01646.JPG
    DSC01646.JPG
    56.9 KB · Views: 159
  • DSC01648.JPG
    DSC01648.JPG
    60.5 KB · Views: 152

WFO Speedracer

A lifetime ban is like a lifetime warranty !
Location
Alabama
There is this stuff ,its called spray paint,its in the automotive section and in the paint section,you should try it sometime.
 

Vumad

Super Hero, with a cape!
Location
St. Pete, FL
Stuff since last post.
 

Attachments

  • DSC01650.JPG
    DSC01650.JPG
    60.7 KB · Views: 155
  • DSC01651.JPG
    DSC01651.JPG
    59.9 KB · Views: 140
  • DSC01653.JPG
    DSC01653.JPG
    60.3 KB · Views: 153
  • DSC01655.JPG
    DSC01655.JPG
    60.2 KB · Views: 136
  • DSC01663.JPG
    DSC01663.JPG
    60.6 KB · Views: 159

Vumad

Super Hero, with a cape!
Location
St. Pete, FL
More stuff.
 

Attachments

  • DSC01668.JPG
    DSC01668.JPG
    61.3 KB · Views: 84
  • DSC01669.JPG
    DSC01669.JPG
    61.2 KB · Views: 80
  • DSC01670.JPG
    DSC01670.JPG
    58 KB · Views: 67
  • DSC01671.JPG
    DSC01671.JPG
    61.5 KB · Views: 78
  • DSC01674.JPG
    DSC01674.JPG
    61.1 KB · Views: 79

Vumad

Super Hero, with a cape!
Location
St. Pete, FL
The 650 X2 just stepped up to a 750 X2. I just picked up this '94 XI SS for stupid cheap. The 750 is going to go into the X2 with the Westcoast pipe.
 

Attachments

  • 100_1704.jpg
    100_1704.jpg
    7.2 KB · Views: 68
  • 0101000115130104072007102699ac3c772aebb7eda500a96b.jpg
    0101000115130104072007102699ac3c772aebb7eda500a96b.jpg
    9.9 KB · Views: 123

Vumad

Super Hero, with a cape!
Location
St. Pete, FL
OMG, my 1st experiance with a spray gun. I had fun.

When I was done, it was blue! It, being the jet ski, in addition to me, the ground, the paper and tape, the house, the cars, basically, if it was in 2 square miles of my house or 5 miles downwind, it is now blue.

I had a blast.

Anyway, here's some pics of the spray job. It was my 1st, so don't rip on me too bad. I'm happy with it. I mixed the paint until "It looked good" (even though i don't know what it was suppose to look like). It was probably 10% mixed. It splattered some, so I think I had the pressure too low, or the paint too thick. I think the paint was way too thick. Probably 25% would be best. Anyway, I'm happy with it and I had a good time. That's the only 2 things that matter.

I would say that this is a better choice than a rattle can if you already own a gun and like one of the few colors you can buy in the quart.
 

Attachments

  • DSC01692.JPG
    DSC01692.JPG
    60.8 KB · Views: 80
  • DSC01695.JPG
    DSC01695.JPG
    59.3 KB · Views: 94
  • DSC01694.JPG
    DSC01694.JPG
    62 KB · Views: 73
  • DSC01700.JPG
    DSC01700.JPG
    59.8 KB · Views: 75
  • DSC01701.JPG
    DSC01701.JPG
    61.2 KB · Views: 72

Vumad

Super Hero, with a cape!
Location
St. Pete, FL
Well, the paint does have quite a bit of orange peal, and the hood has some runs. I could go back, sand, paint another coat and seek perfection, but I was never looking for perfection, so I'm pretty happy with it. Most people wont be able to see the flaws until they are about 5' away. It's shiny from a distance.

I need to paint the fuel door, do some touch up with a brush arround the edges of the hood and etc. Then I just need to pull the engine from the SXI, have Tom lighten the flywheel, put on the pipe and drop in the engine. After that, just some turf and it'll be ready to rock. I received my replacement trim cable from Last, but I can't get the old one out......... =(

It looks better in person. My camera sucks.
 

Attachments

  • DSC01705.JPG
    DSC01705.JPG
    62.6 KB · Views: 132
  • DSC01706.JPG
    DSC01706.JPG
    60.7 KB · Views: 86
  • DSC01707.JPG
    DSC01707.JPG
    61.5 KB · Views: 94

amemoryoncelost

X2/SNsj
Location
tacoma, wa
have you started this thing yet, put it in the water already, you have all winter to make it look pretty, if I lived in florida all my skis would look like ********, I'd be taking advantage of every single day. This washington weather, damn.

But really, the 750 looks nice, wouldn't mind dropping a 750 into mine this winter if I can find the funds.
 

Vumad

Super Hero, with a cape!
Location
St. Pete, FL
have you started this thing yet, put it in the water already, you have all winter to make it look pretty, if I lived in florida all my skis would look like ********, I'd be taking advantage of every single day. This washington weather, damn.

But really, the 750 looks nice, wouldn't mind dropping a 750 into mine this winter if I can find the funds.


No, I haven't had it in the water yet. I will ride all winter in a wet suit so it's not a huge deal. I knew if I were to drop the engine in, it wouldn't come back out. Really, I intended this as a practice build. I'd like to do some more interesting things than taking it apart and putting it back together, but I didn't want it to be the 1st time. I've learned a TON in the whole process and there's been a lot of trial and error.

The work is pretty much done. I'll have the engine out on sunday. It'll be in Tom's shop ASAP to have the flywheel lightened. It will be installed shortly after. Riding it friday is realistic, assuming I don't have issues with the turf. Another trial and error thing.
 

Vumad

Super Hero, with a cape!
Location
St. Pete, FL
Since my last post...

I pulled the engine
Tom looked at the flywheel but we decided not to lighten it so it's back together
I put on the westcoast pipe
ran cooling lines
placed bilge
installed engine
installed the waterbox

I have a problem, that the stock airbox doesn't fit in the ski. I didn't think the base of the airbox fit, so I cut the corner a bit, and guess what, it does fit. That's what I get for being the type of person who measures once and cuts 5 times. Anyway, I need to shave the airbox lid and fiberglass it to the correct shape to fit. Everything else should be a simple fit... I hope.

Oh, PS. I'm not running a right side support. I tried top put a left side support in, but things just do not fit right like that. I wont be going nuts with it, so I think I'll be ok. In any case, I have 5 of these. If I break it, I'll go get another 1. $$

I blamed my mistake with the airbox base on being tired and impatient so I called it for the night. I wish I hadn't cut it, but it wont hurt anything.
 
Last edited:

Crab

thanks darin...noswad!
Location
Seattle
Since my last post...

I pulled the engine
Tom looked at the flywheel but we decided not to lighten it so it's back together
I put on the westcoast pipe
ran cooling lines
placed bilge
installed engine
installed the waterbox

I have a problem, that the stock airbox doesn't fit in the ski. I didn't think the base of the airbox fit, so I cut the corner a bit, and guess what, it does fit. That's what I get for being the type of person who measures once and cuts 5 times. Anyway, I need to shave the airbox lid and fiberglass it to the correct shape to fit. Everything else should be a simple fit... I hope.

Oh, PS. I'm not running a right side support. I tried top put a left side support in, but things just do not fit right like that. I wont be going nuts with it, so I think I'll be ok. In any case, I have 5 of these. If I break it, I'll go get another 1. $$

I blamed my mistake with the airbox base on being tired and impatient so I called it for the night. I wish I hadn't cut it, but it wont hurt anything.
The LH support on the right side will fit, it just needs some minor bending at the plates.
 

Attachments

  • 107_4878.jpg
    107_4878.jpg
    71.7 KB · Views: 110

Vumad

Super Hero, with a cape!
Location
St. Pete, FL
The LH support on the right side will fit, it just needs some minor bending at the plates.

Thanks for the pic. I'm going to get this thing on the water and set the support up later. I can mock the fit with one of my other hulls.
 

Vumad

Super Hero, with a cape!
Location
St. Pete, FL
Today, I completed installing the engine, setting up the exhaust/water box, installed fuel tank, battery box + battery, installed e-box, pulled throttle from the XI SS and installed, Tom (the super nice guy he is) grinded my airbox lid for me so that's set up.

We started the ski at tom's shop, it sounds great.

I have an electrical problem... the stop button isn't working. I wasn't able to get the ski on the water today. I'm working tomorrow so I'm short on time, but I'm still pulling to have it at my Uncles on thursday.
 

Attachments

  • DSC01727.JPG
    DSC01727.JPG
    59.7 KB · Views: 167
  • DSC01729.JPG
    DSC01729.JPG
    59.4 KB · Views: 198

Crab

thanks darin...noswad!
Location
Seattle
Today, I completed installing the engine, setting up the exhaust/water box, installed fuel tank, battery box + battery, installed e-box, pulled throttle from the XI SS and installed, Tom (the super nice guy he is) grinded my airbox lid for me so that's set up.

We started the ski at tom's shop, it sounds great.

I have an electrical problem... the stop button isn't working. I wasn't able to get the ski on the water today. I'm working tomorrow so I'm short on time, but I'm still pulling to have it at my Uncles on thursday.
Take the stop button completely apart and look for rust.
 

Vumad

Super Hero, with a cape!
Location
St. Pete, FL
Take the stop button completely apart and look for rust.

Tom used an OHM meter to check the button. It appears to be a problem in the disconnect or the E-box. I am going to take the switch apart tonight and check it out. I wont get to the e-box, so I'm going to have to install the choke as a safety.
 
Top Bottom