- Location
- Indianapolis, IN, US
I have a fairly rich history with replacing ball bearings on my own equipment, and have managed so far to avoid needing to acquire a shop press. I thought I would share the method I used in case it helps anyone else who's looking for a way to hate themselves over the winter. 
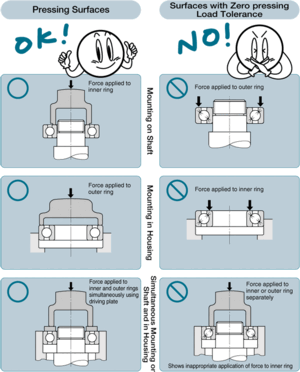
I'm uncomfortable with the rebuild techniques I've seen in that they impart heavy pressing loads onto the balls/races of the deep groove ball bearing in the midshaft housing. This appears to include all of the pre-assembled units that come without a midshaft installed. I understand this is done in practice all the time on these housings, but I wanted to see if a casual mechanic could avoid it. Ideally, the bearing should be pressed into the housing while bracing only the outer race, and the shaft should be pressed into the bearing while bracing only the inner race. (See NTN infographic, particularly "zero pressing load tolerance"):
The method of separating the housing pieces is obviously not important, but I did want to share what I did.
Easy enough to pop off off the old seals by driving a drywall screw in and using a claw hammer:
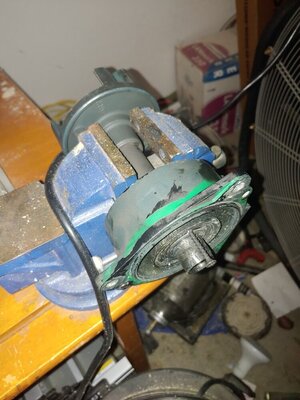
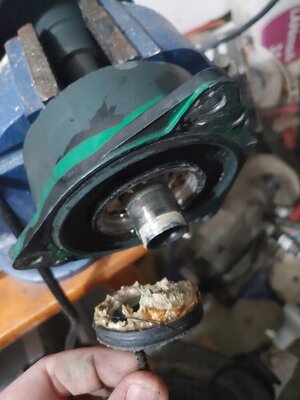
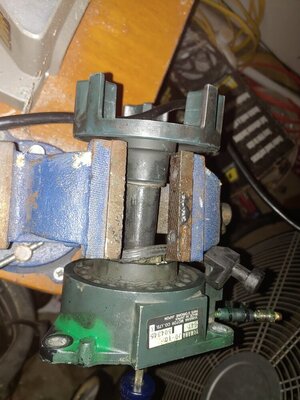
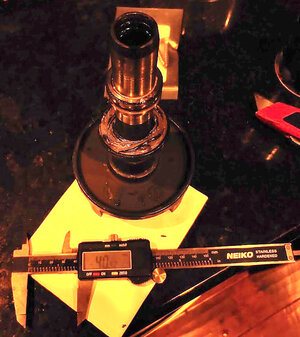
I punched out the ball cage, moved the balls to one side, and used a clamp to move the shaft to the side so that the balls could fall free. Then pressed out the outer race with a bushing installer. The front seal came off with a vice and screwdriver, and decided I'd just cut the inner race off of the shaft. Measure the inner race distance from the end of the shaft just in case, but mine had an obvious mark where the old bearing was:
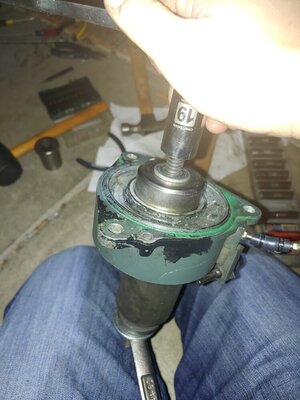
For assembly, I pressed in the front seal (don't push all the way in; back against the circlip appears to be too far). Put the front circlip in, then put midshaft in all the way and tapped the bearing inner race onto the shaft to the previous depth with a socket. I warmed the bearing and put the shaft in a freezer, but not sure how much it helped. Packed some grease between the bearing and the front seal. I believe the original bearing has a rubber seal only on the rear side, and after feeling the drag on this 6205LLUC3, I decided I'd pop the front one off to save some heat and allow for the grease to reach the bearing.
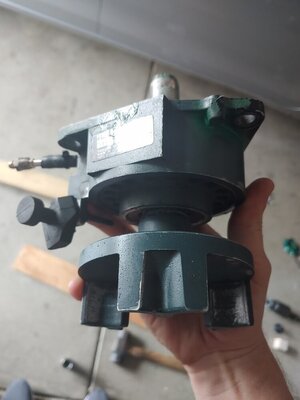
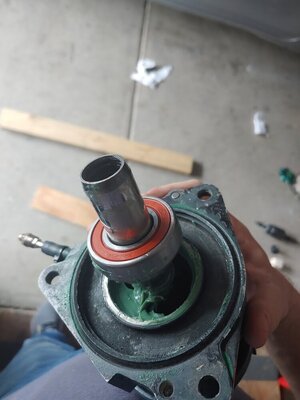
Tapped the bearing/shaft into place using the bushing installer and some jack stands as a makeshift arbor plate:
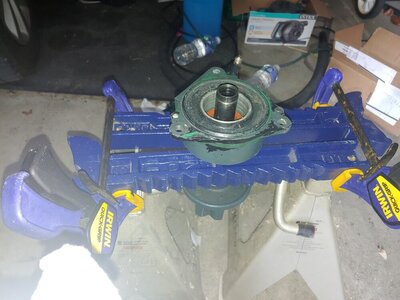
Installed the rear circlip, and pressed the two rear seals into place using the bushing installer and hand pressure. Packed between them with grease, and took the grease hose off to allow pressure relief when installing the second rear seal.
I'm uncomfortable with the rebuild techniques I've seen in that they impart heavy pressing loads onto the balls/races of the deep groove ball bearing in the midshaft housing. This appears to include all of the pre-assembled units that come without a midshaft installed. I understand this is done in practice all the time on these housings, but I wanted to see if a casual mechanic could avoid it. Ideally, the bearing should be pressed into the housing while bracing only the outer race, and the shaft should be pressed into the bearing while bracing only the inner race. (See NTN infographic, particularly "zero pressing load tolerance"):

The method of separating the housing pieces is obviously not important, but I did want to share what I did.
Easy enough to pop off off the old seals by driving a drywall screw in and using a claw hammer:


I punched out the ball cage, moved the balls to one side, and used a clamp to move the shaft to the side so that the balls could fall free. Then pressed out the outer race with a bushing installer. The front seal came off with a vice and screwdriver, and decided I'd just cut the inner race off of the shaft. Measure the inner race distance from the end of the shaft just in case, but mine had an obvious mark where the old bearing was:


For assembly, I pressed in the front seal (don't push all the way in; back against the circlip appears to be too far). Put the front circlip in, then put midshaft in all the way and tapped the bearing inner race onto the shaft to the previous depth with a socket. I warmed the bearing and put the shaft in a freezer, but not sure how much it helped. Packed some grease between the bearing and the front seal. I believe the original bearing has a rubber seal only on the rear side, and after feeling the drag on this 6205LLUC3, I decided I'd pop the front one off to save some heat and allow for the grease to reach the bearing.


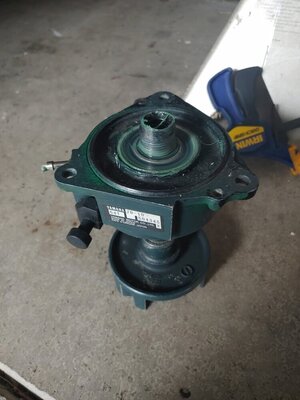
Tapped the bearing/shaft into place using the bushing installer and some jack stands as a makeshift arbor plate:

Installed the rear circlip, and pressed the two rear seals into place using the bushing installer and hand pressure. Packed between them with grease, and took the grease hose off to allow pressure relief when installing the second rear seal.

Last edited:
