SN Superjet fix and improve build

Had a big win for me today. One of the intake grate inserts the bolt broke off. Well I messed it up bad with the drill. I got a big bit and was cleaning up the hole. Then used a punch to knock out the little bit of bolt left. There are about half threads or so left In the insert so I just need a longer bolt and I’ll be good to go.
 
Make sure the bolts are not punching through the black pump shoe. If they are it will cause lots of vibration.
Thanks but it is the front one. I need to make sure the bolt is just short enough that it does not come out of the top of the insert tho so i can seal it up from the inside. I have a new pump shoe so those inserts will be perfect. The pump shoe ones are also broke.
 
All,
Anything i should do while my tray and foam is out? I have single cooling but if i ever go dual i will just use the stock siphon line. Here in Colorado the water is "cold" year round so i don't think i need dual at all. Pretty much stock engine. I will be running little screw drains in the back of the hull to let water out at the end of the day.
 
Pumped I had my buddy help me get the motor out. I was able to pull it with the exhaust on so I can get a really good mount with the coupler not in the ski. I struggled with this when I put the motor in first. I will be able to wheel it around on its side for a bit doing some work underneath then I need to prop it up somehow fully upside down to do the pump shoe. I am making progress for now. If anybody has an engine shim who wants to throw it in an envelope and send to me that would be great. I need one more.
 

Attachments

  • FC79CF91-5097-4173-9A79-1612401C5902.jpeg
    FC79CF91-5097-4173-9A79-1612401C5902.jpeg
    239.1 KB · Views: 32
  • 6B73C887-5F55-445A-9A22-F8E743682A1A.jpeg
    6B73C887-5F55-445A-9A22-F8E743682A1A.jpeg
    270.5 KB · Views: 30
Pretty pumped. After over an hour I got the broken ride plate bolt out. First I tried for a while the way Erickson m&p way with vice grips and a nut but I could not get the weld to go down and melt into the bolt with my little 110 welder. I almost gave up but figured I would try to weld a bolt on. I got one on but it broke off. I ended up getting a second bolt on and I made sure to weld all around it. And I got it out. All the black stuff wiped off. It burnt a tad of the fiberglass around the hole but not bad. I also got the pump shoe out. So I’m ready to clean that up and get the new one back in.
 

Attachments

  • 6EB48AB4-5CBA-44C6-855C-C557CD67FCD9.jpeg
    6EB48AB4-5CBA-44C6-855C-C557CD67FCD9.jpeg
    102.1 KB · Views: 28
  • 86716E3E-447A-4EE9-86FC-77109D3C43AA.jpeg
    86716E3E-447A-4EE9-86FC-77109D3C43AA.jpeg
    128.2 KB · Views: 26
  • 89DC1071-69A4-44A5-8B1B-C77E108FE2E3.jpeg
    89DC1071-69A4-44A5-8B1B-C77E108FE2E3.jpeg
    238.2 KB · Views: 27
  • 4459F023-6488-4CDF-BF14-F5FEDAF937B6.jpeg
    4459F023-6488-4CDF-BF14-F5FEDAF937B6.jpeg
    141.5 KB · Views: 25
  • 5192B7D7-CEB5-40C8-8DC7-F1F78E0D76A3.jpeg
    5192B7D7-CEB5-40C8-8DC7-F1F78E0D76A3.jpeg
    93 KB · Views: 25
  • 50564FD9-2F56-4600-9484-DD66F70BC0EE.jpeg
    50564FD9-2F56-4600-9484-DD66F70BC0EE.jpeg
    229.6 KB · Views: 25
  • 2803725F-4206-477A-BBF3-B2D21EB0E6A1.jpeg
    2803725F-4206-477A-BBF3-B2D21EB0E6A1.jpeg
    119.2 KB · Views: 36
Got the pump shoe in. Went in pretty easy. It’s the pro watercraft one.

One question I used their recommended silicone for the pump shoe which is IS800 series adhesive. I have a bunch left and it’s already opened. Can I used it for sealing up the inside of the tray? Or should I used the recommended 5200 for that. I have the 5200 tube already but keeping it unopened would be nice.

Edit: another question do I need to replace this pump seal? It has a smushed down part to it. Does not seem fully dry rotted tho. Pic below.
 

Attachments

  • 8C170F2A-8046-4454-B816-4879D4AC8A75.jpeg
    8C170F2A-8046-4454-B816-4879D4AC8A75.jpeg
    142.5 KB · Views: 26
  • 37D58896-828A-4A0C-9F11-CD8702558B5F.png
    37D58896-828A-4A0C-9F11-CD8702558B5F.png
    110 KB · Views: 24
  • 6EEF5389-FB92-4CFC-AD1B-269E7184FA3E.jpeg
    6EEF5389-FB92-4CFC-AD1B-269E7184FA3E.jpeg
    291.9 KB · Views: 27
Last edited:
Foam is done I think until I glass it all back in and then fill the sides through the holes for the foot holds.
 

Attachments

  • 3103E21D-82EB-4D32-8BA7-5CCFCA66E43A.jpeg
    3103E21D-82EB-4D32-8BA7-5CCFCA66E43A.jpeg
    203.2 KB · Views: 29
Couple jetting questions. Took the carbs apart for a clean and will rebuild with mikuni kit. My elevation is around 5500. Right now jetting is at
135 main
70 p
1.5 seat
And im 90% sure 115g spring.

Spring pic is below. With a pic of all the springs from mikuni. I’m thinking mine looks like the one on the left which is 115g. Mine measures .564 in length.

When I was riding it before it seemed to load up on first start up in the water from the beach. As soon as you hit it it would clear out in a couple seconds and then run well from what I think. Prob not perfect.

The carb was a bit dirty looking and needs rebuilt so not fully sure if the bog was that or jetting. Does the jetting seem close? Should I drop anything leaner? I was told this was sea level b pipe jetting for the motor that is in it. I have the dry pipe so I would guess it’s close.
 

Attachments

  • 0E7FF1F8-B328-4850-BE5B-7195D586F4B0.jpeg
    0E7FF1F8-B328-4850-BE5B-7195D586F4B0.jpeg
    126.8 KB · Views: 20
  • 3A095FBD-A536-4F9E-8FA2-A1BFA4D3A1CD.png
    3A095FBD-A536-4F9E-8FA2-A1BFA4D3A1CD.png
    408.4 KB · Views: 23
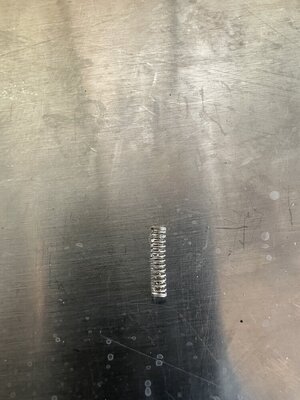
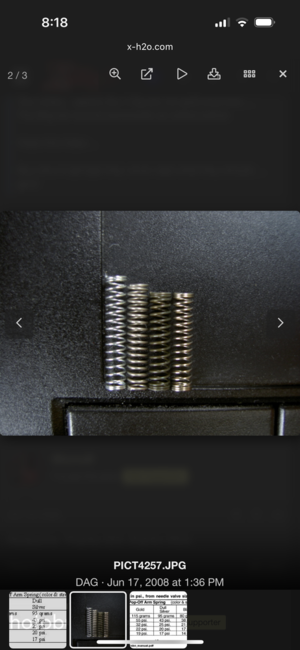
Measure the pop-off pressure, then look-up your Spring in the Mikuni Chart along the 1.5 Needle Valve Size row.

You need to do the Pop-off tests anyway to check for leaks and to know what it is.

Stock OEM Jets are #70 and #135 for Sea Level.

Factory Pipe Type 4 Dry Pipe Jets are #75 and #140 with Stock OEM N&S for Sea Level.

The High Elevation reduction in Oygen, which leads to a Rich Condition with Sea Level settings, can be accounted for by turning in the Carb Adjustment Screws as needed.

Use a Tachometer for Tuning.

The Pop-Off might need to be slightly lower than spec'd for Sea Level, since the higher altitude atmospherice pressure is slighlty lower than at Sea Level, thus the Needle Valve opening a little later for the Spring being slighlty too "strong" to be overcome by the Atmospheirc pressure.

Because the Needle Valve Spring is opposed by the Regulator Diaphragm and the Regulator Diaphragm is "pushed" by Atmospheric Pressure.

Short story, adjust Low Speed Screws until a crisp snappy response is obtained fron Idle to WOT when kneeling on the Tray at Idle. I call it the "Whiplash Test." ;)

If it hesitates or even dies, the Low Speed is Lean, so OPEN the Low Speed Screws. If it gurgles, loads up or responds "dirty", then it's Rich so turn the Low Speeds IN. Make the adjustments 1/8 of a Turn at a time.

Make sure you're synhcronizing or turning them IN or OUT the same in both Carbs. Too easy to forget or get distracted when turning Screws. Many People will turn one Carb one way and go the other way on the other Carb by mistake. Happens more often than you would think.

Pre-set the Carb Screws on the Bench so you start from known Turn Settings.

The more Advanced Tuners will adjust each Carb individually by treating each Cylinder as an independent Engine. But that's another Story.

Make sure the Throttle Butterflys are synchronized after you install them. Adjust until the Butterflyes are dead even. Eyeball is good; ************ Gap Gauge even better.

Odd how the Word F-E-E-L-E-R is not allowed...
Perfect thanks. For the info. A lot of it I am familiar with from reading.

Jet maniac posted for similar elevation and motor set up to mine
132.5
1.5 115g
70-72.5

So I am close to his recommendation. I was playing with screws last year and it was close. The colder it got high 50s temp the worse it got. So maybe I am too lean. The screws were so hard to turn by hand so I did not mess with them on the last ride really. Hopefully getting it all cleaned up and rebuilt will help

Edit: I went ahead and bought carb rebuild kits and two 95g springs to try out. Will probably leave everything else the same for now and try.
 
Last edited:
I took the foam back out and filled the tray with water. It’s not sealed the best. I’ll have to go back over it. 5200 is such a pain to work with. Maybe because it was like 30 deg out when I used it idk. I struggled to get it to smooth out around stuff. May try to apply some heat and see if it’s easier to work with. After that I may go over everything with silicone because that is much easier to squirt into the hard to reach areas and stuff. Just to make sure it’s pretty sealed. It does not have to be perfect tho. I am installing drains in the back.
 
Pretty excited I made the 12hr drive back home this weekend to pick up my other sn for a buddy to ride so we can ride together instead of share.
 

Attachments

  • 93866DA0-8611-4991-8619-427969FAE68E.jpeg
    93866DA0-8611-4991-8619-427969FAE68E.jpeg
    140.1 KB · Views: 20
I re sealed a bunch of areas In the tray and rechecked by filling with water. Still getting slight leaking around the drive shaft and the old bilge line. But 90% of the leaks are gone. I am going to give it one more go with the 5200 I think and then try some silicone if that won’t seal. Just because the silicone is so much easier to work with and to get smooth coverage. I would like to start knowing the tray does not leak. Knowing is still probably won’t be perfect.

Bought an ultra sonic cleaner to clean the carbs. It is doing pretty well. Need to do a bit more but looking good for the rebuild.

I’m really ready to start fiberglassing this thing back together.
 
Does anybody have any thoughts on how to get the side fiberglassed exactly into place? I was thinking maybe drill holes and zip tie a couple areas then fiberglass around then remove them and glass those spots.

Also I think glass it all up then cut holes for foot holds? Any thoughts on this?
 

Attachments

  • D0940820-1953-4E0D-A7F0-4DA08C0E9261.jpeg
    D0940820-1953-4E0D-A7F0-4DA08C0E9261.jpeg
    183.1 KB · Views: 42
Well I got it all zipped up with safety wire. Then I got one layer of glass on it. Probably do just the 1 layer and then cut out for the foot holds and glass it all back. Then probably 3-4 layers total.
 

Attachments

  • F900E3D9-86E6-4E6F-AC12-B457710CBE3C.jpeg
    F900E3D9-86E6-4E6F-AC12-B457710CBE3C.jpeg
    154.1 KB · Views: 20
  • 8EBB6D91-445D-4443-BB01-44ECDA0452AB.jpeg
    8EBB6D91-445D-4443-BB01-44ECDA0452AB.jpeg
    203.5 KB · Views: 17
  • 510A935F-884B-42B9-BE69-19C2E0BD1107.jpeg
    510A935F-884B-42B9-BE69-19C2E0BD1107.jpeg
    207 KB · Views: 21
I have both side footholds fitted. Just need to get them epoxied and riveted in place. Mine fit like crap. They are cheap ones that are prob homemade. I will prob have to trim and stuff on them a tad.

I will say the easiest part of this was the defoam. You are still excited about the project at that point, there is nothing to really screw up so you can just hammer away. Now everything is so detailed so you get it right. It all takes so much time. Seems every little thing takes 30 min to do. I’m ready to just get this thing zipped up and finalized.
 

Attachments

  • IMG_5777.jpeg
    IMG_5777.jpeg
    195.4 KB · Views: 24
Last edited:

smoofers

Rockin' the SQUARE!!!!
Site Supporter
Location
Granbury, TX
You've come this far. Don't be afraid to trim the holds to make them fit properly. You'll be much happier in the long run if you take the time to do it right. Keep up the good work man.
 
You've come this far. Don't be afraid to trim the holds to make them fit properly. You'll be much happier in the long run if you take the time to do it right. Keep up the good work man.
I will trim them some. Bit confused on how to trim them to make them fit well. I think trim the top flange down in all areas. The main issue with these is they dont sit quite flat so i will need some help from screws to get them to flex down a tad.
 
Top Bottom