FX-1 Removeing The Pump Shoe

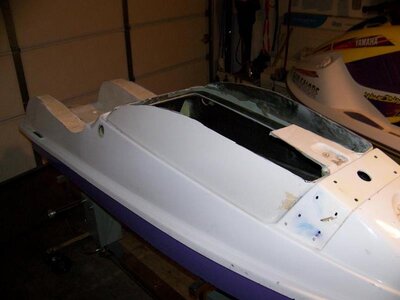
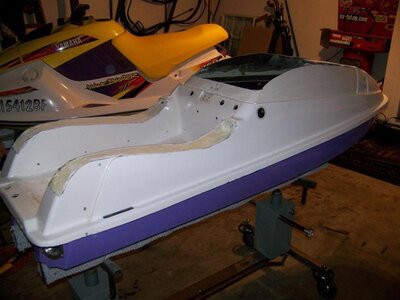
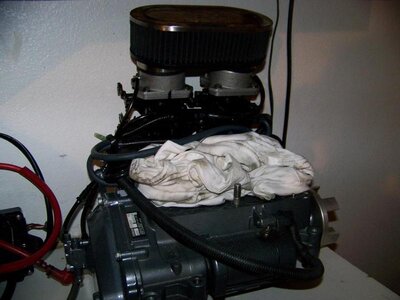
I'm just swapping everything from my stock X2 with a crappy hull to that green one I posted earlier. I'll also be shaving the hood and chopping 1.5" off.

A cast pump shoe would be awesome. Right now I'm thinking I'll beef up the stock shoe as much as possible and then bore it out and re install.
 

yamanube

This Is The Way
Staff member
Location
Mandalor
Not sure if you have any relatives in High School or not but at my HS we had a bunch of metalurgy equipment and could have pretty easily turned out a cast piece at least decent enough to experiment with.
 
Not sure if you have any relatives in High School or not but at my HS we had a bunch of metalurgy equipment and could have pretty easily turned out a cast piece at least decent enough to experiment with.

even better - make a cast piece of a fx-1 pump shoe already epoxied up and bored to 144mm
 
Well I got the shoe out. Thanks for the tips Flash, Special! I started with the heat gun but wound up using a torch. The hotter the easier! I cut a notch in the shoe so it would give me some room to pry from the bottom side. Heat it up to the point its starts to smoke and pop it out. Pretty easy.

Clean job. I just whacked mine with a hammer:smashfreakB:.
 

yamanube

This Is The Way
Staff member
Location
Mandalor
There would be anything left to it, the hull opening is on the shy side of 144mm.
Would it really matter? If you put a bead of adhesive/5200 around it, its not a super high stress area on top, is it? As long as the bottom part that holds the intake grate is screwed and glued to the hull along with the flange wouldn't it be just fine?
 
Would it really matter? If you put a bead of adhesive/5200 around it, its not a super high stress area on top, is it? As long as the bottom part that holds the intake grate is screwed and glued to the hull along with the flange wouldn't it be just fine?

thats kind of what I was thinking - round noses come with plastic pump shoes...
 
Pump shoe/FX-1 build

I'm making this my build thread.

Got'er striped down and started cutting her up. Took 1 1/2"s off top and bottom of handle pole so far. I'm thinking I will go 3 or so "s more off the bottom.
 

Attachments

  • fx1build1.jpg
    fx1build1.jpg
    52.8 KB · Views: 75
  • fx1build2.jpg
    fx1build2.jpg
    40.4 KB · Views: 82
  • fx1build3.jpg
    fx1build3.jpg
    41.2 KB · Views: 59
  • fx1build4.jpg
    fx1build4.jpg
    41.8 KB · Views: 68
  • fx1build5.jpg
    fx1build5.jpg
    39.8 KB · Views: 54
  • fx1build6.jpg
    fx1build6.jpg
    51.8 KB · Views: 71
  • fx1build7.jpg
    fx1build7.jpg
    63.2 KB · Views: 61
I must have missed something somewhere. Whats up with the hood?

Not sure how its going to turn out. I'm thinking I might save a couple of pounds and get rid of that flopping ass hood compartment (you can see it flopping in my avatar). I'm going to seal the hood up and run a 3" snorkel in the pole. Do you guys think 3" diameter in the handle pole will provide the needed air for a stock bore 701?
Just put it on the scale and its 85 pounds as is. I'm thinking the foam under the tray is wet and I can save 10 pounds or so their.
 
Last edited:
I also have a 62T lower end. 500$, FX-1 pump,shaft and 18-22 S/T prop
200 $. Yamaha 144 mm pump,shaft and Solas 18-23/ raider tilt and trim, 250 $. Raider Coffman pipe 300 $. Raider Pro-tec ride plate and grate- 100 $. Or OBO!
 

Attachments

  • fx62T.jpg
    fx62T.jpg
    54.7 KB · Views: 39
Last edited:
Whoa! I thought you was just trying to remove a pump shoe! Great work on the sides. Where did your trick stainless pole mount reinforcement go?
 
Last edited:
Just glue some plexi glass over that hood now and make it see thru. That way when you ride you can see how much waters in there, lol.

Thats a great idea to run the air intake through the pole, that would make the ski stay much drier. I dunno if its enough air though, theres 2 intakes running to the compartment on those skis. I guess your going to have to open up the pole bracket to get the 3" hose thru it.
 
Last edited:
Top Bottom