Nube's '06 superjet and '94 FX1 build 2008

yamanube

This Is The Way
Staff member
Location
Mandalor
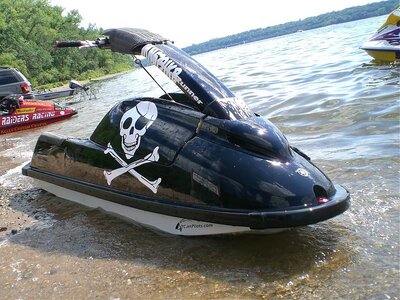
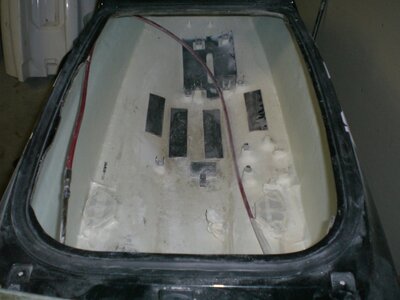
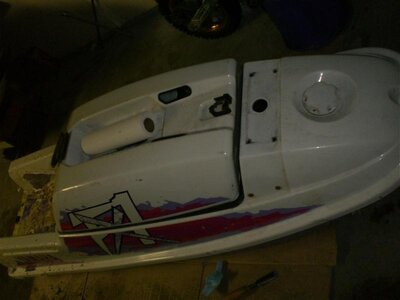
Thanks to a collaboration from Idok, Knoxride and Rehak2 I have a new project for this year. Came with a worn out hull, hood and random pump and bilge parts inside. Its going to be my girlfriends ride as well as a backup. Going for clean power and SUPER reliable.
Solas 19/24 prop?
Open grate
Groovy rideplate
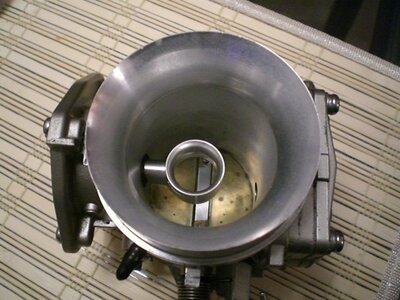
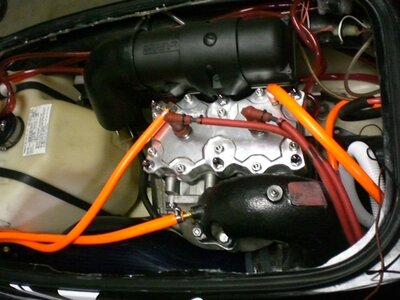
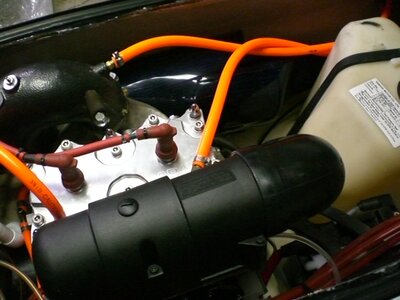
Stock 61x/62t out of my '06
stock dual 38s
Stock exhaust (for now)
MSD enhancer
Rickter footholds
along with all the usual- billet fittings, throttle, bilge pump, etc.

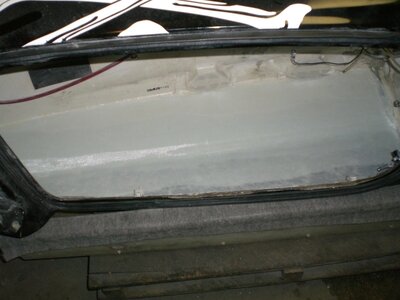
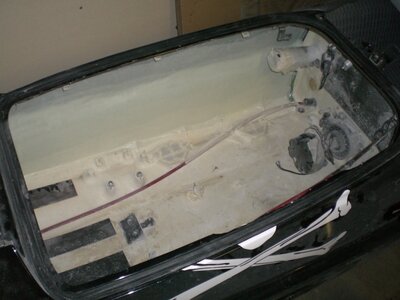
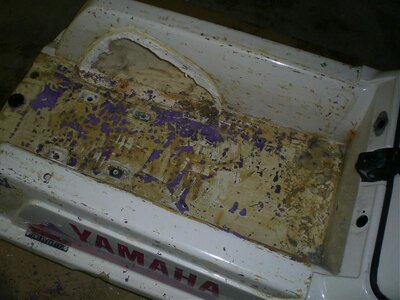
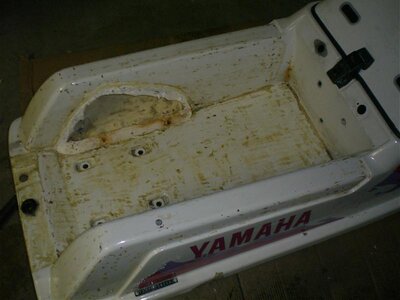
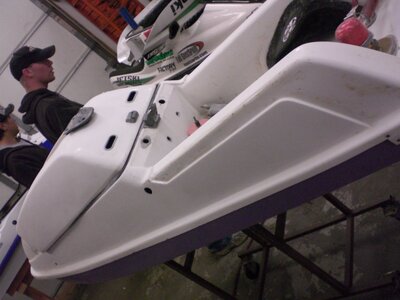
So far I have peeled of all the nasty purple gator grip, removed the footholds (which where held in by 50 pounds of 5200 a handfull of rivets, had no foam behind them and a little wet foam) cut out the small amount of wet foam, removed all the stock decals, reinstalled the footholds with epoxy resin, and epoxied down the battery box mounting plate as it was also held on by 3 tubes of 5200 and had come loose during shipment.:bad3:

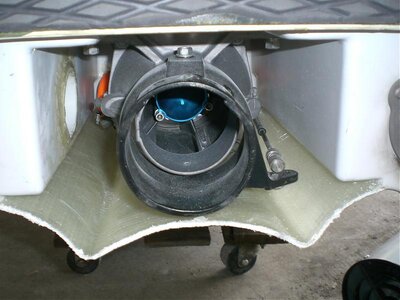
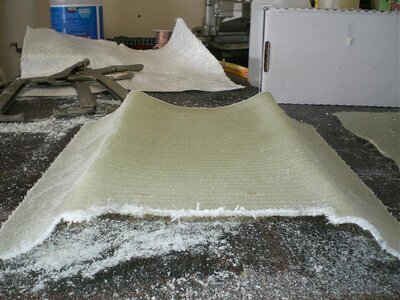
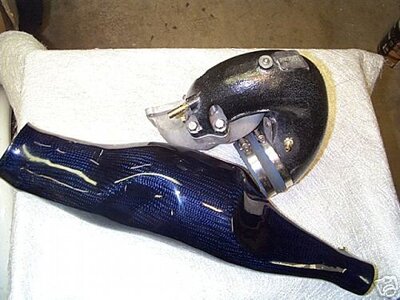
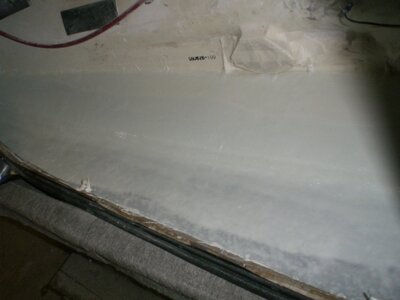
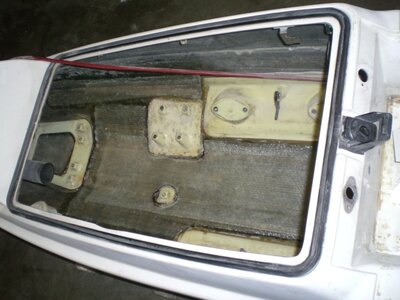
I am also going to be adding a couple layers of biax to the inside just to reinforce a couple thin spots on the bottom of the hull from 14 years of beaching and a little piece of mind. Probably throw a layer or two of glass on the sides of the hull for some light reinforcement as long as its apart.
 

Attachments

  • CIMG2447.jpg
    CIMG2447.jpg
    36.4 KB · Views: 42
  • CIMG2448.jpg
    CIMG2448.jpg
    66.8 KB · Views: 54
  • CIMG2446.jpg
    CIMG2446.jpg
    47.1 KB · Views: 54
  • CIMG2449.jpg
    CIMG2449.jpg
    45.9 KB · Views: 64
  • CIMG2501.JPG
    CIMG2501.JPG
    236.1 KB · Views: 85
Last edited:

yamanube

This Is The Way
Staff member
Location
Mandalor
The superjet is getting revamped a little this season too, I wanted to do somethings that where different than all the other ski builds. Maybe not the most effective mods but looking at the pile of parts makes me happy.
Last year I was running a dry pipe, ada head, solas prop, -7" pole/steering, etc. and put in some WDK Rev holds. This year I am adding:
FPP B pipe with carbon chamber
Jetinetics TL ignition
Riva Powerbomb 48 on Riva manifold
And a new engine setup TBA.
With the new pipe, new ignition and single carb I dropped 10+ pounds off of my engine assembly. Im having the prop cut back and repitched, I made a composite rideplate that I will at least try, and am reinforcing the sides of the engine compartment.
 

Attachments

  • CIMG2584.JPG
    CIMG2584.JPG
    235.4 KB · Views: 52
  • CIMG2454.jpg
    CIMG2454.jpg
    60.1 KB · Views: 75
  • CIMG2451.jpg
    CIMG2451.jpg
    91.9 KB · Views: 91
  • bpipe1.jpg
    bpipe1.jpg
    39.7 KB · Views: 116
  • CIMG1562.jpg
    CIMG1562.jpg
    119.3 KB · Views: 102

yamanube

This Is The Way
Staff member
Location
Mandalor
Shortly after grinding out the ribs on my hull I was second guessing weather or not I should even mess with reinforcing but was at the point of no return. I didnt want to add a ton of weight to my ski and not being 100% confident with my fiberglass skills I figure it would be good to start off small.
I ended up going with 8.9oz S glass, I foamed the bondline with 2 part foam, sanded it all down with 80 grit and layed out one 4" wide section, one 8" wide section and one full length section with USComposites med. epoxy resin and their white dye.
I covered my entire work bench with cling wrap and layed each piece down, poured a bead the length of the cloth then used a plastic body scraper to get the glass fully wet and force as much resin out of it before putting it in. Used the scraper again to smooth the glass and force out any air bubbles.
It turned out pretty good the only thing I wasnt happy with was that the black topdeck shows through the glass because it is so thin (and maybe I didnt use enough dye?) One side is done, doing the other in a couple minutes.
Im really hoping I did all this correctly, I did as much research as possible and did everything I could to make it stronger than it was and not add any significant weight.
 

Attachments

  • CIMG2597.JPG
    CIMG2597.JPG
    223.9 KB · Views: 78
  • CIMG2598.JPG
    CIMG2598.JPG
    215 KB · Views: 61
  • CIMG2599.JPG
    CIMG2599.JPG
    211.6 KB · Views: 57
Last edited:

McDog

Other Administrator
Staff member
Location
South Florida
Everyone will be waiting to hear if it survives you learning to barrell roll without cracking.

Someone has to have the cajones to see how little reinforcing we can get away with.

Good Luck.
 

yamanube

This Is The Way
Staff member
Location
Mandalor
Got some more work done, yesterday I finished up the other side of the SJ reinforcement. It went considerably faster than the first although the exhaust tube was kind of a PITA to work around.
Also addressed the problem areas in the bottom of the FX1 hull, it was thin in a couple spots so I layed down 2 layers of 12oz biax from the waterbox to the bulkhead along with a couple strips in the corners of the front of the hull. While they probably didn't NEED all the glass they should be good now for a while plus the extra piece of mind that its done.
I just need to clean up the bottom of the SJ hull a bit because its nasty dirty, probably lay 1-2 layers of 12oz biax under the hood lip. Reinforce the bond line on the FX and clean that up then both hulls are ready for motors.
 

Attachments

  • CIMG2601.JPG
    CIMG2601.JPG
    230.3 KB · Views: 66
  • CIMG2602.JPG
    CIMG2602.JPG
    224.4 KB · Views: 42
  • CIMG2604.JPG
    CIMG2604.JPG
    231.6 KB · Views: 77

yamanube

This Is The Way
Staff member
Location
Mandalor
Careful with that single 48 on that manifold, and full throttle runs.

Yep I've done the research, this setup is more of an experiment, all the other guys in my group are running dual 44s or 46s I wanted to do something different. I really never did full throttle runs anyways.
 

Matt_E

steals hub caps from cars
Site Supporter
Location
at peace
I said that because I had a very similar setup last year and suspect I had some trouble because of it.
 

yamanube

This Is The Way
Staff member
Location
Mandalor
I said that because I had a very similar setup last year and suspect I had some trouble because of it.

Trouble as in you did some damage or trouble as in you noticed a lean condition up top and just had to be careful with the throttle?
 

Matt_E

steals hub caps from cars
Site Supporter
Location
at peace
I could hold it wide open for a few seconds and then could feel/hear the RPMs drop.
I never let it get far enough to damage anything seriously, but there were a few grooves on the sleeves at the end of the season.
The carb was jetted appropriately, and not too lean. In fact, an identical jetting and carb was used on X cases without any problems at all.
I don't know that the manifold and the T-cases caused this, or that it was carb related at all.
Just something to watch for.
 

yamanube

This Is The Way
Staff member
Location
Mandalor
I could hold it wide open for a few seconds and then could feel/hear the RPMs drop.
I never let it get far enough to damage anything seriously, but there were a few grooves on the sleeves at the end of the season.
The carb was jetted appropriately, and not too lean. In fact, an identical jetting and carb was used on X cases without any problems at all.
I don't know that the manifold and the T-cases caused this, or that it was carb related at all.
Just something to watch for.

Thank you for the info.
 

yamanube

This Is The Way
Staff member
Location
Mandalor
The superjet hull is finally ready for a motor, I reinforced the hood lip with 2 layers of 12oz biax and the pole bracket area with 2 layers of 12oz biax. Have to do a little sanding then the stock motor and carbs are going in so I can bring it down to Surfside, TX to ride for the weekend and once I get back it will come back out and apart and the new motor will go in.
 

yamanube

This Is The Way
Staff member
Location
Mandalor
Stock motor is reinstalled with the ADA head and B pipe. I had no idea how much of a PITA installing a B pipe was. It made my dry pipe install look like a cake walk.
Here are a couple pics of my temporary setup:
 

Attachments

  • CIMG2636.JPG
    CIMG2636.JPG
    231 KB · Views: 69
  • CIMG2638.JPG
    CIMG2638.JPG
    236.5 KB · Views: 55
  • CIMG2640.JPG
    CIMG2640.JPG
    232.2 KB · Views: 91
Location
FL
Pull battery box, pull tank, install chamber first, then install headpipe, reinstall tank, reinstall battery box....done
 

yamanube

This Is The Way
Staff member
Location
Mandalor
Pull battery box, pull tank, install chamber first, then install headpipe, reinstall tank, reinstall battery box....done
Thats how I did it, but kept the battery box in. The hardest part was getting the chamber and headpipe together by myself. Relatively it wasnt to tough but definitly not easier than my Type4 dry pipe. That goes in without removing anything. It will go much faster the next time around.
 

rehak2

Here we go again!
Location
Lino Lakes,MN
Looks good Nube. You did a pretty good job on the glassing part. It looks good. Now when you get back from TX you get to tear it all apart again!! haha. ANd then comes fx1 time!! My ski will be done by then so I will be over at your place helpin you out
 

yamanube

This Is The Way
Staff member
Location
Mandalor
Yes, updates are long past due. I have the bottom of the FX1 painted as soon as I flip it over I can start to install everything and get the motor ready for the superjet.
Superjet will have a 790cc 86mm 62T motor with big bore sleeves, wiseco pistons, ported cylinders and cases, ADA girdled head, OEM fiber reeds, Riva single manifold and Powerbomb 48, carbon fiber B pipe and jetinetics TL ignition.
Thanks to Ben (24-7 760 superjet) who was a great seller, super patient and gave me a great deal!!
 
Top Bottom