My X2 build (pics) comments please

Well, I figured I'd start this build thread now to get some help and comments from the experts who have done most of this stuff before. Maybe this thread will help somebody else sometime.

Stuff I'm doing in no particular order:

1.750 engine with 650 electrics
2. shortened hull
3. nozzle/steering throw mod
4. Push-rod Up trim
5. Waterbox mod
6. bilge pump install
7. dual cooling
8. ?


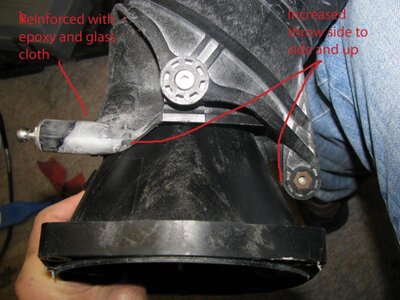
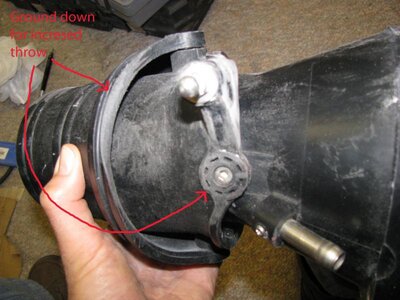
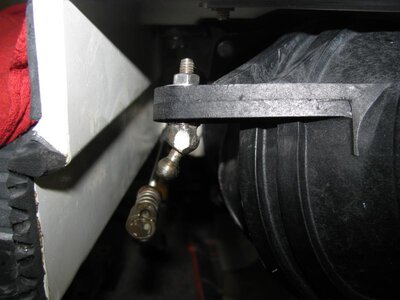
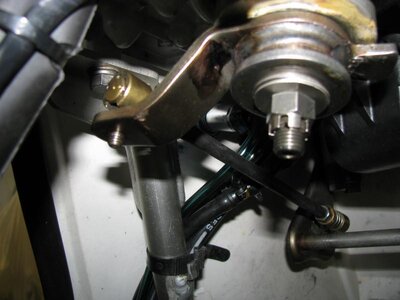
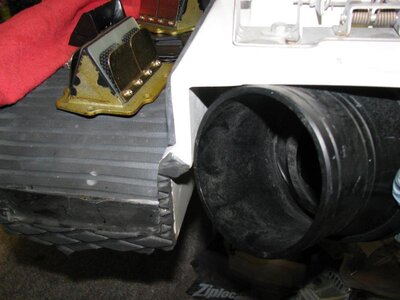
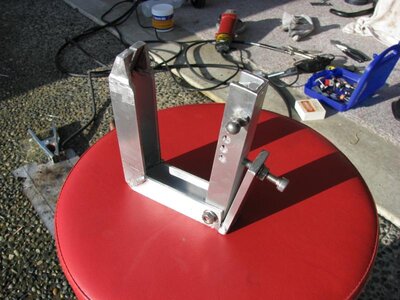
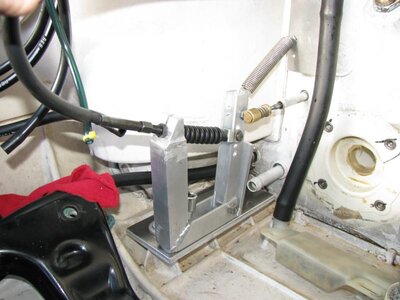
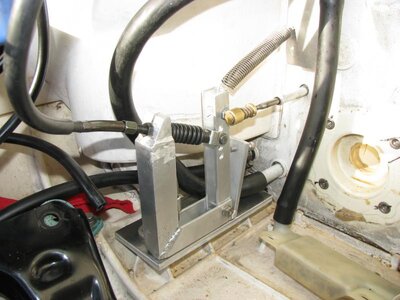
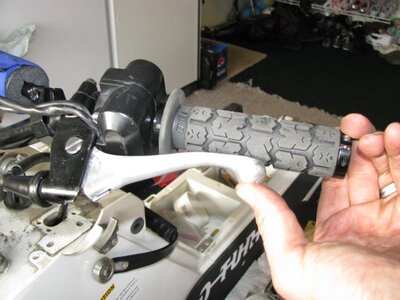
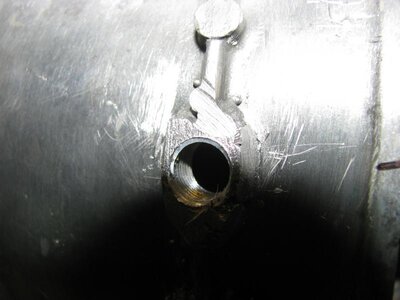
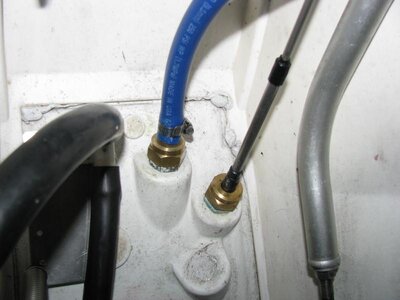
3. First, here's a couple pics of the steering actuator and nozzle. The nozzle was ground down to increase throw side to side and upwards. I heated and straightened the steering actuator arm to get the max throw where the nozzle would just touch the shortened hull each way with full up trim. There wasn't much straightening required with my location of the squirrel cage balls. I also needed to weld the ball for the nozzle onto a bolt at an angle no that the brass coupler wouldn't bind while steering at max up trim. The pics of the nozzle are still with the stock ball. Also, the trim nozzle section is flipped 180° for the push-rod trim mod.
 

Attachments

  • 2008-11-21 13-40-23 - IMG_2410.jpg
    2008-11-21 13-40-23 - IMG_2410.jpg
    76 KB · Views: 45
  • 2008-11-21 13-39-23 - IMG_2407.jpg
    2008-11-21 13-39-23 - IMG_2407.jpg
    63.8 KB · Views: 44
  • 2008-11-30 18-15-04 - IMG_2425.jpg
    2008-11-30 18-15-04 - IMG_2425.jpg
    52 KB · Views: 41
  • 2008-11-30 18-15-29 - IMG_2426.jpg
    2008-11-30 18-15-29 - IMG_2426.jpg
    46.6 KB · Views: 61
  • 2008-11-30 18-16-43 - IMG_2427.jpg
    2008-11-30 18-16-43 - IMG_2427.jpg
    52.7 KB · Views: 44

WFO Speedracer

A lifetime ban is like a lifetime warranty !
Location
Alabama
In pic #4 on the steering arm you can put it in a press and straighten it some,that makes it longer and in effect a quick steer,it still clears everything but makes the turn ratio quicker.
 
In pic #4 on the steering arm you can put it in a press and straighten it some,that makes it longer and in effect a quick steer,it still clears everything but makes the turn ratio quicker.

I did straighten it out a bit, which increased throw till the nozzle would just touch the side of the hull. If I straighten it out any more, I think I'll get too much travel and the nozzle will hit before the steering stop does. My balls (steering balls) have been welded onto the squirrel cage too and I don't think they are in the stock location. I'm at max nozzle throw right now as the UMI stops hit.

looks good

check the x2 build sticky


Yea, lots of good info there.
I have more pics, etc to post and an idea that I haven't seen on any of those builds. Maybe this will be linked.
 
Last edited:

madscientist

chilling with these guys.
Location
good old p'cola
the balls on the later models were welded/secured in a different location than earlier models and the stering rod is shorter. i'm running the early style rod (reinforced) on the later cage
 

WFO Speedracer

A lifetime ban is like a lifetime warranty !
Location
Alabama
I don't even want to get into the crazy a$$ setup I am running,lets just say that wiothout my steering setup it won't work.
 
Lever operated push-rod trim

This is my trim set up. It uses a SS push-rod from the inverted nozzle through the factory return cooling tube to a custom actuator operated by a motorcycle cable and lever. There is an adjustable stop, adjustable travel/leverage ratio, adjustable rod length and cable length. I'm still waiting for a couple rubber boots on order to seal the push-rod tube. Works super smooth.
 

Attachments

  • 2008-12-07 13-23-52 - IMG_2437 (2).jpg
    2008-12-07 13-23-52 - IMG_2437 (2).jpg
    69.7 KB · Views: 48
  • 2008-12-07 14-00-29 - IMG_2440 (2).jpg
    2008-12-07 14-00-29 - IMG_2440 (2).jpg
    58.8 KB · Views: 47
  • 2008-12-07 14-05-45 - IMG_2442 (2).jpg
    2008-12-07 14-05-45 - IMG_2442 (2).jpg
    61.8 KB · Views: 58
  • 2008-12-07 19-42-48 - IMG_2446.jpg
    2008-12-07 19-42-48 - IMG_2446.jpg
    41.8 KB · Views: 46
  • 2008-12-07 14-48-24 - IMG_2443 (2).jpg
    2008-12-07 14-48-24 - IMG_2443 (2).jpg
    59.5 KB · Views: 48
7. Dual Cooling

Here's a couple pics of dual cooling using a second cooling tube through the stock trim cable tube. All fittings drilled out to max size. Pump welded to tap more threads for second fitting.
 

Attachments

  • 2008-12-15 15-39-52 - IMG_2448.jpg
    2008-12-15 15-39-52 - IMG_2448.jpg
    46.1 KB · Views: 37
  • 2008-12-23 10-32-21 - IMG_2473.jpg
    2008-12-23 10-32-21 - IMG_2473.jpg
    33.8 KB · Views: 40
  • 2008-12-23 11-32-50 - IMG_2484.jpg
    2008-12-23 11-32-50 - IMG_2484.jpg
    48.4 KB · Views: 45
  • 2008-12-23 11-33-11 - IMG_2485.jpg
    2008-12-23 11-33-11 - IMG_2485.jpg
    46 KB · Views: 43
Last edited:
Top Bottom