Laser Cut Fiberglass Reinforcement Fabric or Template

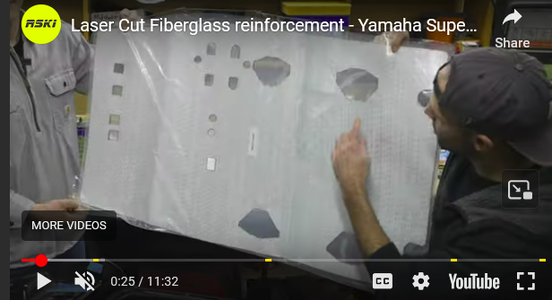
RSKI riders has a surf ski super jet fiberglass reinforcement video which shows a laser cut chopped strand and S-glass kit for to reinforce a super jet hull.

Does anyone know where I could get something like that?

Or does anyone have a template which I could lay over my fabric to cut out the holes and cut the side triangles to form the necessary curves?

Yes, I know I can do it myself, I have chopped strand mat and X-mat (and S-glass), but I would love it if the fabric was pre-cut with the holes and the curves already cut in.

Check it out:
1754688116337.png


@RSKI

Response from RSKI riders:

Hey Timothy!

Unfortunately we don’t have access to the machines we used to make those kits anymore. We had aspirations of bringing them to the market to make reinforcement kits but we haven’t been able to follow through on that yet.
I wish I had the something more to give you beyond the YouTube video but right now that’s all I have.

Thank you for watching and supporting RSKI.

Best,
Stu
RSKI RIDERS
 
Last edited:
Thanks BK, I looked on their youtube channel, went to their website and saw nothing.
Plus under the video they only link the bulk fabric not the pre-cut fabric.

I also went to Jared's JetSkiAddict youtube channel and he does not mention it.

Anyone know how to get a hold of Jared?
 
Last edited:
Location
dfw
You probably never break the bottom but the sides are very weak. Are you going to try barrel rolls? If so then add material to the sides. If not leave it stock, it won’t break.
 
I was given a 1990 SN SJ bare hull with stock pole and hood.

Since the hull is bare, I would like to reinforce it now for the surf. I would like to have a ski which I am not afraid to break.

But with that attitude, I had better reinforce it now . . .
 
Last edited:
Location
dfw
Square nose upper decks are weak and difficult to bond. Their trays just hang from the top and almost always break around the edge. Adding material around the edge usually won’t stay bonded. The best way to repair one is to cut the floor out, refoam, and bond in a new tray attached to the bottom. Doing this also allows you to also make it wider and use either slots or whatever foot hold you want.
 
and bond in a new tray attached to the bottom.

I don't understand this part of your post. Would you mind explaining a little more?

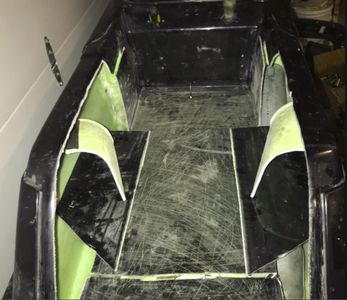
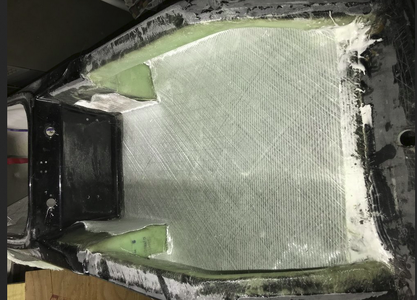
When reinforcing the tray, I assume that reinforcement material must be bent up the bulkhead on the tray side and also somehow bent up the sides near the bulkhead on the tray side.

I will also look for photos and videos on youtube.

1754750475798.png
1754750764763.png

 
Last edited:

WFO Speedracer

A lifetime ban is like a lifetime warranty !
Location
Alabama


Check out the thread below for links to threads about reinforcement :

 
Last edited:
Location
dfw
The sharp edge between the floor and side is a terrible design. It would be 10X less likely to crack if it was a larger radius.
 
@kevbo Is this what you are thinking at the tray floor to tray walls to increase radius? I can wet out the S-glass, place the glass balloon/putty mixture in the corners, lay the S-glass on top, then use maybe a 3/4" PVC pipe to pressure the corner to create the radius?

an angle grinder /w a sanding wheel will take about 5 minutes to grind all the ribs down... then fill in the bond line /w epoxy resin and glass bubbles /w about 5% fumed silica...

@WFO Speedracer Your links are golden. Thank you!
Reading about grind the ribs out or not to grind out the ribs now.
I have all the tools from my welding (err my weld grinding) hobby to get this job done . . .
 
Last edited:
Location
dfw
Increasing the radius is better but the real problem is nothing sticks to to the deck material very well.
 

WFO Speedracer

A lifetime ban is like a lifetime warranty !
Location
Alabama
Epoxy sticks just fine if you give it some tooth to stick to, when I make repairs I grind into it deeply and quite purposefully put deep gouges into the material , sanding with whatever grit doesn't cut it unless we are talking about 40 grit floor sanding paper.

The other key to a sucessful bonding or repair is proper surface area, spread the load out as wide as you can , think of it like welding, you vee out the material generously , make multiple passes and put the material back in , almost the exact same principles you use to make a strong repair when welding apply to FRP -SMC- Metton repairs , it needs to be ground , vee'd out and it needs to be spotlessly clean so the epoxy can stick to it.

I was taught to blow the area off with an air nozzle , this gets all the dust that settles into small voids and pinholes out , then follow that up with Acetone or lacquer thinner and a rag to wipe off the surface before applying epoxy .
 
Speaking of Vee's. Maybe this was why the hull was abandoned.

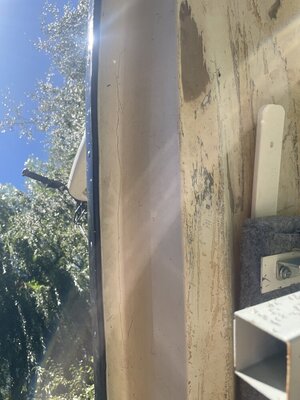
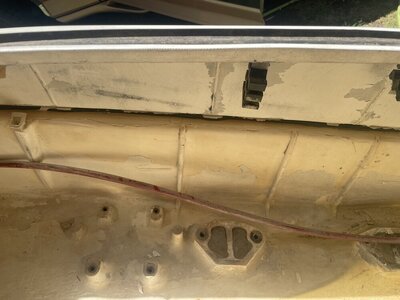
A crack in the bottom hull which goes to the inside of the hull near the port side bond line:

IMG_3074.jpgIMG_3076.jpg

I would assume that the correct fix would be to Vee the entire crack on both sides; drill a series of ~1/8" holes ~1 1/4" center-to-center along the entire length of the crack, push chop strand fiberglass saturated with epoxy resin into the holes and lay a 2" strip of seam tape over the crack on the outside of the hull and another over the crack on the inside of the hull?

Any other suggestions?

Or do you guys and gals think this hull is toast?
 
Last edited:

WFO Speedracer

A lifetime ban is like a lifetime warranty !
Location
Alabama
Yeah skip the chopped mat , it's crap and is not designed to be used with epoxy resin , it's designed for use with polyester resin which has styrene in it, the stryene partially breaks down the mat and lets it lay down , do not use it with epoxy use Biax cloth .

I find it easier to start by putting in small pieces of cloth in strips , these get wider and wider as I go , If it's really deep and I want it to build up the area faster I mix in cabosil and use that as the resin , I tend to overfill the area slightly then grind it back down flush and start the fairing procedure with epoxy and microballoons filler.

One more trick I use is Surfboard cloth , if you use it on the last layer you can get it to lay down much smoother and it doesn't trap air bubbles nearly as bad as regular fiberglass cloth does. .
 
Last edited:
Speaking of Vee's. Maybe this was why the hull was abandoned.

A crack in the bottom hull which goes to the inside of the hull near the port side bond line:

View attachment 457719View attachment 457720

I would assume that the correct fix would be to Vee the entire crack on both sides; drill a series of ~1/8" holes ~1 1/4" center-to-center along the entire length of the crack, push chop strand fiberglass saturated with epoxy resin into the holes and lay a 2" strip of seam tape over the crack on the outside of the hull and another over the crack on the inside of the hull?

Any other suggestions?

Or do you guys and gals think this hull is toast?
My superfreak had a crack like that in almost the same exact spot on both sides. The crack was actually just in the gelcoat and in a spot that had a few pinhole ls in the resin below the gel. I sanded down to the bare glass and added a few layers of 8oz cloth and a little fairing filler to smooth it out.
 
Top Bottom