The other Alex
(Jetdude)
- Location
- Lake St. Clair--
:Banane01: :woot:
Alright, I started on my footholds a few weeks ago, and this week I headed over to Aaron's (GainerA2582) house and we started his, so here's are progress and pics.
I know there are a ton of threads on footholds, but there has got to be a ton of people out there waiting to install some, and I know every foothold thread is read so you can gather up. So here's for you.
Before I start I want to say that everyone has their own way of doing things, and their own opinions on what works better. I did things the way that was easiest for me and game me the most confidence, even if it meant a little extra work. So please, feel free to ask any questions, but keep any smart ass comments to yourself if you don't like the way I did it. :smile:
(Oh, and you think Luke used a lot of rivets...)
Here’s my list of materials so far:
Dremel tool or disc grinder
Hammer (This is nice to dig out foam with.)
Flathead
Drill
Drill bit
Screws
Rivets (Make sure you have the proper reach, I have to see what I was using)
5200
Rubber gloves
Long sleeved shirt
Mask
The foam will make you itch like crazy, we both wore rubber gloves the whole time working. And I wear long sleeves and pants so foam and dust don’t itch my skin. Also it’s a good idea to wear a mask when cutting and grinding. I did when I did mine, but forgot to when we cut Aaron’s, and my asthma is irritated today along with a nice thick cough. Ew.
Ok first off, I ordered some Watercraft Factory footholds. I thought I ordered the new style, but after much contemplation and comparison to Aaron's new style WCF's, I decided that they are the old style. I don't really care, footholds are footholds to me and I got them at a good price. With that said the quality of mine weren’t the best, they were very warped and kind of oddly shaped, and they didn’t sit flush with the ski really. Still I don’t care, I made it work. Plus, I’m going to be fiber glassing over it anyways. And also, before you make any comments about the amount of rivets I used, I used that many so that my footholds would stay down firmly and flush with the ski!
So to start, I had a template out of cardboard for the foothold that I traced onto the ski, then I cut out on the inside of the lines with a dremel tool and a few similar tools to clean up the edges.
Then I went at the foam and just started digging it out chunks at a time until the foothold fit firmly into the hole. I found that digging the foam out was easiest with the forked side of a hammer, and a flat head for small areas and to break it loose. Once I had the hole dug out, I screwed the footholds in to fit them, and see how they would go. I drilled some pilot holes with a drill bit then screwed in self tapping wood screws so that nothing would break or stress crack.
After I had the footholds screwed in, I took out the screws and pulled out the foothold. Then around the edges of the hole I put a bead of 5200. I then screwed the holds back into the original holes they were screwed into before. I chose to use rivets so even through the fiberglass and 5200, the holds would always be anchored in. Plus, I have this awesome hydraulic riveter that is easy as cake so it was no big deal to me. I screwed the footholds in first, because they wouldn’t sit flush and needed the screws to be positioned right against the ski. So then I backed out one screw at a time, and inserted a rivet into the existing hole. This system worked very nice for me and was easier, since the holds didn’t want to sit nicely. Yes, I used an excessive amount of rivets, but like I said, the hold wouldn’t sit nice against the ski without that many rivets holding it down.
After that I put a bead of 5200 around the edge of the foothold to fill in some gaps. This isn’t really necessary, and it looks kind of messy, but it gave me some piece of mind. Especially at the top of the hold where I had to cut to get them to fit.
For Aaron’s ski, we did the same thing. Cut, dig, drill. He has the new style WCF, which are VERY nice and very good quality. They are sturdy, and fit flush to the ski. This made it a hell of a lot easier for the install.
I went over there yesterday to work on it with him, since I fitted mine before and had more confidence, and the knowledge that helps make it go smoother, and the tips and tricks and little un necessary stuff you figure out as you do it the first time.
First we cut the holes. Then dug out the foam. The footholds fit perfect, and were easy to fit. The only thing we did different with Aaron’s ski was he remembered to drill the hole on top of the rail to pour foam BEFORE he had the hold secured. Then we drilled and screwed. The holds fit VERY nicely and look pretty sharp. Im going back later this week and we’ll 5200 and rivet them, and possibly pour some foam.
Left to do:
I still have to fiberglass mine in, and pour foam in. Then new Hydro Turf. I think I am going to wait on the Hydro Turf for now because I might paint my boat.
Aaron has to 5200, rivet, fiberglass, pour foam, and turf yet.
Here are some pictures—
Here is a picture of my old style WCF’s fitted, and then Aaron’s new style WCFs.
New style

Old style

For a 90 square, the foam was nice and dry. Which I wasn’t really worried about in the first place since it has never been cut into. As was Aaron’s foam, again, not surprising since his is an ’01 and never been cut into.
Al’s square-

Aaron’s round-

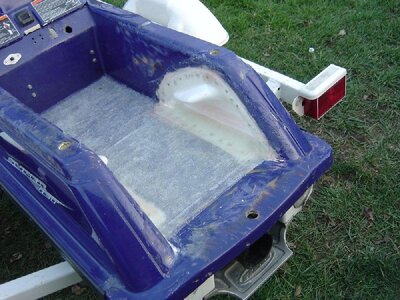
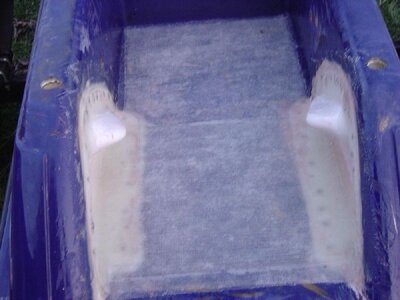
Cut and fitted. The white ones are Aaron’s new WCFs, the black ones are my old style WCFs.

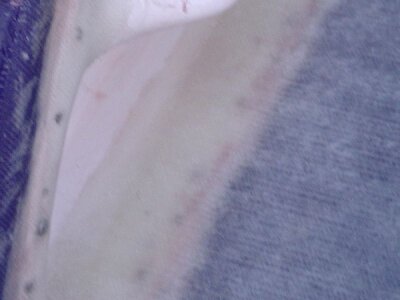
These are mine after they were 5200d. Not the cleanest looking, but I’ll be glassing over it anyways so I don’t care.

And last for now are some random pictures while working in the garage, and after the holds were fitted.
I like doing footholds because they are messy.
Here’s Aaron checking out his holes.

And here’s Aaron trying them out after they are fitted for the first time!

And of course I had to get in on the action…

That’s all I’ve got for now. One of us will update later this week as we 5200 Aarons holds, pour foam in both of our skis, and do the ‘glassin.
If anyone has any questions or would like more detail, I’ll be glad to explain more. Again, this is my first time doing holds, and this was my way of doing it and is what worked easiest for me. I know there are short cuts and some of the things I did may not be totally necessary, but it gave me more confidence which is all I care about.
Feel free to add anything Aaron!
Alright, I started on my footholds a few weeks ago, and this week I headed over to Aaron's (GainerA2582) house and we started his, so here's are progress and pics.
I know there are a ton of threads on footholds, but there has got to be a ton of people out there waiting to install some, and I know every foothold thread is read so you can gather up. So here's for you.
Before I start I want to say that everyone has their own way of doing things, and their own opinions on what works better. I did things the way that was easiest for me and game me the most confidence, even if it meant a little extra work. So please, feel free to ask any questions, but keep any smart ass comments to yourself if you don't like the way I did it. :smile:
(Oh, and you think Luke used a lot of rivets...)
Here’s my list of materials so far:
Dremel tool or disc grinder
Hammer (This is nice to dig out foam with.)
Flathead
Drill
Drill bit
Screws
Rivets (Make sure you have the proper reach, I have to see what I was using)
5200
Rubber gloves
Long sleeved shirt
Mask
The foam will make you itch like crazy, we both wore rubber gloves the whole time working. And I wear long sleeves and pants so foam and dust don’t itch my skin. Also it’s a good idea to wear a mask when cutting and grinding. I did when I did mine, but forgot to when we cut Aaron’s, and my asthma is irritated today along with a nice thick cough. Ew.
Ok first off, I ordered some Watercraft Factory footholds. I thought I ordered the new style, but after much contemplation and comparison to Aaron's new style WCF's, I decided that they are the old style. I don't really care, footholds are footholds to me and I got them at a good price. With that said the quality of mine weren’t the best, they were very warped and kind of oddly shaped, and they didn’t sit flush with the ski really. Still I don’t care, I made it work. Plus, I’m going to be fiber glassing over it anyways. And also, before you make any comments about the amount of rivets I used, I used that many so that my footholds would stay down firmly and flush with the ski!
So to start, I had a template out of cardboard for the foothold that I traced onto the ski, then I cut out on the inside of the lines with a dremel tool and a few similar tools to clean up the edges.
Then I went at the foam and just started digging it out chunks at a time until the foothold fit firmly into the hole. I found that digging the foam out was easiest with the forked side of a hammer, and a flat head for small areas and to break it loose. Once I had the hole dug out, I screwed the footholds in to fit them, and see how they would go. I drilled some pilot holes with a drill bit then screwed in self tapping wood screws so that nothing would break or stress crack.
After I had the footholds screwed in, I took out the screws and pulled out the foothold. Then around the edges of the hole I put a bead of 5200. I then screwed the holds back into the original holes they were screwed into before. I chose to use rivets so even through the fiberglass and 5200, the holds would always be anchored in. Plus, I have this awesome hydraulic riveter that is easy as cake so it was no big deal to me. I screwed the footholds in first, because they wouldn’t sit flush and needed the screws to be positioned right against the ski. So then I backed out one screw at a time, and inserted a rivet into the existing hole. This system worked very nice for me and was easier, since the holds didn’t want to sit nicely. Yes, I used an excessive amount of rivets, but like I said, the hold wouldn’t sit nice against the ski without that many rivets holding it down.
After that I put a bead of 5200 around the edge of the foothold to fill in some gaps. This isn’t really necessary, and it looks kind of messy, but it gave me some piece of mind. Especially at the top of the hold where I had to cut to get them to fit.
For Aaron’s ski, we did the same thing. Cut, dig, drill. He has the new style WCF, which are VERY nice and very good quality. They are sturdy, and fit flush to the ski. This made it a hell of a lot easier for the install.
I went over there yesterday to work on it with him, since I fitted mine before and had more confidence, and the knowledge that helps make it go smoother, and the tips and tricks and little un necessary stuff you figure out as you do it the first time.
First we cut the holes. Then dug out the foam. The footholds fit perfect, and were easy to fit. The only thing we did different with Aaron’s ski was he remembered to drill the hole on top of the rail to pour foam BEFORE he had the hold secured. Then we drilled and screwed. The holds fit VERY nicely and look pretty sharp. Im going back later this week and we’ll 5200 and rivet them, and possibly pour some foam.
Left to do:
I still have to fiberglass mine in, and pour foam in. Then new Hydro Turf. I think I am going to wait on the Hydro Turf for now because I might paint my boat.
Aaron has to 5200, rivet, fiberglass, pour foam, and turf yet.
Here are some pictures—
Here is a picture of my old style WCF’s fitted, and then Aaron’s new style WCFs.
New style
Old style
For a 90 square, the foam was nice and dry. Which I wasn’t really worried about in the first place since it has never been cut into. As was Aaron’s foam, again, not surprising since his is an ’01 and never been cut into.
Al’s square-
Aaron’s round-
Cut and fitted. The white ones are Aaron’s new WCFs, the black ones are my old style WCFs.
These are mine after they were 5200d. Not the cleanest looking, but I’ll be glassing over it anyways so I don’t care.
And last for now are some random pictures while working in the garage, and after the holds were fitted.
I like doing footholds because they are messy.
Here’s Aaron checking out his holes.
And here’s Aaron trying them out after they are fitted for the first time!
And of course I had to get in on the action…
That’s all I’ve got for now. One of us will update later this week as we 5200 Aarons holds, pour foam in both of our skis, and do the ‘glassin.
If anyone has any questions or would like more detail, I’ll be glad to explain more. Again, this is my first time doing holds, and this was my way of doing it and is what worked easiest for me. I know there are short cuts and some of the things I did may not be totally necessary, but it gave me more confidence which is all I care about.
Feel free to add anything Aaron!