I finally got a superjet!

Okay... With Matt_E's help, I ported my stock cylinder, replaced the rusty old outer bearings, removed the choke plate and plumbed the carb for a primer (I made more work for myself by getting a KEIHIN primer kit:banghead:) and assembled my engine. I also got reinforcing done on one side, but my camera broke so pics will have to wait.
 

Matt_E

steals hub caps from cars
Site Supporter
Location
at peace
Good to hear! Hey, when did you come by yesterday? I was home all day, I must have been on the couch sleeping.

All I know is I found my dremel stuff in the garage. :haha:

How'd you like my work stand for the square hull?
 
I came by about 7, I could hear your kids inside but no one came to the door so I figured you were napping. After doing one side on my ski today I decided I want to redo the foam on the other side, so I'm gonna have to get mine back from you sometime. Your work stand for the square looks great, I'm gonna have to figure out something like that for doing my handlepole mount reinforcing. Should be easy 'cause I have a couple exra skis too.:cool:
 
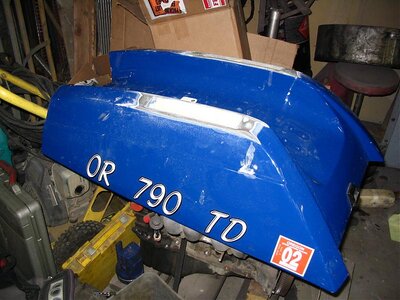
I'm pretty much done reinforcing now, I did the nose like Mike Serlin's and totally screwed up the handle pole bracket reinfocement.... I also got my hood liner removed. It only took about 20 minutes with a heat gun, air chisel, and my ridiculously strong upper body.:haha: I promise to get some pics by this weekend (of the ski, not my torso)
 
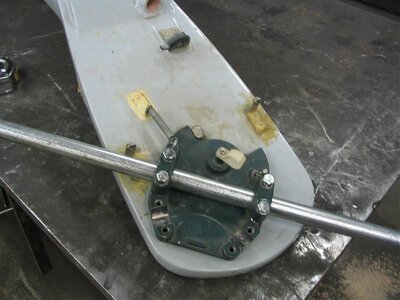
Here's some pics. I drilled & tapped new holes on my steering plate so I can run straight bars. At the end of the bars they are about 4" further forward than the 4* bars that the ski came with. I had to cut a couple chunks out of the handlepole pad to allow full steering movement.
 

Attachments

  • IMG_0236.jpg
    IMG_0236.jpg
    53.8 KB · Views: 63
  • IMG_0237.jpg
    IMG_0237.jpg
    83.3 KB · Views: 55
  • IMG_0238.jpg
    IMG_0238.jpg
    78.6 KB · Views: 47
  • IMG_0239.jpg
    IMG_0239.jpg
    56.1 KB · Views: 70

Matt_E

steals hub caps from cars
Site Supporter
Location
at peace
Hey! I think I need you to do that for me...if it ain't too time consuming!

Be aware that you might run into issues with the start/stop switch assembly hitting the pole.
 
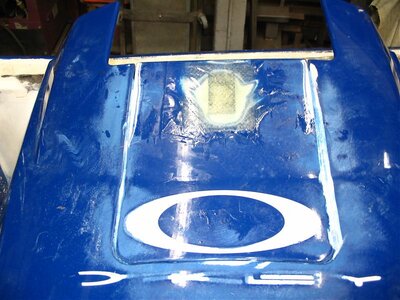
Glassed over vents, fuel fill hole, and fuel fill door latch hole. Using tape to compress and hold down the cloth worked great:biggthumpup:
I only wish I would have discovered it sooner:17:
 

Attachments

  • IMG_0244.jpg
    IMG_0244.jpg
    75.3 KB · Views: 46
  • IMG_0249.jpg
    IMG_0249.jpg
    79.7 KB · Views: 40
  • IMG_0247.jpg
    IMG_0247.jpg
    78.7 KB · Views: 36
  • IMG_0243.jpg
    IMG_0243.jpg
    80.1 KB · Views: 36

Snackem

Danger Zone
Location
Colfax WA
Nice progress. Keep up the good work. I can't wait to ride that thing this spring. I may even let you take a trip on a new 750 powered X2:biggthumpup: :biggthumpup: :biggthumpup:
 
I did my internal fuel fill mod and smoothed out the bottom till it was "good enough". I just used fiberglass resin jelly, and sealed up the tank with Yamabond 5
 

Attachments

  • IMG_0250.jpg
    IMG_0250.jpg
    44.3 KB · Views: 60
  • IMG_0251.jpg
    IMG_0251.jpg
    47.3 KB · Views: 45
  • IMG_0252_2.jpg
    IMG_0252_2.jpg
    43.1 KB · Views: 32
I cut the tray sides because I didn't have enough work to do already.
This is the color I decided to paint it too. Wonder which project it's left over from???
 

Attachments

  • IMG_0255.jpg
    IMG_0255.jpg
    85.4 KB · Views: 76
  • IMG_0254.jpg
    IMG_0254.jpg
    88.7 KB · Views: 44
  • IMG_0253.jpg
    IMG_0253.jpg
    92.6 KB · Views: 54
Top Bottom