Another SN build. South Africa

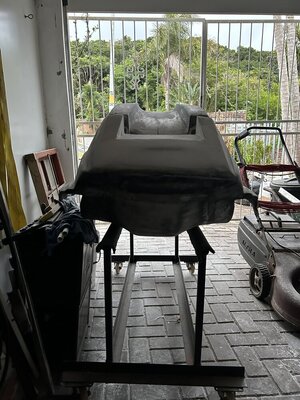
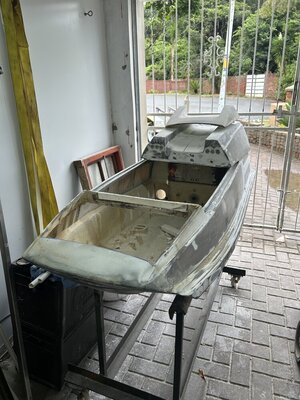
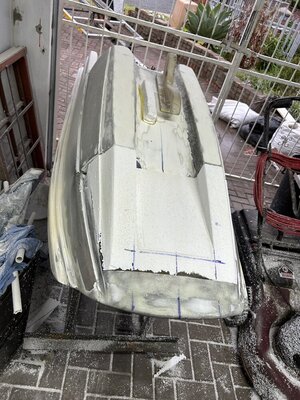
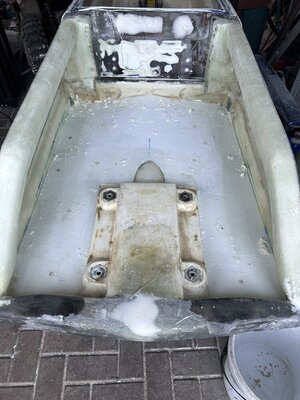
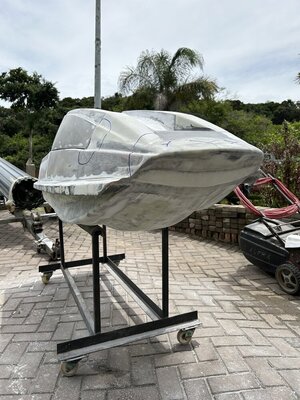
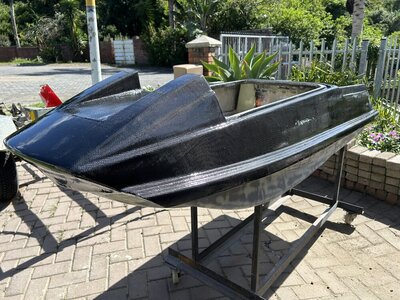
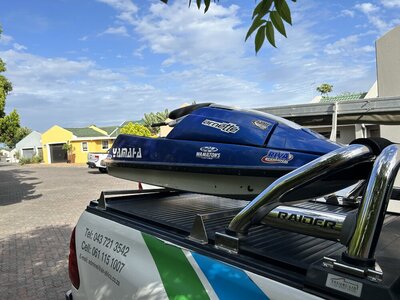
I’ve ridden a blaster 1 for almost 8years, and build it up along the way to what I imagined as my dream ski. My brother and a couple mates have all moved onto Superjets, leaving me feeling a little out. This last December holiday I spent a day on the couch watching YouTube - free ride videos, ended up calling my brother and asking if I can collect the Square nose hull that had been lying in he’s garden for the last two years. I have rockered a blaster one hull and my brothers RN Superjet in the past, so had a pretty good idea of what I wanted to do to the square nose. In South Africa the sport/ hobby is really small with only a hand full of guys free riding / surf riding in each city. Our currency exchange rate is not great making after market hulls, motors and parts almost unobtainable for an average working individual.

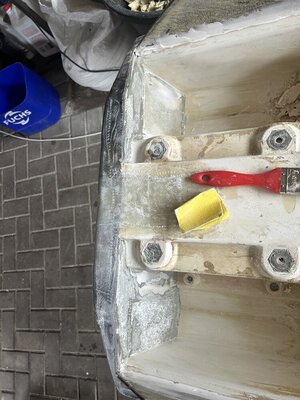
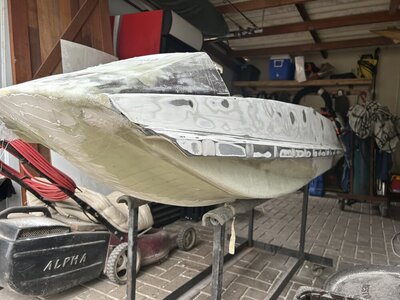
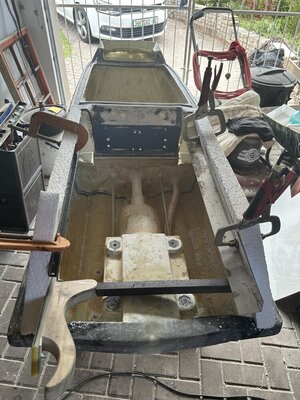
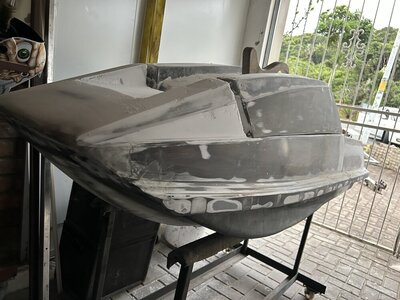
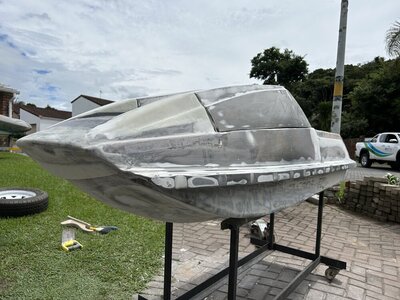
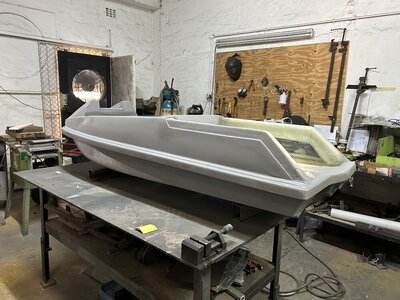
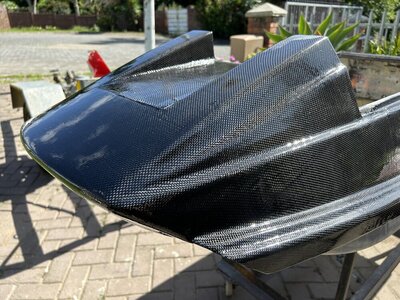
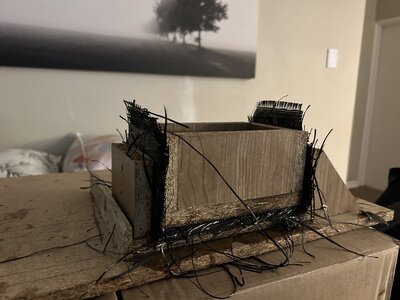
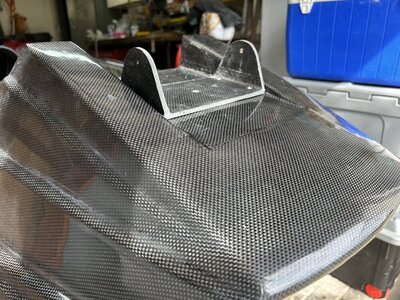
Here’s how the build started,
 

Attachments

  • 10126D62-59E4-4DC0-9FCF-0734D80308C3.jpeg
    10126D62-59E4-4DC0-9FCF-0734D80308C3.jpeg
    189 KB · Views: 98
  • 9AA83393-D203-403F-B6CB-1C7542E2072E.jpeg
    9AA83393-D203-403F-B6CB-1C7542E2072E.jpeg
    182.9 KB · Views: 69
  • 8202CF43-28DC-4840-BCE7-862A7FE3521E.jpeg
    8202CF43-28DC-4840-BCE7-862A7FE3521E.jpeg
    189.2 KB · Views: 56
  • 3AFF692B-2394-4B33-927F-B042D9E4F31F.jpeg
    3AFF692B-2394-4B33-927F-B042D9E4F31F.jpeg
    207.1 KB · Views: 55
  • 5ACEA0A3-3306-416B-92C6-9F5171AF27B8.jpeg
    5ACEA0A3-3306-416B-92C6-9F5171AF27B8.jpeg
    154.8 KB · Views: 57
To date I have glassed up the outside of the rockered nose, glassed the back it the ski, resined in foam on the tray to shape the sides of the tray, cotton flocked all the cooling lines and drive line piping in place. Reinforced the inside of the hull. I have also shaped my own sponsons about 45mm wide on each side of the hull, I can’t find anything online where someone has gone that wide, so it’s a bit of gamble to how it’s going to handle. Worst case after riding for the first time I’ll have to flip the ski over and shave them down and re glass and paint the hull again. But after looking at a lot of the AM hulls my general hull shape is not that far off.

Any advice, tips or pointers Would be appreciated.
 

Attachments

  • 021B2848-8031-4644-A4BB-66EC88530A46.jpeg
    021B2848-8031-4644-A4BB-66EC88530A46.jpeg
    164 KB · Views: 43
  • 972A5B52-DCA0-48C1-892B-82F5088EF343.jpeg
    972A5B52-DCA0-48C1-892B-82F5088EF343.jpeg
    199.2 KB · Views: 46
  • 35DD8A5B-B336-42E2-A0C8-C3423D459AC8.jpeg
    35DD8A5B-B336-42E2-A0C8-C3423D459AC8.jpeg
    181.1 KB · Views: 47
  • 834E8E3D-CC96-484D-968A-B20CEA8A8DE0.jpeg
    834E8E3D-CC96-484D-968A-B20CEA8A8DE0.jpeg
    162.4 KB · Views: 44
  • F8E325C4-3DCF-408B-8503-380C9172D4E6.jpeg
    F8E325C4-3DCF-408B-8503-380C9172D4E6.jpeg
    144.8 KB · Views: 43
  • 0F7E8041-F480-4D0A-8939-5B6840AB268D.jpeg
    0F7E8041-F480-4D0A-8939-5B6840AB268D.jpeg
    132.8 KB · Views: 45
  • 389178B5-8729-43E0-9B55-43994B84A198.jpeg
    389178B5-8729-43E0-9B55-43994B84A198.jpeg
    139 KB · Views: 48
  • 1C0366AD-DDD5-4CDD-ACD6-8BD634BBA313.jpeg
    1C0366AD-DDD5-4CDD-ACD6-8BD634BBA313.jpeg
    195.8 KB · Views: 60
I had glassed onto the existing profile on the top deck and did my best to fill with micro balloons. But I was still far off the profile and want as little filler as possible, so I made the call to cut it it all off. Started again with a block of foam and shaped it so that there was minimal gap between the hood and the nose section. Already glassed it in, plant to lay up some more glass today before I remove the foam.
 

Attachments

  • 8BDA1886-9A7B-4AD3-9ED2-F259A21ED1D6.jpeg
    8BDA1886-9A7B-4AD3-9ED2-F259A21ED1D6.jpeg
    145.8 KB · Views: 38
  • 777FEE30-DB09-4429-A024-1B53BCA12EED.jpeg
    777FEE30-DB09-4429-A024-1B53BCA12EED.jpeg
    192.4 KB · Views: 39
  • FCAA619D-4505-436F-B250-6E49311C8079.jpeg
    FCAA619D-4505-436F-B250-6E49311C8079.jpeg
    185.3 KB · Views: 41
  • 04836B0A-13DC-494B-9B99-2C1745CFD166.jpeg
    04836B0A-13DC-494B-9B99-2C1745CFD166.jpeg
    190.6 KB · Views: 40
  • 158E3385-6183-4390-B920-8D2391D05C96.jpeg
    158E3385-6183-4390-B920-8D2391D05C96.jpeg
    207.5 KB · Views: 41
  • DB203391-6160-4632-BC75-DEDEAA146CB3.jpeg
    DB203391-6160-4632-BC75-DEDEAA146CB3.jpeg
    220.6 KB · Views: 43
Got the exhaust in, tray foam filled. Busy drawing up the pole brackets.
 

Attachments

  • 953F818A-A150-4AA4-AB0E-506AFBD8E1AA.jpeg
    953F818A-A150-4AA4-AB0E-506AFBD8E1AA.jpeg
    162 KB · Views: 42
  • 6D23F0DA-F08F-447D-92A2-0DAA297D95B9.jpeg
    6D23F0DA-F08F-447D-92A2-0DAA297D95B9.jpeg
    194.4 KB · Views: 39
  • 6796A42C-0220-46BB-BD77-A10775F818F6.jpeg
    6796A42C-0220-46BB-BD77-A10775F818F6.jpeg
    176.1 KB · Views: 37
  • 8293415E-2C4C-4D0A-AF24-EC34C486CA34.jpeg
    8293415E-2C4C-4D0A-AF24-EC34C486CA34.jpeg
    188.5 KB · Views: 38
Glassed in a small deflector on the nose and been filling in and flattening some high spots. So over sanding with coarse paper, my fingerprints are none existent at the moment! But almost ready for primer.
 

Attachments

  • 6FBFF337-FC24-435C-9732-EDA168B2C358.jpeg
    6FBFF337-FC24-435C-9732-EDA168B2C358.jpeg
    186.6 KB · Views: 38
  • C8658162-B435-41CB-92DC-D6C6100386C5.jpeg
    C8658162-B435-41CB-92DC-D6C6100386C5.jpeg
    163.7 KB · Views: 36
  • 2CCE4769-06BD-4B61-833F-3B9E3CACDFA1.jpeg
    2CCE4769-06BD-4B61-833F-3B9E3CACDFA1.jpeg
    215.7 KB · Views: 37
  • F0806470-CDF9-48A6-9699-98A72DD1CBFF.jpeg
    F0806470-CDF9-48A6-9699-98A72DD1CBFF.jpeg
    210.5 KB · Views: 36
  • 03BD3642-7FCC-4DF3-BC56-DBB32651E96C.jpeg
    03BD3642-7FCC-4DF3-BC56-DBB32651E96C.jpeg
    158.5 KB · Views: 40
Managed to get some primer down. Showed all the small imperfections. We get filling and flattening this week.
 

Attachments

  • 4B18BF73-7F9C-45E5-952B-0D55CFB5D705.jpeg
    4B18BF73-7F9C-45E5-952B-0D55CFB5D705.jpeg
    174.3 KB · Views: 37
  • 02CBD725-0C42-482E-B2E1-CB67FDE82B63.jpeg
    02CBD725-0C42-482E-B2E1-CB67FDE82B63.jpeg
    161.3 KB · Views: 37
  • 31631E82-2B07-432C-AC1E-CB251A143002.jpeg
    31631E82-2B07-432C-AC1E-CB251A143002.jpeg
    165.2 KB · Views: 46
Planes have changed slightly. Decided to flatten the primer and lay up some carbon.
 

Attachments

  • 10E84C62-740B-472D-B1FD-753625F92708.jpeg
    10E84C62-740B-472D-B1FD-753625F92708.jpeg
    216.8 KB · Views: 42
Been coating with resin as often as possible, the silver flake in the resin is looking sick in the light. The pictures don’t do it justice. There’s a video on Instagram @freeride_africa
 

Attachments

  • F15908CD-9490-4498-BB58-E541723CC148.jpeg
    F15908CD-9490-4498-BB58-E541723CC148.jpeg
    236.1 KB · Views: 30
  • FF1FE498-CD86-4DDE-8435-244E77AED8F5.jpeg
    FF1FE498-CD86-4DDE-8435-244E77AED8F5.jpeg
    242.4 KB · Views: 39
  • 6BF9EE65-3E6A-4BE7-97F2-E347DB055270.jpeg
    6BF9EE65-3E6A-4BE7-97F2-E347DB055270.jpeg
    236.1 KB · Views: 31
  • 0C8E89F0-7316-4E5F-809C-DFD3DEFFB7F0.jpeg
    0C8E89F0-7316-4E5F-809C-DFD3DEFFB7F0.jpeg
    247.8 KB · Views: 32
  • CD0A558B-ACCE-4330-B59D-5A993C3F5843.jpeg
    CD0A558B-ACCE-4330-B59D-5A993C3F5843.jpeg
    247.8 KB · Views: 31
Last edited:
Well DAMN! You sure didn't waste any time! I'm just now getting my wife's SN together after several years.
Haha my wife has forgotten what I look like! We have a free ride event coming up in june and the goal is to have a rideable ski for the event, pressure is on! Keen to see your wife’s ski build
 
Got some paint on the hull, few little imperfections to sort out today before spraying again. Put together a little list of todo’s and parts needed
 

Attachments

  • 5C59A5E2-B12F-467F-BD88-0C6A2954B212.jpeg
    5C59A5E2-B12F-467F-BD88-0C6A2954B212.jpeg
    161 KB · Views: 24
  • FDBDE051-A657-4558-9678-1E51A7D1AEE2.jpeg
    FDBDE051-A657-4558-9678-1E51A7D1AEE2.jpeg
    151.8 KB · Views: 25
  • 3026B628-2115-4400-8A87-BEC187B26E15.jpeg
    3026B628-2115-4400-8A87-BEC187B26E15.jpeg
    167.8 KB · Views: 26
My brother drew up a pole bracket and clamps for me and printed, was able to test the pole bracket heights with. Even tho we lowered it 20mm than the stock pole bracket, it looked ridiculous. Dane took a bit long with the reprint of the lower pole bracket, so I ended up making a press/mould and made a carbon bracket.. it must have about 15 layers of matting, seems pretty strong.
 

Attachments

  • 5ABF86B7-2F4A-4FAE-8038-6055D3A64621.jpeg
    5ABF86B7-2F4A-4FAE-8038-6055D3A64621.jpeg
    161.8 KB · Views: 20
  • 5A5CD2AD-4F82-420B-AB61-02382C43E3D7.jpeg
    5A5CD2AD-4F82-420B-AB61-02382C43E3D7.jpeg
    165.2 KB · Views: 18
  • 30FF5068-DADA-4C14-89D2-E2138E88BF16.jpeg
    30FF5068-DADA-4C14-89D2-E2138E88BF16.jpeg
    114.1 KB · Views: 19
  • 002D67F3-247B-408E-B40B-DCC691C96D72.jpeg
    002D67F3-247B-408E-B40B-DCC691C96D72.jpeg
    222.9 KB · Views: 18

smoofers

Rockin' the SQUARE!!!!
Site Supporter
Location
Granbury, TX
The nose on your ski is the best looking rockered SN I've seen to date. excellent job! Can't wait to see the next update!
 
Top Bottom