Blaster freestyle seat build

LBE

Eddie Would Go.
Location
Charlotte, NC
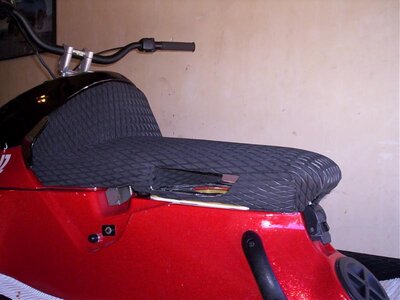
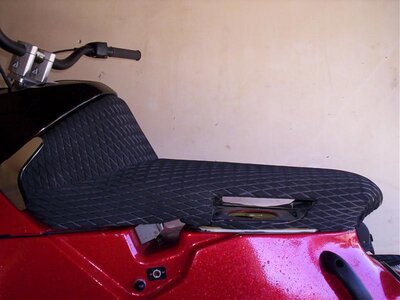
So I wanted a seat that was lower than stock and shorter as well. Most of the Osiders that are on B1's are running seats with the hump shaved down and shotened in the rear. After ridding w/o a seat one day (for tuning purposes) I realized how encumbersom the stock seat can be. SO here is the build.
I must first say that I used a seat that I had put handholds in already, so the seat box had the hand hold cut outs. I recomend against the hand holds in the seat box, weakens the box too much.

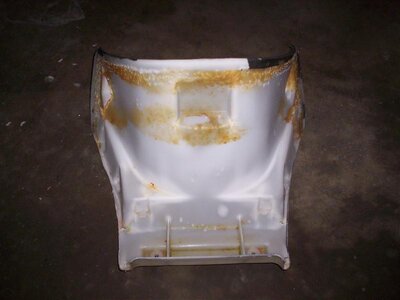
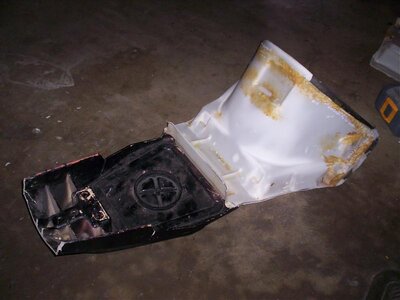
With the seat cover removed and all the foam removed from the base, separate the seat box and seat base. For purposes of this discussion I will refer to the seat base as the white plastic piece.
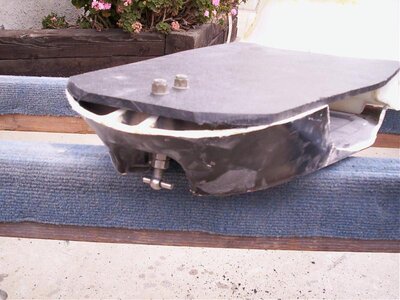
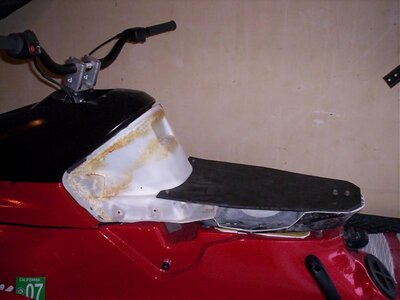
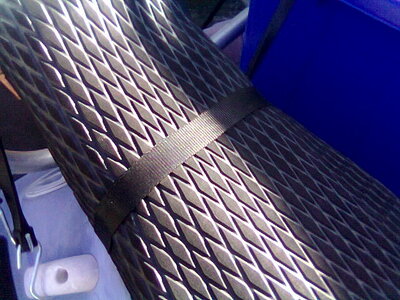
Pic 1-3:
Cut the seat base almost completely off from at the first "rise" section. On mine, I also trimmed the bottom where the plastic moulding on the seat would have bolted to, but you can leave that. (On mine it exposes the lower front seat brackets when installed.)
When cutting the seat base, make sure that the lip sticking up is as high as the small flat part toward the front. (Also See pic 5)

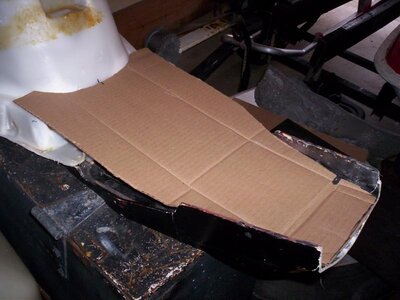
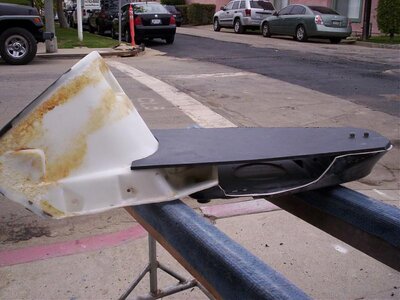
Pic 4: With the base cut you can use the stock front 2 bolts to mount the base to the box. Yous may look a little different, my seat box was cut before for the hand holds, thust the notched looking sides.
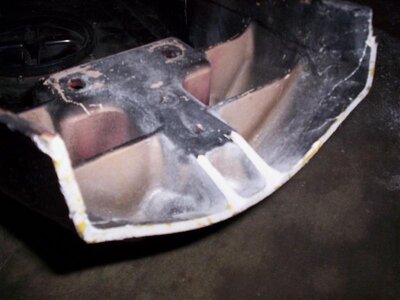
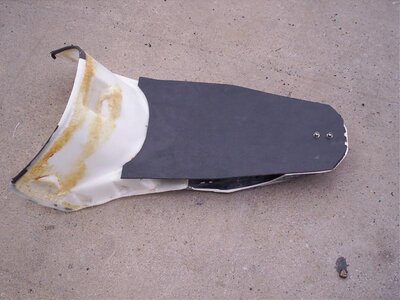
Pic 5:

A view from the rear, you are actuallly looking at the lip on the seat base from the rear. Mabey easier to see why later on. My seat box was already cut short in this pic, but we will get to that in a min.
 

Attachments

  • 100_7914.jpg
    100_7914.jpg
    38.1 KB · Views: 348
  • 100_7915.jpg
    100_7915.jpg
    41.3 KB · Views: 328
  • 100_7916.jpg
    100_7916.jpg
    47.5 KB · Views: 482
  • 100_7918.jpg
    100_7918.jpg
    39.6 KB · Views: 381
  • 100_7913.jpg
    100_7913.jpg
    44.1 KB · Views: 403

LBE

Eddie Would Go.
Location
Charlotte, NC
Pic 1-3:
The lowest I could make the seat was only as low as the topside of the seat bracket mount (pic 4). So using a saws-all I cut the seat base "level" with the plateau where the seat bracket mounts. Looking at how the cardboard, you can see the "high spots to cut.

I made a template out of cardboard to get the shape for the new seat base. Here is where you can see why we left the up lip on the seat base piece. It will add support and a finished look later on.
 

Attachments

  • 100_7923.jpg
    100_7923.jpg
    56.4 KB · Views: 354
  • 100_7922.jpg
    100_7922.jpg
    35.8 KB · Views: 300
  • 100_7921.jpg
    100_7921.jpg
    53.7 KB · Views: 314
  • 100_7919.jpg
    100_7919.jpg
    45.3 KB · Views: 364

LBE

Eddie Would Go.
Location
Charlotte, NC
I went to a local shop here that makes all types of plastic stuff. I'll see if I can find a link to post.
I bought a small rectangular sheet of 1/4 in med density abs. I think it was $12.
I cut the plastic to match the cardboard template using the sawz-all and a grinder for fine trimming. I set it on my seat box/base piece to fit and trim.
With the plastic sitting on the seat box/base you can see if the lip on the base is the right height.
Pic 3: OOPS, I cut a little low in the rear, nothing some turf won't cover up later.
Drilled 2 holes in the rear of the plastic where the seat bracket mounts, and mounted the new plastic pice. and then drilled 2 holes in the front corners to hold the front. Mount the rear first, then put the seat on the ski and mark the front holes. The reason is: the original base is flimsy, the new plastic piece will be the backbone. But the original base can be positioned so the front hooks grab better.
(Hope that makes sense)
 

Attachments

  • 100_7949.jpg
    100_7949.jpg
    74.4 KB · Views: 392
  • 100_7952.jpg
    100_7952.jpg
    42 KB · Views: 562
  • 100_7950.jpg
    100_7950.jpg
    48.3 KB · Views: 334
  • 100_7947.jpg
    100_7947.jpg
    70.5 KB · Views: 411
  • 100_7946.jpg
    100_7946.jpg
    68.5 KB · Views: 394

LBE

Eddie Would Go.
Location
Charlotte, NC
So thats pretty much it for the mew seat. Cover and padding are up to you.
I used 1 thin layer of turf for the front part (wrap) portion of the seat. I then used 2 layesr of the thick HT on the plastic. Sanded the edges with 60 grit (the thick HT is verry easy to shape) to get the shape I wanted.

I covered mine in HT, obviously. I don't sit, nor do I intend to sit much on this seat. I wraped the seat and continued the turff over the seat box.

Time to test it out!!

Pic 5:
The stocker looks huge

Not that weight is a huge issue, but this seat is light!! and it won't absorb water like the stock foam!
 

Attachments

  • 100_1102.jpg
    100_1102.jpg
    48.5 KB · Views: 684
  • 100_1100.jpg
    100_1100.jpg
    56.6 KB · Views: 839
  • 100_1101.jpg
    100_1101.jpg
    61.8 KB · Views: 616
  • 100_1103.jpg
    100_1103.jpg
    51.6 KB · Views: 760
  • 100_1104.jpg
    100_1104.jpg
    47.4 KB · Views: 574

LBE

Eddie Would Go.
Location
Charlotte, NC
A few more notes:

Boarding with a shorter seat is sssooo much easier!

If my seat box was not already cut, I would not have done the handholds. This seat is low, and I don't see them as usefull for tricks. I'm gonna put a strap on the seat for Heart attack type tricks.

I made a lot of cuts! I cut a little at a time so I wouldn't have to make any repairs. This thread should help you avoid that. That said, I should not have cut the front lower portion off. I don't like that you can see through the ski by the front lower brackets.


Start cuttin!!!
 

Big Kahuna

Administrator
Location
Tuscaloosa, AL
my only question is I thought on the B1's that when you went to roll, you had your feet locked in and you were actually using the seat as leverage when you went into the rotation...............
 
im down with the lowered seat! i like how you integrated the front of the stock seat. I wanted to try something like that but it seemed like alotta work. this is what i came up with. im going to turf the back of the hood and the area in front of the seat to tie it all in.
 

Attachments

  • seatback.jpg
    seatback.jpg
    46.5 KB · Views: 434
  • seatup.jpg
    seatup.jpg
    60.2 KB · Views: 485
  • sideview.jpg
    sideview.jpg
    50.1 KB · Views: 644
  • straptop.jpg
    straptop.jpg
    73.9 KB · Views: 395

LBE

Eddie Would Go.
Location
Charlotte, NC
I have been working on this seat quite a while, mostly in my head I guess. Without any major fabrication this is as low as I can get it. I juess if I used less padding I could go lower, but I'm really pleased with it.
Overall cost is minimal, and I think it still looks good.

To answer you question Kahuna; When I roll the Blaster, I roll it thae same as a super jet. As long as the feet are locked in, I don't need the seat for leverage.
 
Nice work! Looks very functional to me. Stock seats get very heavy when they are water logged.

Did you notice if the boat handled any different?... You should do some other mods to save some weight... I think you would like what you end up with!
 

LBE

Eddie Would Go.
Location
Charlotte, NC
Nice work! Looks very functional to me. Stock seats get very heavy when they are water logged.

Did you notice if the boat handled any different?... You should do some other mods to save some weight... I think you would like what you end up with!

The ski feels light to me. I'm a surf ridder so weight is not as big of a concern, Strength is. The 760 makes it feel lighter!
 

cattledog

EH TEAM RACING
Location
toronto canada
great job going to do same thing i never sit on my blaster i ride it a lot without seat, but it is dangerous with all the sharp objects and seat pins i think the blaster would be even better without seat and seat hump a better x2
 

Prem1x

Tinkering obsessed
Location
Austin, TX
I was going to give you props on this in Pismo. Very original thinking. I liked yours and I think Derricks, who had another Hydroturf-padded seat but he could reach into the side and grab a tow rope out and stuff. That was cool.
 
Top Bottom