SN Tray Revamp & Exhaust Install

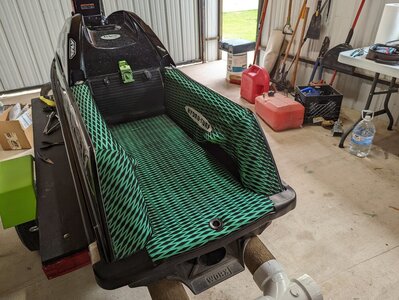
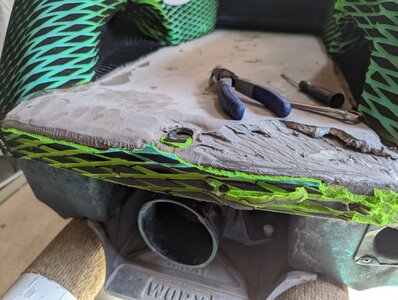
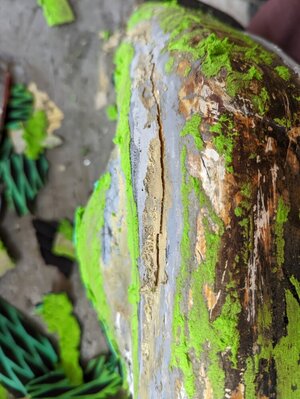
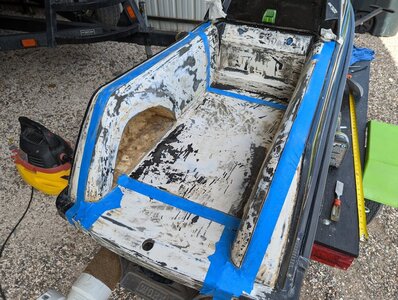
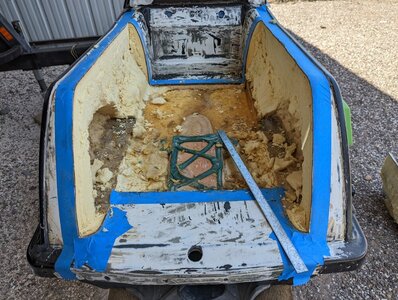
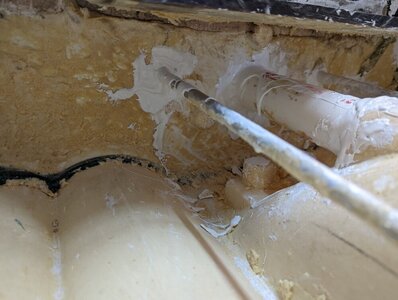
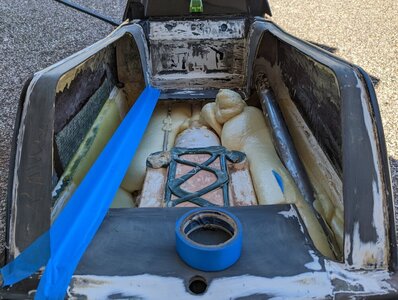
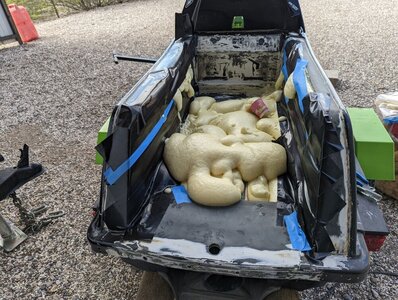
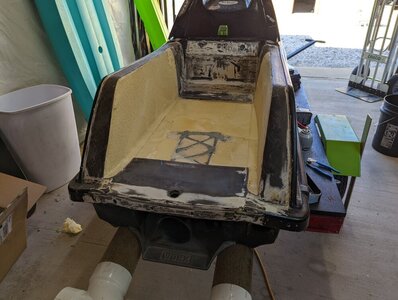
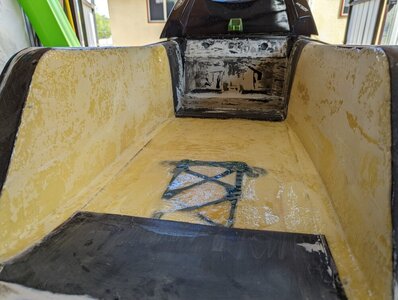
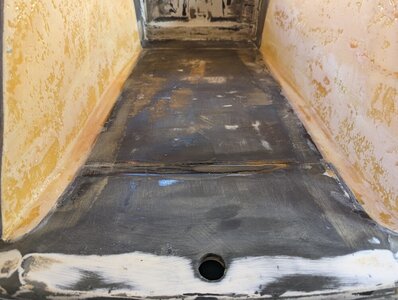
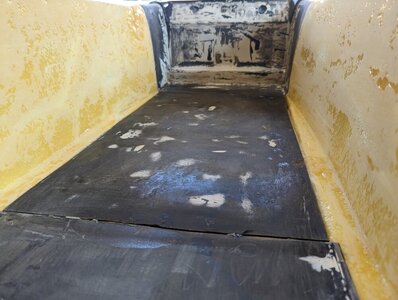
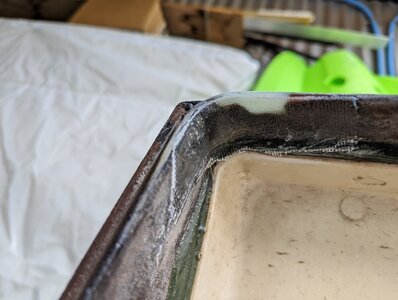
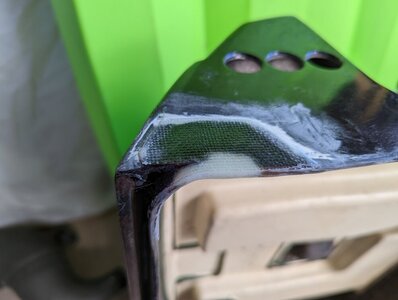
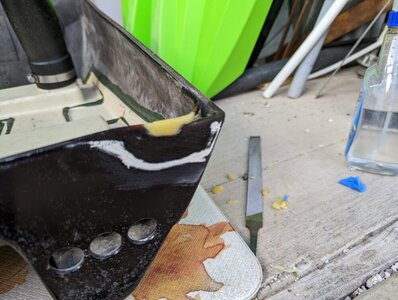
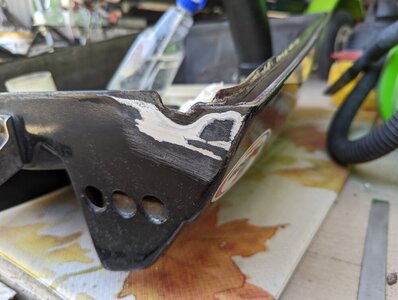
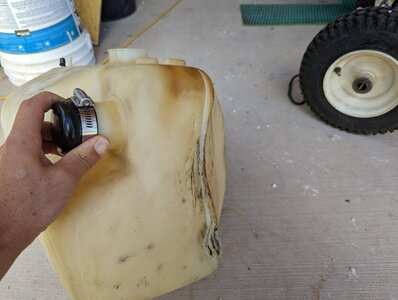
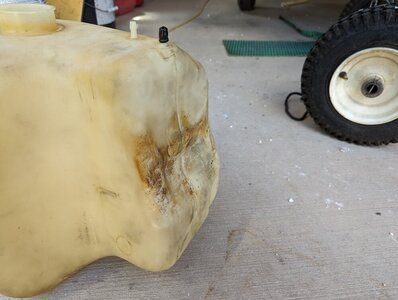
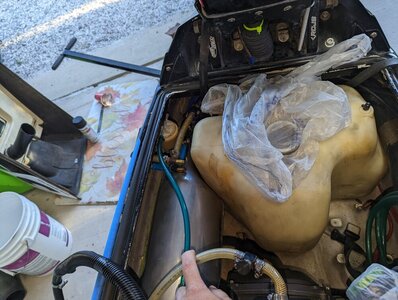
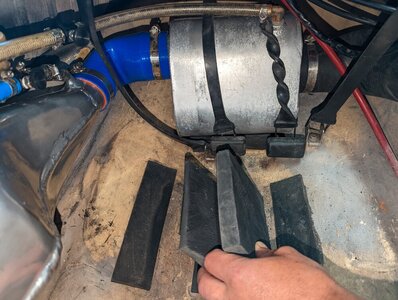
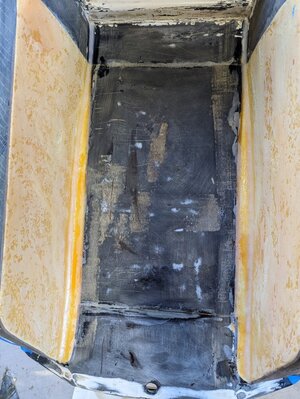
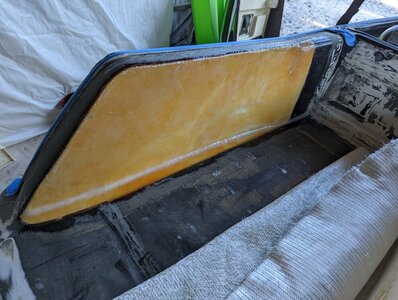
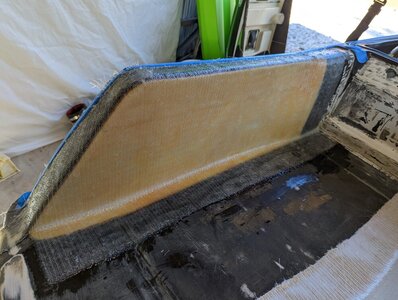
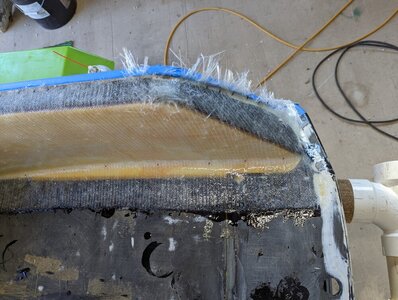
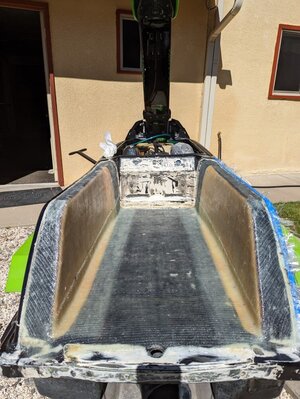
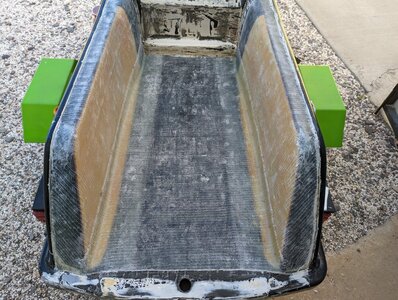
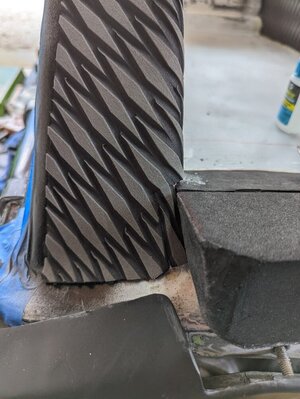
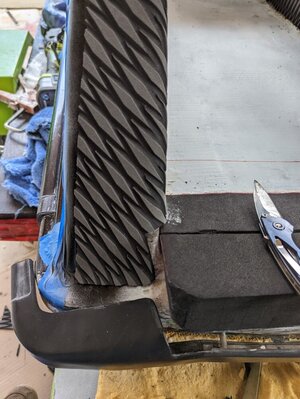
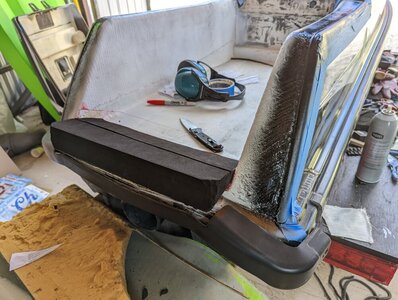
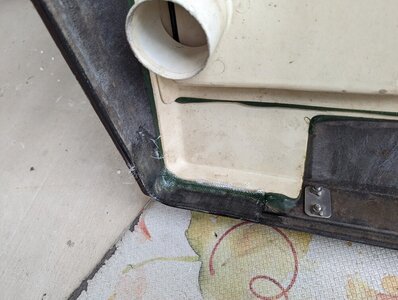
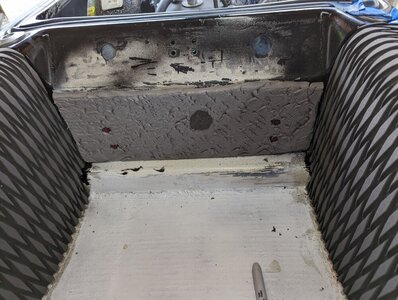
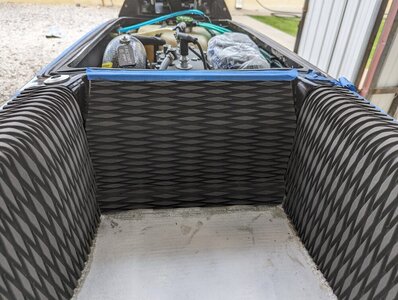
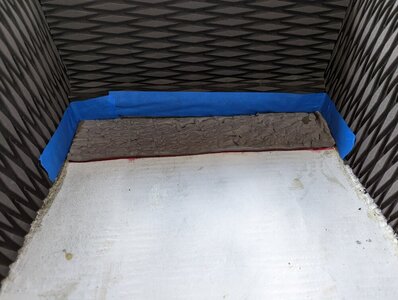
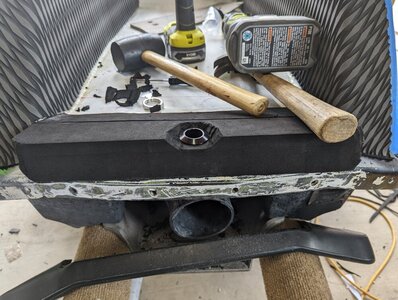
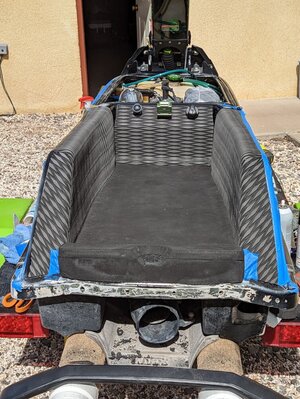
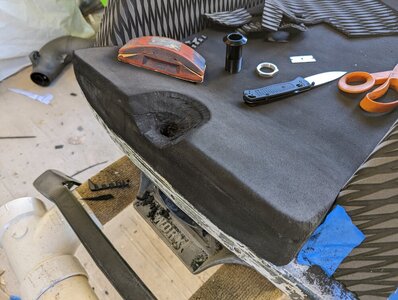
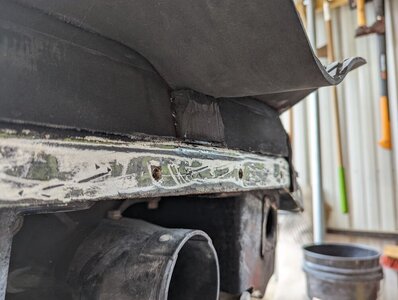
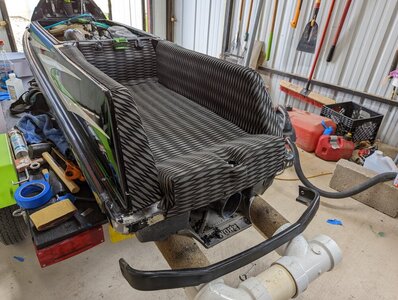
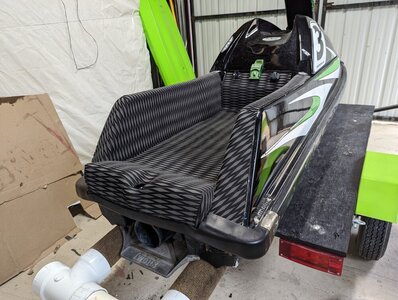
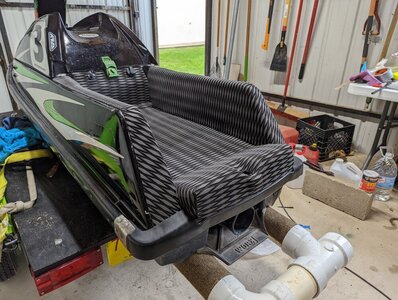
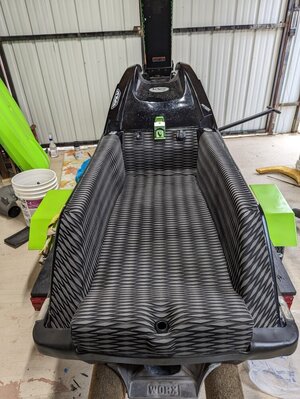
I broke my Pro-Tec exhaust mounts in July and was told that late October would be the earliest I could expect to get a Factory B Pipe. My SN had a pretty decent list on the exhaust corner when just floating in the water (wish I had taken a photo) and it had a good case of porpoising so I decided to redo my tray while I waited for the B pipe. This project was started at the end of July and has been a great experience. The funny part about the revamp is that I was made aware that my pipe would be shipping from blowsion the day I started cutting into my tray! I figured now wold be a good time to post some of my progress before I finish glassing in the tray. Thanks to all who have posted before me and provided insights into defoaming a superjet. Hopefully this helps someone out in the future.
 

Attachments

  • PXL_20220803_150319555.jpg
    PXL_20220803_150319555.jpg
    199 KB · Views: 55
I suspected my foam was soaked based on how the ski floated in the water and found some early confirmations of my suspicions. the footholds were barely held in with epoxy and the fiberglass work could have been better. The foam below the footholds was was confirmed to be wet.
 

Attachments

  • PXL_20220803_160541424.jpg
    PXL_20220803_160541424.jpg
    155.2 KB · Views: 44
  • PXL_20220803_170645408.jpg
    PXL_20220803_170645408.jpg
    220.4 KB · Views: 33
  • PXL_20220803_164928425.jpg
    PXL_20220803_164928425.jpg
    156.4 KB · Views: 34
  • PXL_20220803_164934639.jpg
    PXL_20220803_164934639.jpg
    190.2 KB · Views: 36
I wanted to widen the tray a bit without removing too much flotation so this is how I chose to cut the tray. I don't have any interest in footholds so I decided to get rid of them. I may put in a footstrap in at a later date but for now I'm happy to just get a bit more width since riding buoys is best for this ski. There was a puddle of water sitting on top of the foam seam after pulling the tray bottom. About 65% of the foam below this point was not actually water logged. I was expecting it to be totally soaked but it was not. This defoam may or may not help the porpoising due to the added weight of the epoxy and fiberglass.
 

Attachments

  • PXL_20220805_165059363.jpg
    PXL_20220805_165059363.jpg
    244.7 KB · Views: 36
  • PXL_20220805_174338194.jpg
    PXL_20220805_174338194.jpg
    221.6 KB · Views: 37
Defoamed and 5200'd. The temperatures were not kind to me and my 5200 was a nasty mess to work with. Both of the coolant line seals were leaking along with the exhaust seal. Some of the green glue appeared to be allowing water to get through below the exhaust inlet so I 5200'd those spots along with the gunwales.
 

Attachments

  • PXL_20220826_182734648.jpg
    PXL_20220826_182734648.jpg
    159.8 KB · Views: 36
  • PXL_20220826_182745456.jpg
    PXL_20220826_182745456.jpg
    110.9 KB · Views: 38
I used 4lb foam in the bottom for strength since the 2lb foam is pretty weak. All the local foam board products i found were very weak so I decided to use 4lb on the bottom where it could take weight and 2lb up the side rails. The 4lb foam is quite strong and cant take some weight so I am happy with this decision. I used some gorilla tape to attempt to contain the sides when filling up the sides. It worked ok and if I had to do it again I would use the same technique but do a better job. I then shaped and sanded the foam to get my wide tray. I also made a slot in the bottom where I could reinsert my tray bottom and epoxy it down.
 

Attachments

  • PXL_20220828_171621850.jpg
    PXL_20220828_171621850.jpg
    179.5 KB · Views: 32
  • PXL_20220828_171634969.jpg
    PXL_20220828_171634969.jpg
    125.2 KB · Views: 33
  • PXL_20220828_213251962.jpg
    PXL_20220828_213251962.jpg
    237.9 KB · Views: 38
  • PXL_20220902_211611503.jpg
    PXL_20220902_211611503.jpg
    139.4 KB · Views: 36
I decided to reuse my tray bottom which is my biggest regret of the build as it lead to a few mistakes and extra weight. The tray bottom was bowing quite badly so I attempted to reform it by putting it in the sun with some weight on it for a couple weeks during the whole process. It helped a lot but was still bowing up by about 0.4" in the middle when I epoxied it in.

In the second picture here you will see what I think to be my biggest mistake. I thought I needed to seal all the foam before glassing over it so I went ahead and coated everything with epoxy. It would have been ok to do in the bottom but the sides was dumb imo. I assumed that epoxy would bind to itself but I recently read that only fresh epoxy binds in multiple layers so it was a waste of weight and epoxy. The epoxy on the sides also had to be sanded down and the low spots filled in with thickened epoxy to get a somewhat flat surface for when I go to lay glass. I believe the correct way to do it would be to wait until I am ready to glass and then coat the sides with epoxy before I glass it in.

I used ~6oz of thickened epoxy to glue the tray bottom down to the now sanded and epoxy'd foam. I should have just done this whole process in one step and mixed up 12 oz of thickened epoxy and laid the bottom over it with a bunch of weight to squeeze out the extra epoxy. I had to go back after gluing the tray and fill in the gaps all around it with some thinner epoxy. to get a nice flat bottom. This took a few mixings to get all the gaps filled and was probably an additional 6oz of epoxy. Yay more weight!

I finally got the bottom sanded flat and it should be easy to glass over when I get there but this took forever to get right. I should have just sanded the foam and glassed in a new bottom. It's extremely solid now with the help of the 4lb foam but it was a huge pain in the butt.

After reading tons of information on b pipe cooling I went ahead and tapped the second manifold hole since my ski is already set up with dual cooling lines from the old Pro-Tec exhaust.
 

Attachments

  • PXL_20220907_170658975.jpg
    PXL_20220907_170658975.jpg
    135.7 KB · Views: 36
  • PXL_20220920_172338573.jpg
    PXL_20220920_172338573.jpg
    140.5 KB · Views: 38
  • PXL_20220910_162524144.jpg
    PXL_20220910_162524144.jpg
    125.2 KB · Views: 31
  • PXL_20220909_184545903.jpg
    PXL_20220909_184545903.jpg
    145.6 KB · Views: 32
  • PXL_20220902_212000593.jpg
    PXL_20220902_212000593.jpg
    213.1 KB · Views: 34

WFO Speedracer

A lifetime ban is like a lifetime warranty !
Location
Alabama
I decided to reuse my tray bottom which is my biggest regret of the build as it lead to a few mistakes and extra weight. The tray bottom was bowing quite badly so I attempted to reform it by putting it in the sun with some weight on it for a couple weeks during the whole process. It helped a lot but was still bowing up by about 0.4" in the middle when I epoxied it in.

In the second picture here you will see what I think to be my biggest mistake. I thought I needed to seal all the foam before glassing over it so I went ahead and coated everything with epoxy. It would have been ok to do in the bottom but the sides was dumb imo. I assumed that epoxy would bind to itself but I recently read that only fresh epoxy binds in multiple layers so it was a waste of weight and epoxy. The epoxy on the sides also had to be sanded down and the low spots filled in with thickened epoxy to get a somewhat flat surface for when I go to lay glass. I believe the correct way to do it would be to wait until I am ready to glass and then coat the sides with epoxy before I glass it in.

I used ~6oz of thickened epoxy to glue the tray bottom down to the now sanded and epoxy'd foam. I should have just done this whole process in one step and mixed up 12 oz of thickened epoxy and laid the bottom over it with a bunch of weight to squeeze out the extra epoxy. I had to go back after gluing the tray and fill in the gaps all around it with some thinner epoxy. to get a nice flat bottom. This took a few mixings to get all the gaps filled and was probably an additional 6oz of epoxy. Yay more weight!

I finally got the bottom sanded flat and it should be easy to glass over when I get there but this took forever to get right. I should have just sanded the foam and glassed in a new bottom. It's extremely solid now with the help of the 4lb foam but it was a huge pain in the butt.

After reading tons of information on b pipe cooling I went ahead and tapped the second manifold hole since my ski is already set up with dual cooling lines from the old Pro-Tec exhaust.
Epoxy will stick to epoxy regardless, the only thing you have to watch out for is anime blush, which basically means yes you need to sand the epoxy before applying more epoxy, you need to do that with pretty much anything body related anyway, no biggie IMO.
 
This winter i will be doing this to my ski.
Awesome, It's a fun project. The majority of my time has been spent sanding things while I plan the next step. I wish I had gotten a dual action sander or something similar earlier on in the project. A good mask is also a staple that I regret not purchasing sooner. I started out with some cheap N95's leftover from the lockdown's but upgraded to a 3M P100 (I think) one of the ones with the real filters. You breathe better and filter more.
 
Here I had a pretty big chip in the hood that was just caulked and painted. I have no idea how it held together as long as it did. My first experience trying to glass something and it was a bear. I filled it with epoxy by creating a mold with tape and then planned to glass over the epoxy. I initially tried to wrap the 6 oz weave that I had around the corner but the air bubbles would not yield around such a tight bend and I had to rip it all off. I gave up on that plan and ended up just sandwiching 3 layers of glass on each side and it now feels very sturdy.

Passed out dog added because who doesn't like dogs.
 

Attachments

  • PXL_20220915_144127268 (Large).jpg
    PXL_20220915_144127268 (Large).jpg
    101.5 KB · Views: 27
  • PXL_20220915_144116563 (Large).jpg
    PXL_20220915_144116563 (Large).jpg
    75 KB · Views: 26
  • PXL_20220913_144612649 (Large).jpg
    PXL_20220913_144612649 (Large).jpg
    134.4 KB · Views: 32
  • PXL_20220912_160833663 (Large).jpg
    PXL_20220912_160833663 (Large).jpg
    302.4 KB · Views: 30
  • PXL_20220910_163619648 (Large).jpg
    PXL_20220910_163619648 (Large).jpg
    105.2 KB · Views: 30
Back to working on the exhaust and I had fit issues with the fuel tank and clearance with the water separator. I had to trim the support foam block to lower the exhaust chamber near the stinger. I may have to come back to this as I still may not have enough clearance and find another solution. At this point the foam support block cannot be trimmed down anymore. The elbow hose is also a bit pinched since I would ideally have a 90 degree elbow and not the stock ~60 degree elbow but i'll see how it runs with the slight restriction here. I had to use the heat gun to mold the gas tank to make room for the black exhaust outlet on the port side and dent it near to where the exhaust chamber sits. Shout out speedracer for this tip.

I still don't have enough clearance with the bottom screw cap on the water separator and exhaust chamber but I'm gonna make do with it as is for now and revisit later since I don't have a good solution. I think I'm gonna just put some heavy plastic over the end and a zip tie and keep an eye on it.
 

Attachments

  • PXL_20220919_181500427.jpg
    PXL_20220919_181500427.jpg
    95.1 KB · Views: 28
  • PXL_20220919_181439015.jpg
    PXL_20220919_181439015.jpg
    108.9 KB · Views: 26
  • PXL_20220917_134259279.jpg
    PXL_20220917_134259279.jpg
    161.2 KB · Views: 26
  • PXL_20220917_134722202.jpg
    PXL_20220917_134722202.jpg
    166.5 KB · Views: 28
I was quite nervous about glassing the tray in but it turned out ok. I started out by laying two small lines of thickened epoxy on the lower corners since I was worried about rounding the corners with the 1708 biax. I started out by laying ~4 oz of maple syrup thick epoxy on the sides and waited for it to get tacky. From here I laid up my glass and then brushed on the epoxy. I used an online epoxy calculator to measure how much epoxy I needed but I ended up needing more. I don't believe I got a good wet out on the glass as I can still see some glass lines. It just would not penetrate further. I had one decent sized air pocket on one of the rails that I couldnt get out as the 3:1 epoxy set up faster than anticipated and I was making it worse when trying to remove so I let it be. On the second gunwell I prewet the side with thickened epoxy again but this time I wet out the 1708 before laying it up and still ended up with a similar not so great wet out. Weather was in the high 70's low 80's and the epoxy set up faster then expected so in hindsight I would have gone with the US Composites 2:1. Weather was High 80's low 90's when I planned on glassing but it should be fine. Finally I laid up one layer of 1708 to cover the entire bottom.

I took alot of staring at the ski to decide what I thought was the least amount of fiberglass I would need and this is what I came up with. I would consider doing 2 layers of something lighter in the future as the 1708 didnt seem to wet out properly for me.
 

Attachments

  • PXL_20220922_145635240.jpg
    PXL_20220922_145635240.jpg
    187.3 KB · Views: 26
  • PXL_20220923_140822325.jpg
    PXL_20220923_140822325.jpg
    166.9 KB · Views: 25
  • PXL_20220923_153652468.jpg
    PXL_20220923_153652468.jpg
    158.1 KB · Views: 25
  • PXL_20220924_151426630.jpg
    PXL_20220924_151426630.jpg
    188.1 KB · Views: 27
  • PXL_20220924_151436610.jpg
    PXL_20220924_151436610.jpg
    177.3 KB · Views: 26
  • PXL_20220924_203203641.jpg
    PXL_20220924_203203641.jpg
    180.9 KB · Views: 26
  • PXL_20220924_220507405.jpg
    PXL_20220924_220507405.jpg
    248.3 KB · Views: 26
In the first picture I went ahead and laid up 3 layers of weave on the other corner of the hood because I could se some stress cracks in the paint so I figured I would just give it a little reinforcement since the other side shattered. Second pick shows my kicker install. I had originally planned on putting the kicker in line with the gunwells (red sharpie outline) to make the turf job and everything else easier. In the end I knew I wouldn't be happy with that placement because I wanted as much tray room as I could get. It took a bit to get the kicker to sit somewhat flat. I tried to cut the underside of the kicker to match the curves of the ski but ended up just gluing back the pieces I cut off and cutting a line down the middle of it so it could flex around the edge of the fiberglass and back of the ski.

It took quite awhile to get a good fit with the turf and I had to trim some excess turf on the bottoms because it stretched quite a bit when applying. I am glad I didn't tac the backs of the wells on the first stick since everything stretched. This allowed me to get a better cut on the corner and get everything to fit nicely. I also ended up with an extra gap on the corners near the kickers from a swagged cut on the hydrotrurf. I went ahead and stuck a piece in there that mostly continues the pattern.

I did not think about matching the pattern on the left vs right gunwell but ideally I would have tried to get them to have the diamonds in similar places so It looks clean. I got lucky and they are pretty similar.
 

Attachments

  • PXL_20221002_191106323.jpg
    PXL_20221002_191106323.jpg
    141.1 KB · Views: 27
  • PXL_20221002_190753970.jpg
    PXL_20221002_190753970.jpg
    151.5 KB · Views: 28
  • PXL_20221002_175238690.jpg
    PXL_20221002_175238690.jpg
    192.1 KB · Views: 28
  • PXL_20220930_193425480.jpg
    PXL_20220930_193425480.jpg
    164.1 KB · Views: 27
  • PXL_20220925_154905248.jpg
    PXL_20220925_154905248.jpg
    152.5 KB · Views: 32

smoofers

Rockin' the SQUARE!!!!
Site Supporter
Location
Granbury, TX
That's odd, some Guy on this Forum keeps telling me that any 701 Round Nose SJ Exhaust System just drops right in the 650 Square Nose :rolleyes:

But every time somebody does the conversion, they run into this fitment issue...

I remember an experienced Guy posting a video where he fumbles trying to install the Round Nose Waterbox into the 650 Square Nose. He gave up and installed a different Waterbox.

How many Hours do you have so far on the Tray Re-foam and Fiberglass?
You mean me? He isn't using a stock RN waterbox.
 
That's odd, some Guy on this Forum keeps telling me that any 701 Round Nose SJ Exhaust System just drops right in the 650 Square Nose :rolleyes:

But every time somebody does the conversion, they run into this fitment issue...

I remember an experienced Guy posting a video where he fumbles trying to install the Round Nose Waterbox into the 650 Square Nose. He gave up and installed a different Waterbox.

How many Hours do you have so far on the Tray Re-foam and Fiberglass?
I bet I'm at least 80 hours of work and many hours of research at this point . I am definitely not fast at this type of thing since I tend to overthink my projects. If I had to do it again I'm sure I could do it in half the time which is a nice positive!
 
I put a piece of the old foam back on the firewall with holes cut out to cover the bolts that stick out as this was how it was done originally. I put down a small piece of the old pad in the front so when I put the 18mm foam down it would raise the front a bit and keep a better transition to that ledge on the SN's. I would ride with my foot on it before at an awkward angle to get more leverage but now the tray will be mostly all flat.
 

Attachments

  • PXL_20221002_194303285.jpg
    PXL_20221002_194303285.jpg
    173.5 KB · Views: 25
  • PXL_20221003_173105919.jpg
    PXL_20221003_173105919.jpg
    168.2 KB · Views: 26
  • PXL_20221003_182649131.jpg
    PXL_20221003_182649131.jpg
    129.5 KB · Views: 28
I got the undermatting in and it went pretty good. I had a couple spots on the side where I could have had a little more matting. I wanted it to really fill all the gaps but overall it came out great.

More sanding.

Sanded down the matting and the kicker wedge to be flush. I had to keep cutting and sanding around the bow eye bushing to get an angle I was happy with. I wanted to not put too much stress on the turf going around the hole.

For turfing the tray I started with the back end on the top of the kicker around the eye and went forward to the firewall. It ended up getting a little cockeyed since I didn't have an easy edge to follow due to everything having curves. I was hoping the hydroturf would stretch to any gaps I had but in the end I had a small gap on the right side of the tray that only I will notice.

I wanted the turf to be a smooth transition over the eyelet but once I rounded the corner off the kicker it wanted to bunch up. I could have cut it or just left the part that bunched up but I wanted a better method. I Thought it over overnight and it hit me that I could put a little wedge in their to allow the turf to flow over the back nicely.
 

Attachments

  • PXL_20221003_152520015.jpg
    PXL_20221003_152520015.jpg
    173.4 KB · Views: 29
  • PXL_20221004_195543824.jpg
    PXL_20221004_195543824.jpg
    227.2 KB · Views: 30
  • PXL_20221004_210600179.jpg
    PXL_20221004_210600179.jpg
    164.3 KB · Views: 28
  • PXL_20221005_211127031.jpg
    PXL_20221005_211127031.jpg
    117 KB · Views: 31
  • PXL_20221005_224808499.jpg
    PXL_20221005_224808499.jpg
    202.9 KB · Views: 31
And she's done!

I was very hesitant about putting the 18mm undermatting in as I generally hate soft things but I am glad I went with it. I saw a lot of recommendations for the thicker padding and I am really glad I chose it.

I'll update with some more impressions when I get a few rides in but initial impressions are great and I'm really pleased with the kicker and the extra room in the back of the tray.
 

Attachments

  • PXL_20221007_161054025.jpg
    PXL_20221007_161054025.jpg
    174.5 KB · Views: 29
  • PXL_20221007_161107256.jpg
    PXL_20221007_161107256.jpg
    196.6 KB · Views: 27
  • PXL_20221007_161119869.jpg
    PXL_20221007_161119869.jpg
    188.6 KB · Views: 25
  • PXL_20221007_162327462.jpg
    PXL_20221007_162327462.jpg
    164.8 KB · Views: 28
And she's done!

I was very hesitant about putting the 18mm undermatting in as I generally hate soft things but I am glad I went with it. I saw a lot of recommendations for the thicker padding and I am really glad I chose it.

I'll update with some more impressions when I get a few rides in but initial impressions are great and I'm really pleased with the kicker and the extra room in the back of the tray.
What bow eye did you use with that kicker?
 
Top Bottom