- Location
- Lake Orion, MI
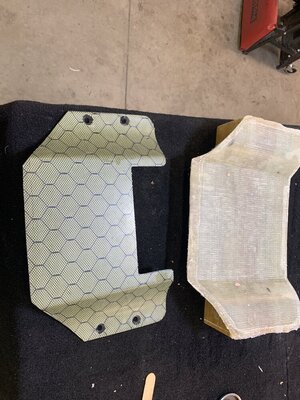
With it being the boring Michigan offseason I decided to take on a project to occupy my time and learn/experiment more with composites. Picked up a circus hull in early December and the ride plate is hideous. Plan is to make a mold and replicate in full carbon with a visual finish.
After I replicate this particular plate. Plan is to extend the plug to create a longer plate for Great Lakes / Small surf & Rec riding.
No plans of vacuum bagging or infusion currently as this is just me playing around in my garage. Maybe in the future. Anyway, enjoy the process!
Here are a few videos I watched a few times that I found helpful:
First step was to fill all the multiple holes and start the sanding/prep process. A lot of bondo, sand, bondo, sand etc to get the plug back to a mint finish.


After I got the surface somewhat close to the shape I wanted, I then picked up a cheap filler primer. 3-5 coats later....

Started to wetsand at 220 then 380 then 400 and then 800 and noticed a few blemishes. So used some cheap filler putty

Primer again and now looking good.

Another round of wet sanding 220, 380, 400, 800, 1000, 1200 trying to get a nice almost mirror like finish. Then some polish.

Plan was to throw a sticker in and see if I can imprint a logo into the mold (weird idea not sure if it would work)
From the videos I made a flange out of cheap foam board wrapped in packing tape. Braced the sides with some 2x4s. Cheap hot glue gun to stick the stuff to the plug.


Started waxing and then realized....im a jackass and did all this on the wrong side!!!!! Doh! Lesson learned
So currently working on the other side....will report back when the process continues.
After I replicate this particular plate. Plan is to extend the plug to create a longer plate for Great Lakes / Small surf & Rec riding.
No plans of vacuum bagging or infusion currently as this is just me playing around in my garage. Maybe in the future. Anyway, enjoy the process!
Here are a few videos I watched a few times that I found helpful:
First step was to fill all the multiple holes and start the sanding/prep process. A lot of bondo, sand, bondo, sand etc to get the plug back to a mint finish.
After I got the surface somewhat close to the shape I wanted, I then picked up a cheap filler primer. 3-5 coats later....
Started to wetsand at 220 then 380 then 400 and then 800 and noticed a few blemishes. So used some cheap filler putty
Primer again and now looking good.
Another round of wet sanding 220, 380, 400, 800, 1000, 1200 trying to get a nice almost mirror like finish. Then some polish.
Plan was to throw a sticker in and see if I can imprint a logo into the mold (weird idea not sure if it would work)
From the videos I made a flange out of cheap foam board wrapped in packing tape. Braced the sides with some 2x4s. Cheap hot glue gun to stick the stuff to the plug.
Started waxing and then realized....im a jackass and did all this on the wrong side!!!!! Doh! Lesson learned
So currently working on the other side....will report back when the process continues.