- Location
- Corona, CA
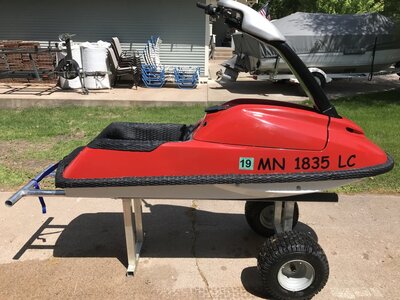
After looking around at beach carts for a while, I decided to make my own. The cheapest one I could find was a Tiger Tote for $535, plus the ~$100 oversized shipping charge that goes on top of that, you're looking at close to $650 for the cheapest beach cart I could find. Not terrible for what you get, but I still thought I could do just as good for a fraction of the cost. There are also used ones that come up from time to time, but that is pretty few and far between, and even then they still are fairly expensive (and rightfully so) and still a pain to ship.
I work as a design engineer and have access to a CAD program and my father in law is very crafty and has every tool imaginable. It was because I'm fortunate enough to have access to all the right tools that I decided to tackle this. I wasn't looking to reinvent the wheel, just make something that functions well for what I need it to do and do it at a lower cost than what I could purchase outright.
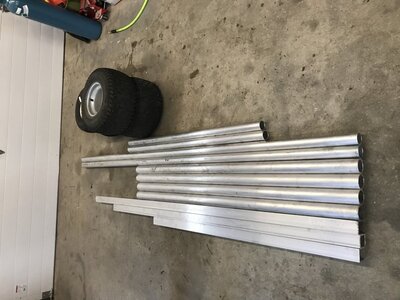
I started by researching existing carts and getting a feel for sizing. Then I started modeling what I wanted and talking it over with my father in law. He made a few good suggestions, I made some tweaks, and we locked in the design and got materials. I got all the aluminum I needed (for two carts) for $270, so $135 per cart. I got some used 18x8.5-8 tractor wheels off Craigslist for $50 a set, indoor/outdoor carpet from Menards for $10, and some pipe caps to fancy it up for $25 off Amazon.
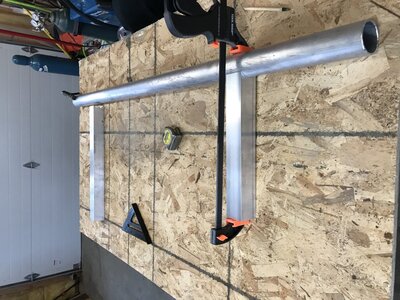
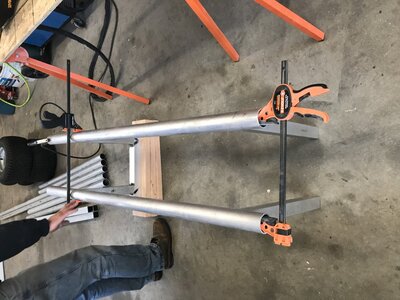
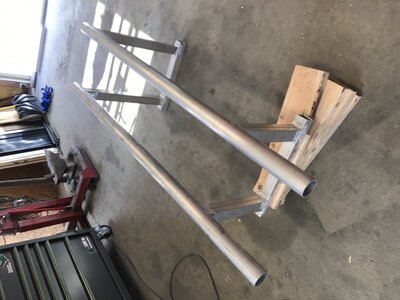
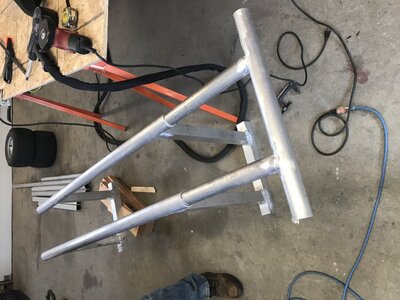
We started by making each side and then combining the two halves together. We used a drill press with a hole saw to cope the square down tubes and welded those to the main round tube. Once we made these, we welded them together at the front axle tube. I used a 12" on center spacing for my Superjet stand and a 14" on center spacing for my X2. From there, we welded the rear stand tube. This essentially completed the main frame structure for the carts. Then we coped each end of the handle poles and welded the carrying handle on to that. The main tube OD is 2.375" with 1/8" wall and the handle tube is 2" OD so it fits perfectly into the main tube and allows for telescoping action. We then inserted the handle all the way inward and drilled holes on each side and put a ball detent pin through it to get our main hole in the main tube and the corresponding hole in the handle tube. Then we slide the handle out 10" and drilled through the hole in the main frame tube into the handle tube. We did this a second time so we had an extended, standard, and fully inward position to pin the handle to.
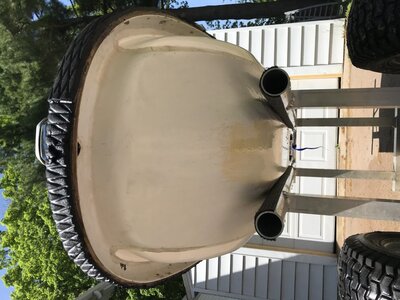
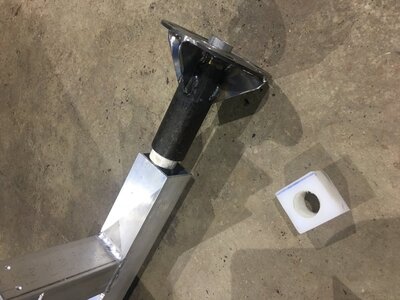
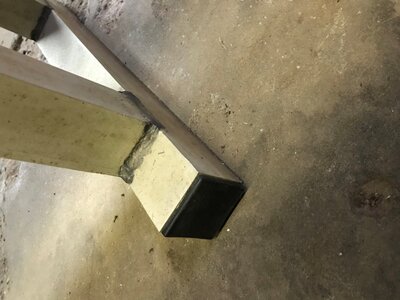
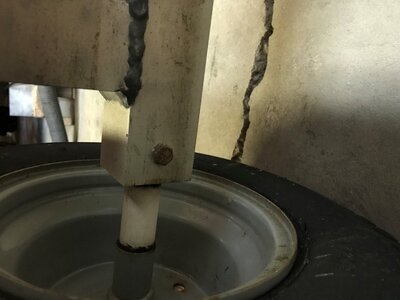
Then it was on to the axle. I used 2" square tube with 1/8" wall for the axle shaft main tube. From there I turned down a piece of steel on a lathe to make a snug fitting 1.75" OD .75" ID bushing. I placed it flush with the end of the square tube and drilled a hole through the aluminum tube and in to the steel bushing. Then I tapped the steel bushing with a 1/4-20 bolt and assembled that together so the steel bushings would not move inside the tube. I then slid my .75" OD axle through the bushings and used PVC spacers to keep wheels from sliding inward. Then I installed the wheels and placed a bearing retainer collar on the outside of the wheel to prevent it from sliding outward. This also serves as a method of keeping the axle from sliding out.
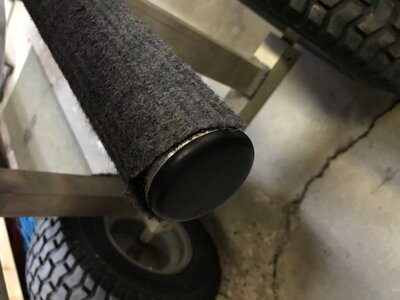
Then the final step was to put the padding on the tops of the main tubes. I got some indoor/outdoor carpet from Menards that works well and was cheap. I put it on using Weldwood contact cement that I had laying around from a turf job - worked great. Capped it all off with some plastic end caps from Amazon and walla, an inexpensive cart that works great for what I use it for.
Various Dimensions:
Height of Main Tube from ground: 25"
Length of Main Tube: 59.5"
Length of Handle Tube: 47.5"
Width of Handle: 24"
Hopefully this can help show some people how to dive in and make their own beach cart that have been wanting one and on the fence about dropping the cash on a name-brand one.
I work as a design engineer and have access to a CAD program and my father in law is very crafty and has every tool imaginable. It was because I'm fortunate enough to have access to all the right tools that I decided to tackle this. I wasn't looking to reinvent the wheel, just make something that functions well for what I need it to do and do it at a lower cost than what I could purchase outright.
I started by researching existing carts and getting a feel for sizing. Then I started modeling what I wanted and talking it over with my father in law. He made a few good suggestions, I made some tweaks, and we locked in the design and got materials. I got all the aluminum I needed (for two carts) for $270, so $135 per cart. I got some used 18x8.5-8 tractor wheels off Craigslist for $50 a set, indoor/outdoor carpet from Menards for $10, and some pipe caps to fancy it up for $25 off Amazon.
We started by making each side and then combining the two halves together. We used a drill press with a hole saw to cope the square down tubes and welded those to the main round tube. Once we made these, we welded them together at the front axle tube. I used a 12" on center spacing for my Superjet stand and a 14" on center spacing for my X2. From there, we welded the rear stand tube. This essentially completed the main frame structure for the carts. Then we coped each end of the handle poles and welded the carrying handle on to that. The main tube OD is 2.375" with 1/8" wall and the handle tube is 2" OD so it fits perfectly into the main tube and allows for telescoping action. We then inserted the handle all the way inward and drilled holes on each side and put a ball detent pin through it to get our main hole in the main tube and the corresponding hole in the handle tube. Then we slide the handle out 10" and drilled through the hole in the main frame tube into the handle tube. We did this a second time so we had an extended, standard, and fully inward position to pin the handle to.
Then it was on to the axle. I used 2" square tube with 1/8" wall for the axle shaft main tube. From there I turned down a piece of steel on a lathe to make a snug fitting 1.75" OD .75" ID bushing. I placed it flush with the end of the square tube and drilled a hole through the aluminum tube and in to the steel bushing. Then I tapped the steel bushing with a 1/4-20 bolt and assembled that together so the steel bushings would not move inside the tube. I then slid my .75" OD axle through the bushings and used PVC spacers to keep wheels from sliding inward. Then I installed the wheels and placed a bearing retainer collar on the outside of the wheel to prevent it from sliding outward. This also serves as a method of keeping the axle from sliding out.
Then the final step was to put the padding on the tops of the main tubes. I got some indoor/outdoor carpet from Menards that works well and was cheap. I put it on using Weldwood contact cement that I had laying around from a turf job - worked great. Capped it all off with some plastic end caps from Amazon and walla, an inexpensive cart that works great for what I use it for.
Various Dimensions:
Height of Main Tube from ground: 25"
Length of Main Tube: 59.5"
Length of Handle Tube: 47.5"
Width of Handle: 24"
Hopefully this can help show some people how to dive in and make their own beach cart that have been wanting one and on the fence about dropping the cash on a name-brand one.
Attachments
-
 Materials.jpg134.3 KB · Views: 246
 -
 Step 1.jpg191.7 KB · Views: 247
 -
 Step 2.jpg143.5 KB · Views: 239
 -
 Step 3.jpg118.9 KB · Views: 249
 -
 Step 4.jpg147.3 KB · Views: 244
 -
 End Cap and Carpet.jpg86.2 KB · Views: 245
 -
 End Cap.jpg116.6 KB · Views: 248
 -
 Axle.jpg88 KB · Views: 330
 -
 Final Carts.jpg176.6 KB · Views: 366
Last edited: