You are using an out of date browser. It may not display this or other websites correctly.
You should upgrade or use an alternative browser.
You should upgrade or use an alternative browser.
WB1 With Turbocharged Spark Engine
- Thread starter SWLAmarshrunner
- Start date
Yeah you aren't kidding... I didn't include any final assembly or tuning. I'll add it on there to keep track of totals... I keep track of costs but this will be the first build I keep track with labor hour totals. I know someone in New Zealand with a turbo spark SJ and they are using a 144 solas with it 2" setback and said it works awesome. Had originally wanted to get a 148 but after hearing the 144 solas worked good on the SJ, I'm going to try that first. I already have the pump too so that's a plus. I have no clue on impeller. Big lol
- Location
- Apache junction az
So is it running?
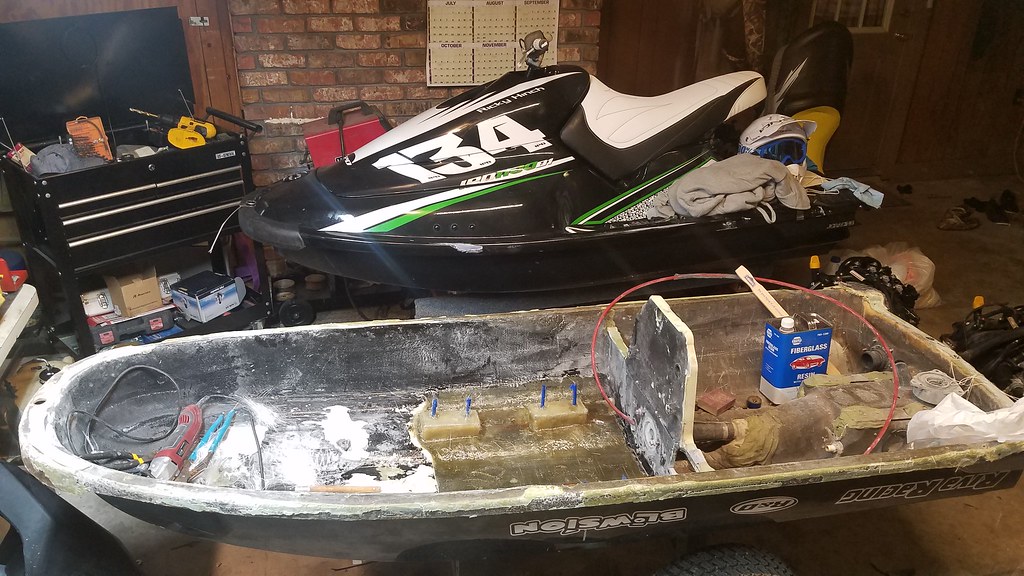
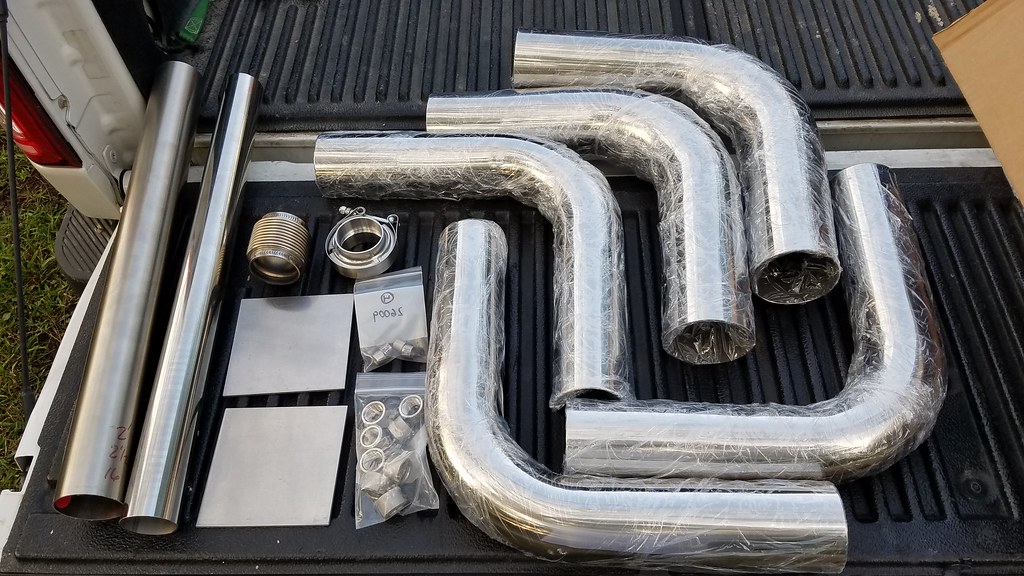
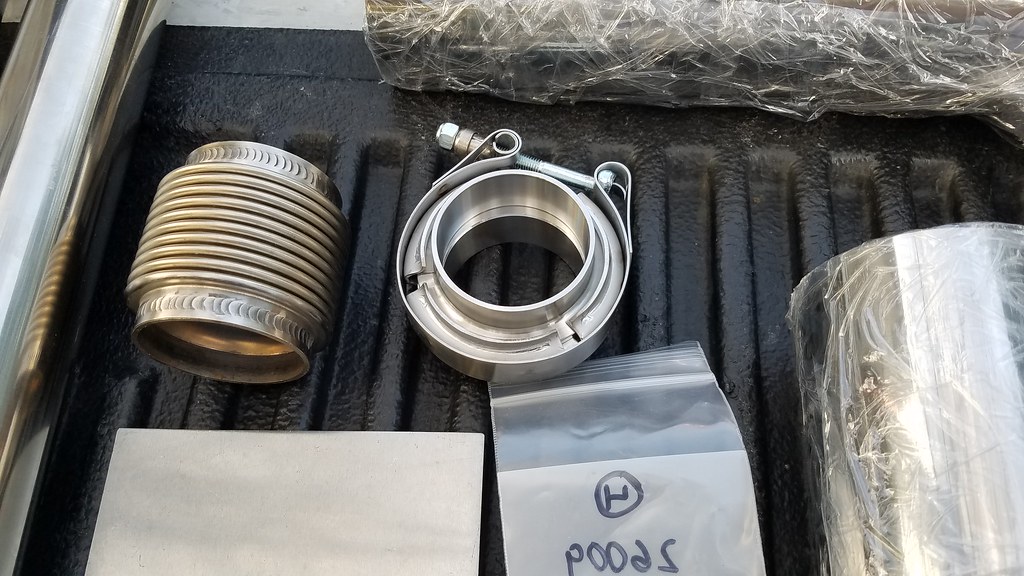
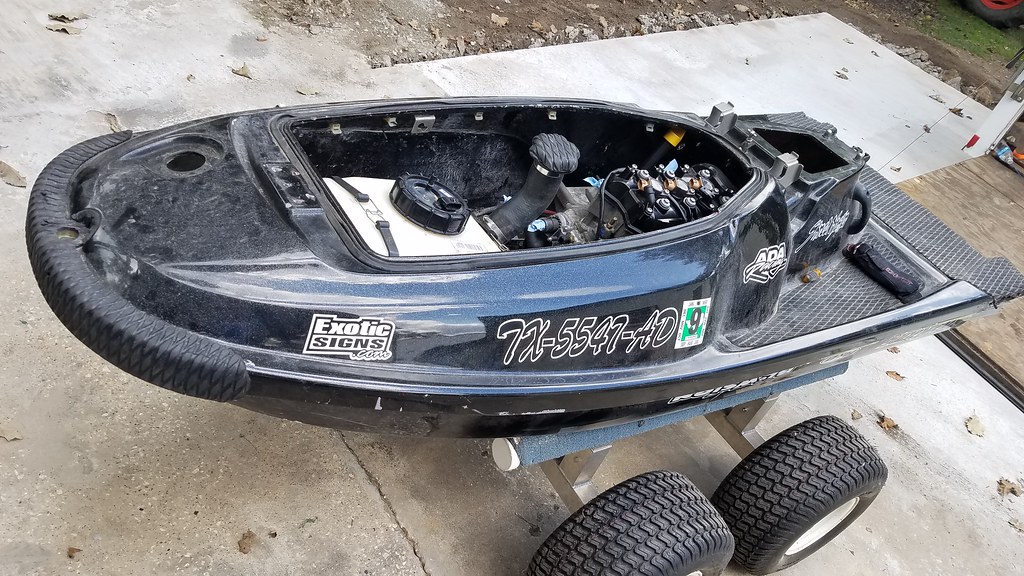
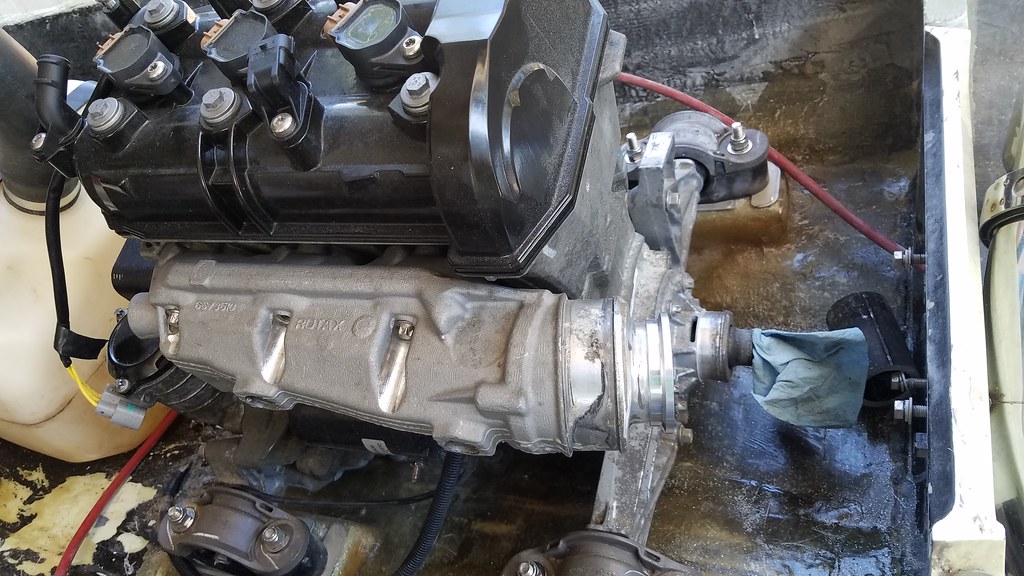
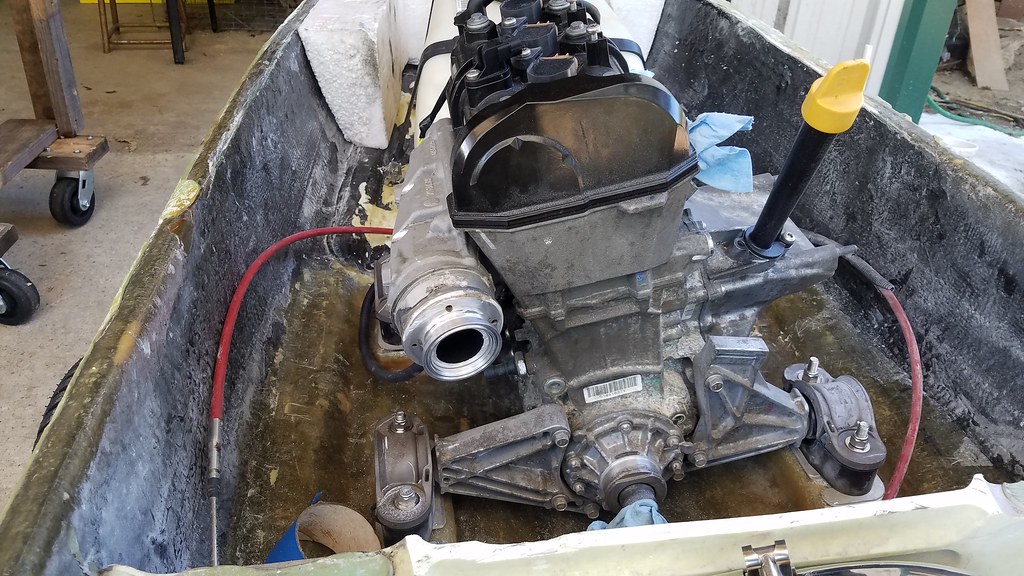
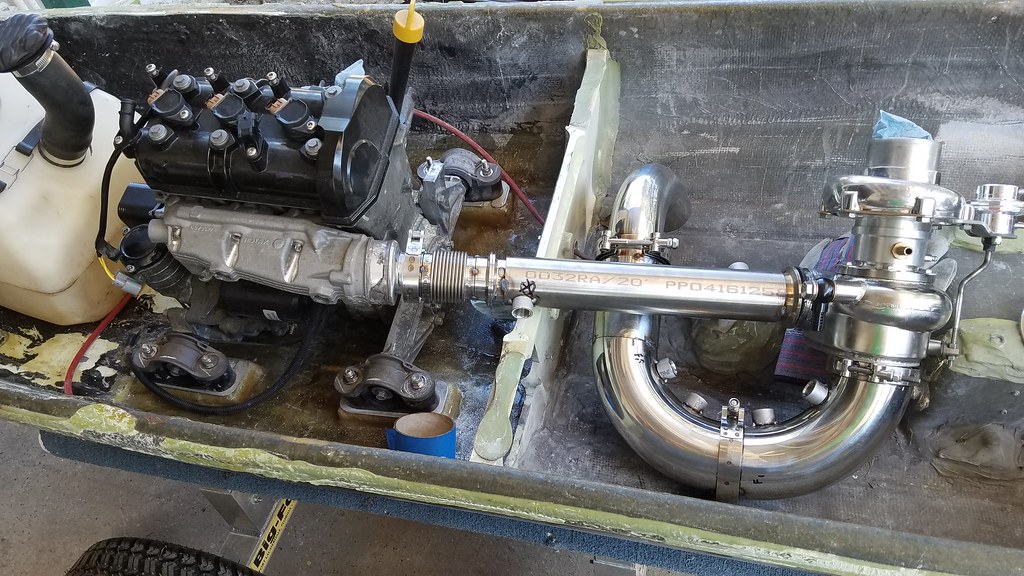
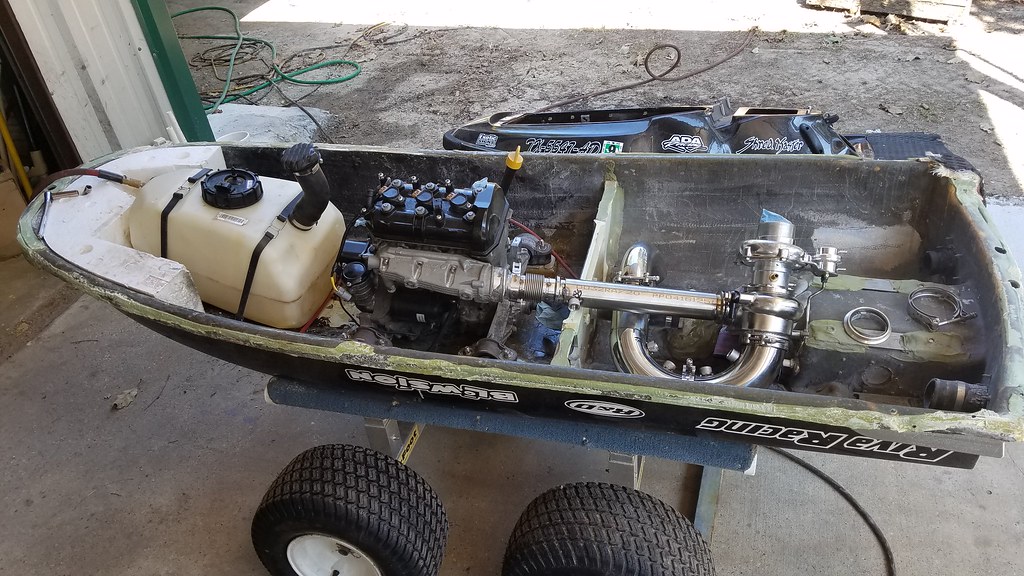
The engine is a running engine but theres alot left to do in this build. I got all the piping, hoses and fittings ordered to build the turbo setup
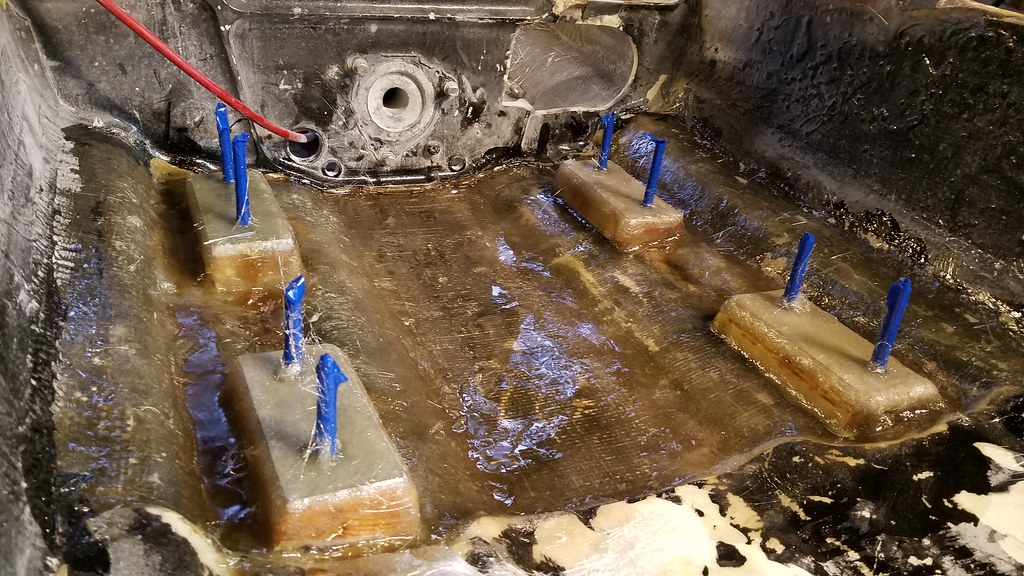
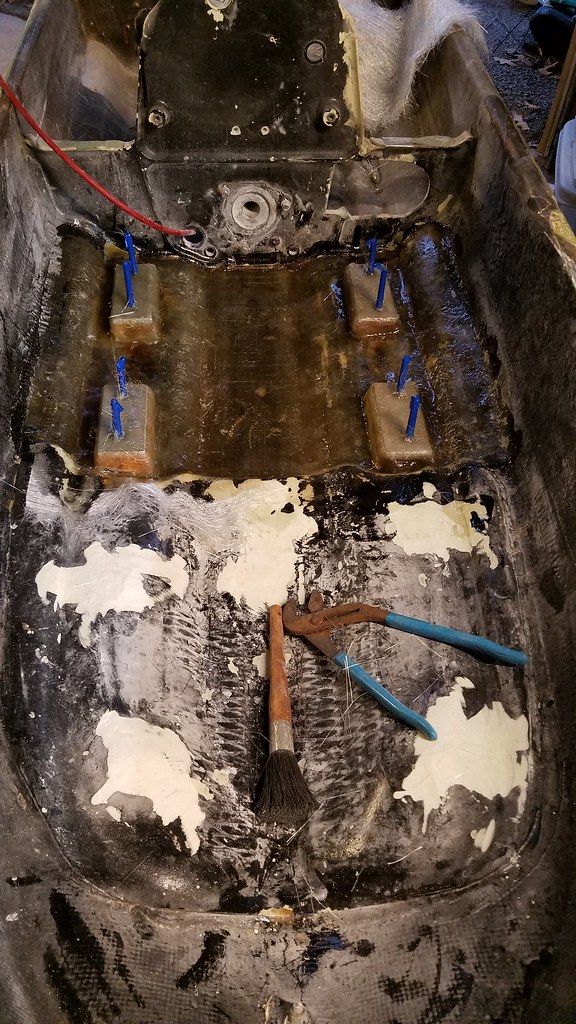
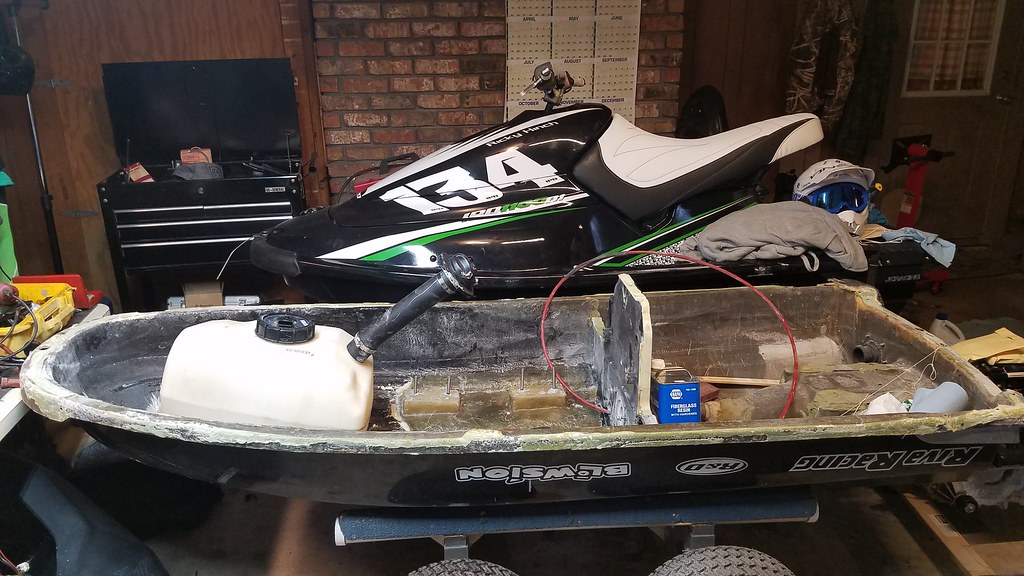
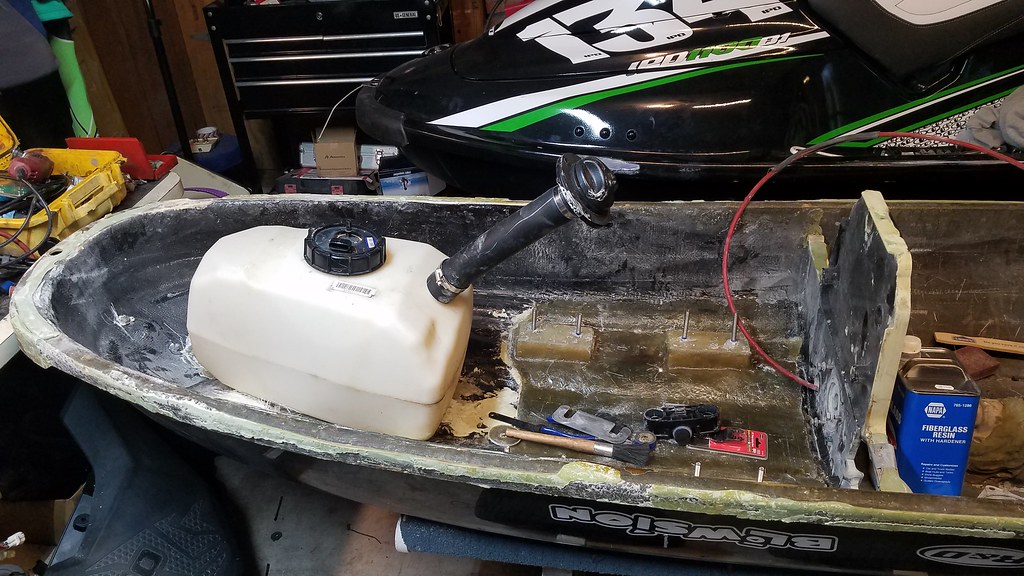
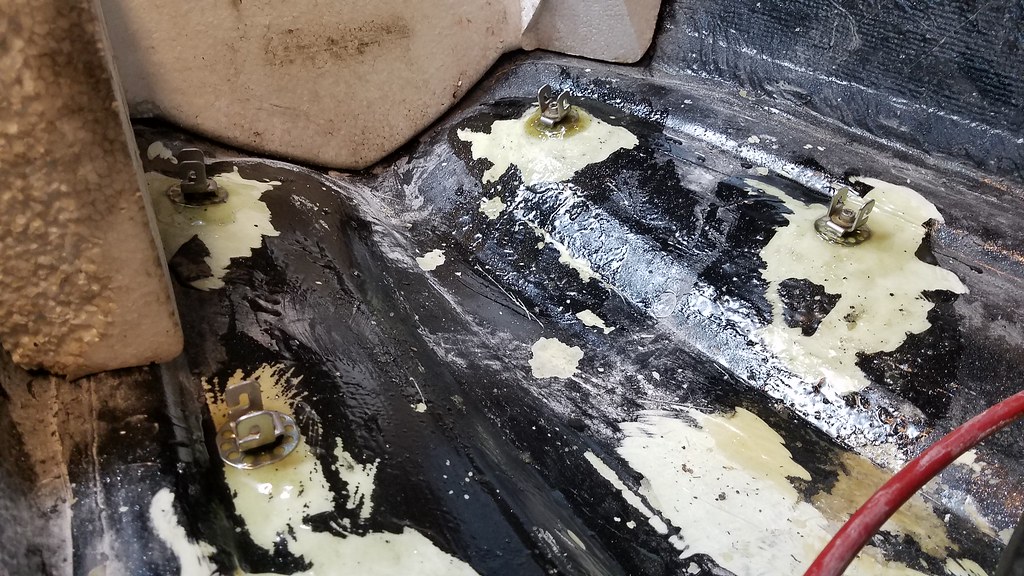
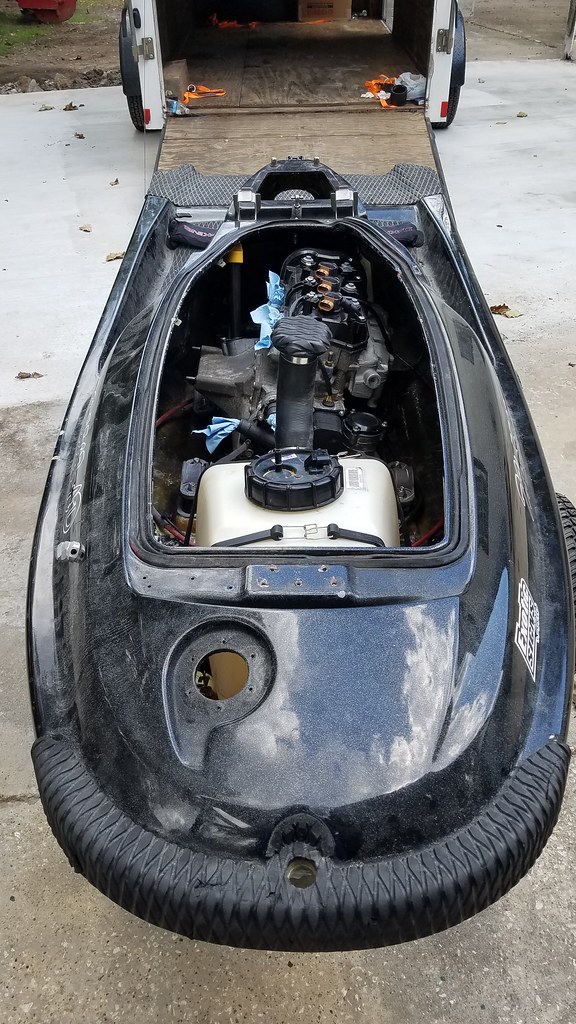
Got the gas tank & waterbox brackets grinded down smooth. Glassed in the mounts but still need to put 1 more layer on the front and rear sides. All turbo piping, fittings and hoses ordered... just waiting for it to come in. While waiting, I can still grind the glue down where the hull was seperated and start working on making the base of the aluminum intake manifold.
 20170916_192739 by Ricky Hinch, on Flickr
 20170916_192725 by Ricky Hinch, on Flickr
 20170916_230542 by Ricky Hinch, on Flickr
 20170917_175215 by Ricky Hinch, on Flickr
20170916_192739 by Ricky Hinch, on Flickr
20170916_192725 by Ricky Hinch, on Flickr
20170916_230542 by Ricky Hinch, on Flickr
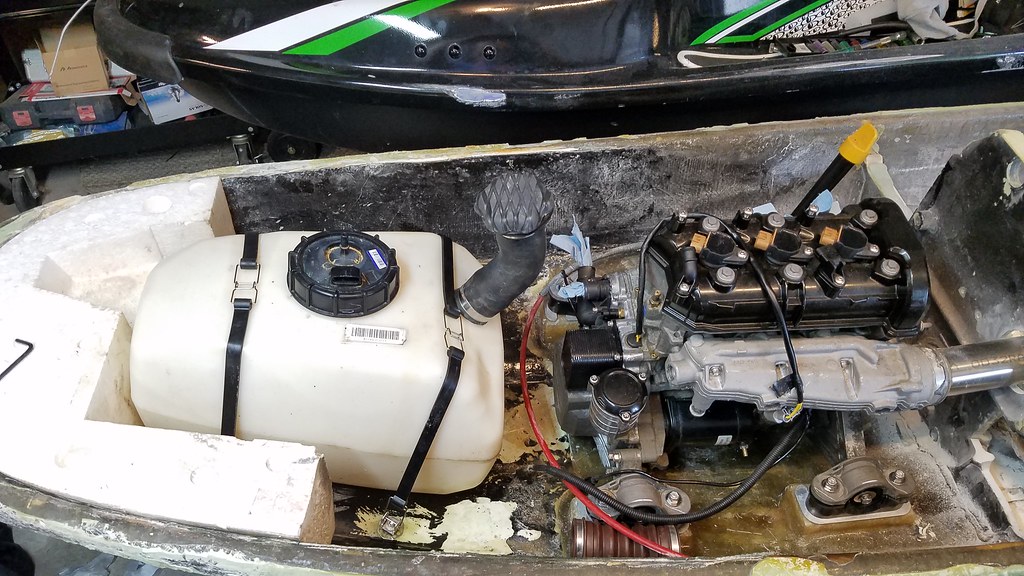
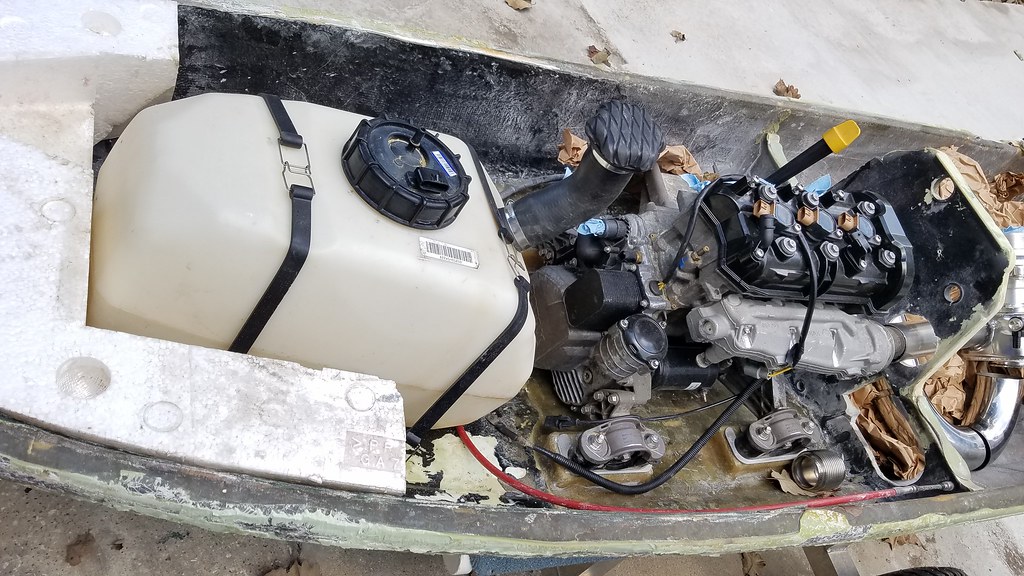
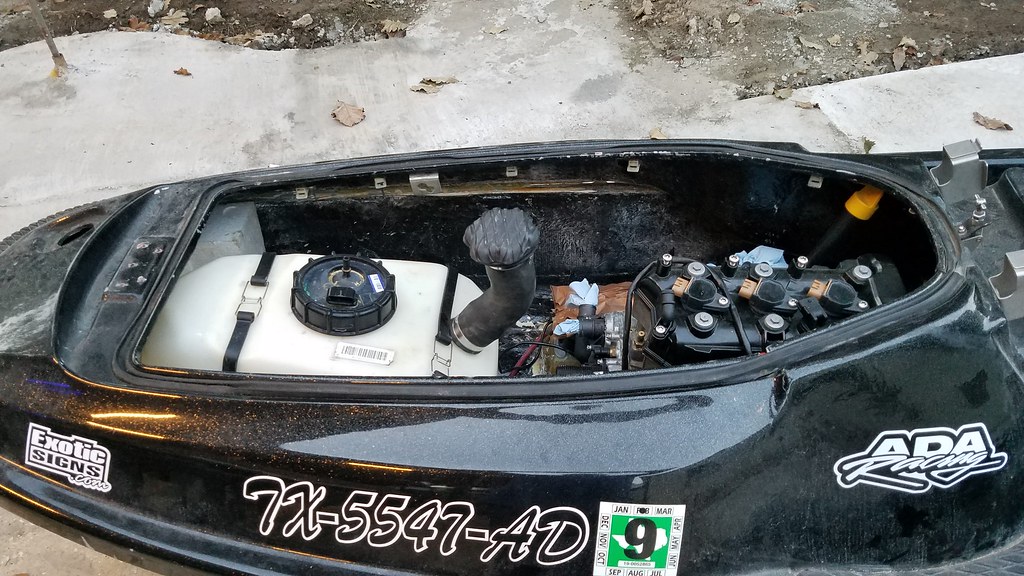
20170917_175215 by Ricky Hinch, on FlickrJust been waiting on parts to come in this last week. Rest of the flanges and fittings should be in next week. Leaving for a trip to Colorado tomorrow so I probably won't be jumping back on this until next weekend. I did shave the stock gas tank/waterbox brackets off and set the spark tank in. The tank contours the hull really good and I should be able to put together some silicone piping to run from stock blaster fill location to the tank.
 20170920_183012 by Ricky Hinch, on Flickr
 20170920_183021 by Ricky Hinch, on Flickr
 20170918_185027 by Ricky Hinch, on Flickr
 20170918_185019 by Ricky Hinch, on Flickr
 20170918_185035 by Ricky Hinch, on Flickr
20170920_183012 by Ricky Hinch, on Flickr
20170920_183021 by Ricky Hinch, on Flickr
20170918_185027 by Ricky Hinch, on Flickr
20170918_185019 by Ricky Hinch, on Flickr
20170918_185035 by Ricky Hinch, on Flickr- Location
- Stouffville, Ontario
I salute your passion and insanity. Kudos for going for it. Can't wait to see the finished product.
Mike
Mike
- Location
- Plymouth, MA
What he said ^^^
Quinc
Buy a Superjet
- Location
- California
I had no idea napa sold fiberglass resin.
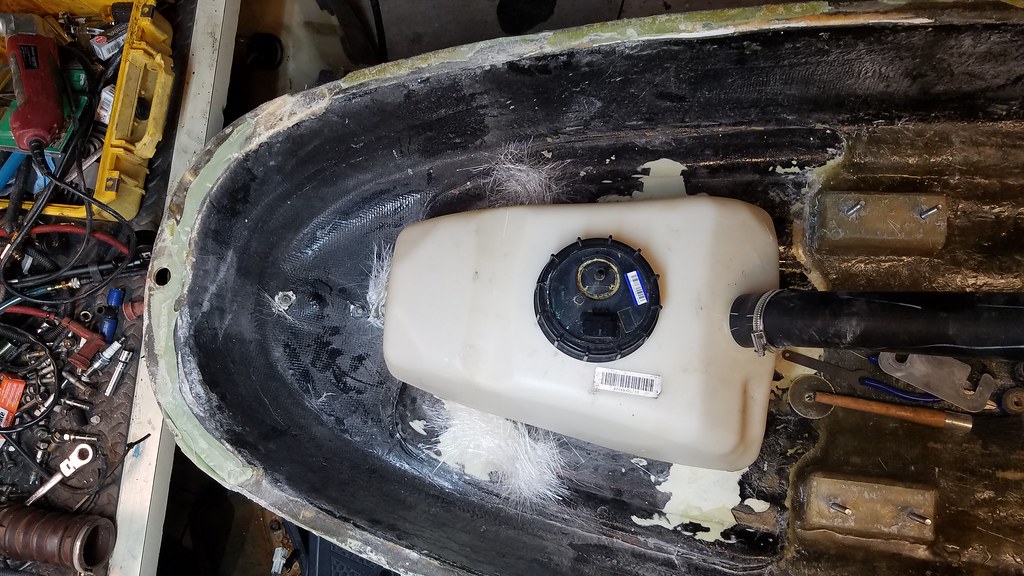
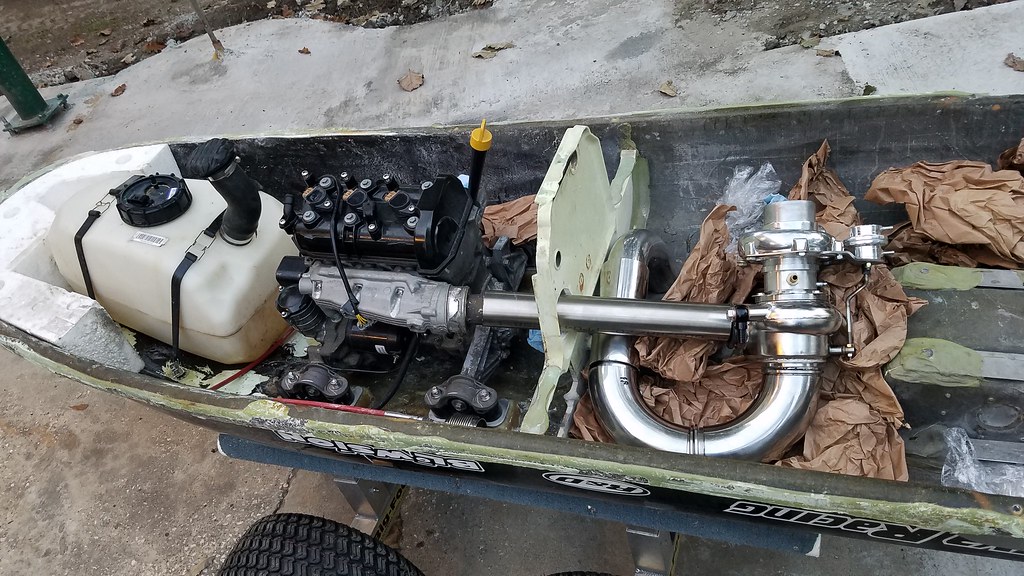
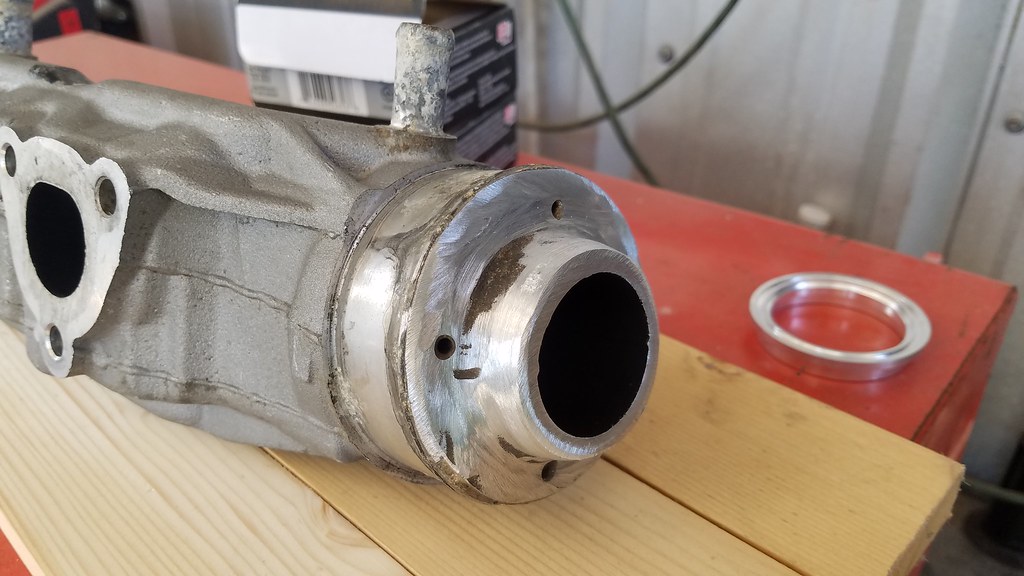
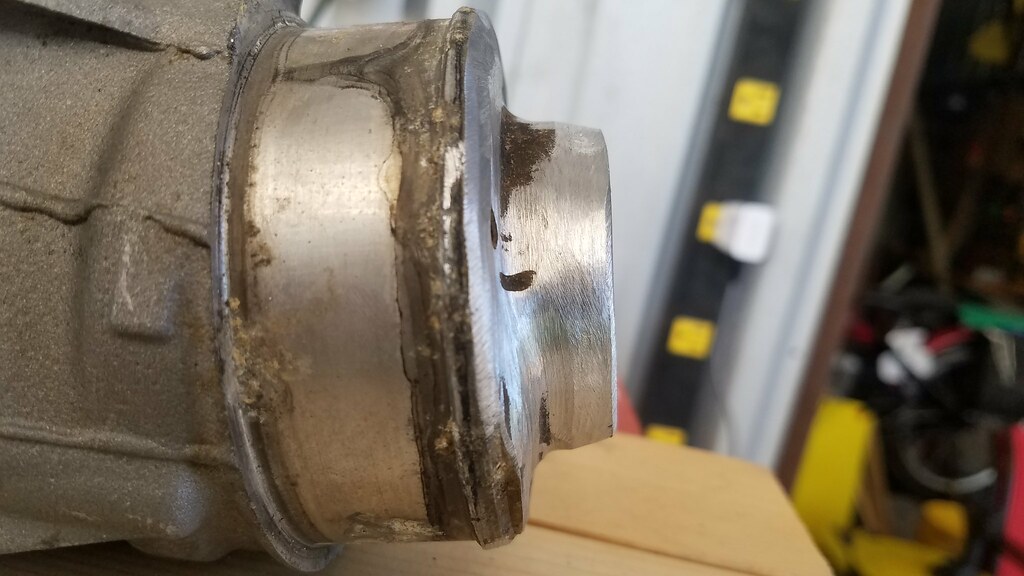
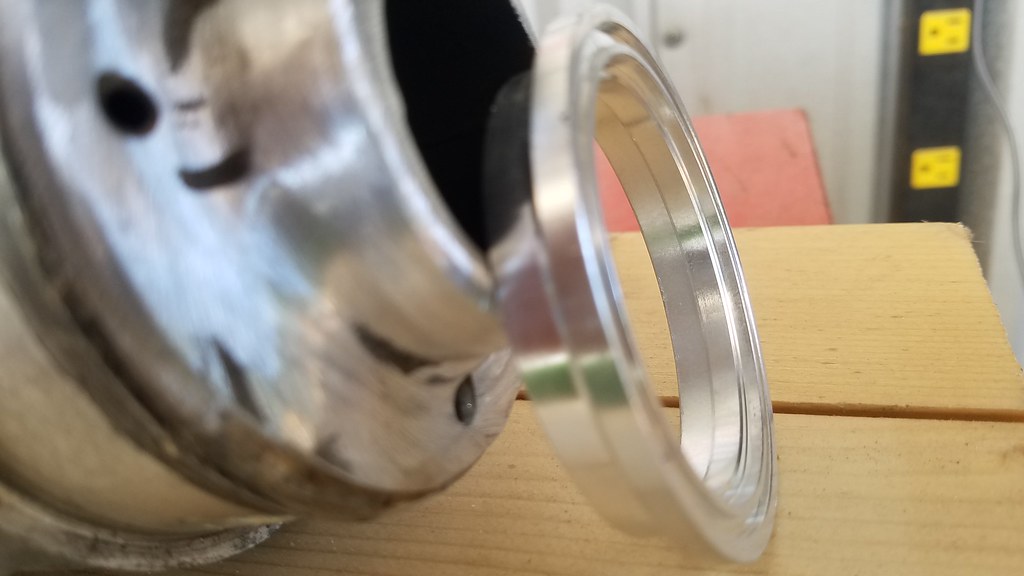
The rest of the materials came in while I was on vacation so I worked on it a little bit yesterday while I had a few hours. Gas tank mounts glassed in, oem spark tank straps is what I used and the tank fits nicely, even with the front foam in. Started fabricating the water-jacketed uppipe and downpipe and just have a little more to do before getting it welded out. Pics below
 1 by Ricky Hinch, on Flickr
 2 by Ricky Hinch, on Flickr
 3 by Ricky Hinch, on Flickr
 4 by Ricky Hinch, on Flickr
 5 by Ricky Hinch, on Flickr
 6 by Ricky Hinch, on Flickr
 7 by Ricky Hinch, on Flickr
 8 by Ricky Hinch, on Flickr
 9 by Ricky Hinch, on Flickr
 10 by Ricky Hinch, on Flickr
 11 by Ricky Hinch, on Flickr
1 by Ricky Hinch, on Flickr
2 by Ricky Hinch, on Flickr
3 by Ricky Hinch, on Flickr
4 by Ricky Hinch, on Flickr
5 by Ricky Hinch, on Flickr
6 by Ricky Hinch, on Flickr
7 by Ricky Hinch, on Flickr
8 by Ricky Hinch, on Flickr
9 by Ricky Hinch, on Flickr
10 by Ricky Hinch, on Flickr
11 by Ricky Hinch, on Flickr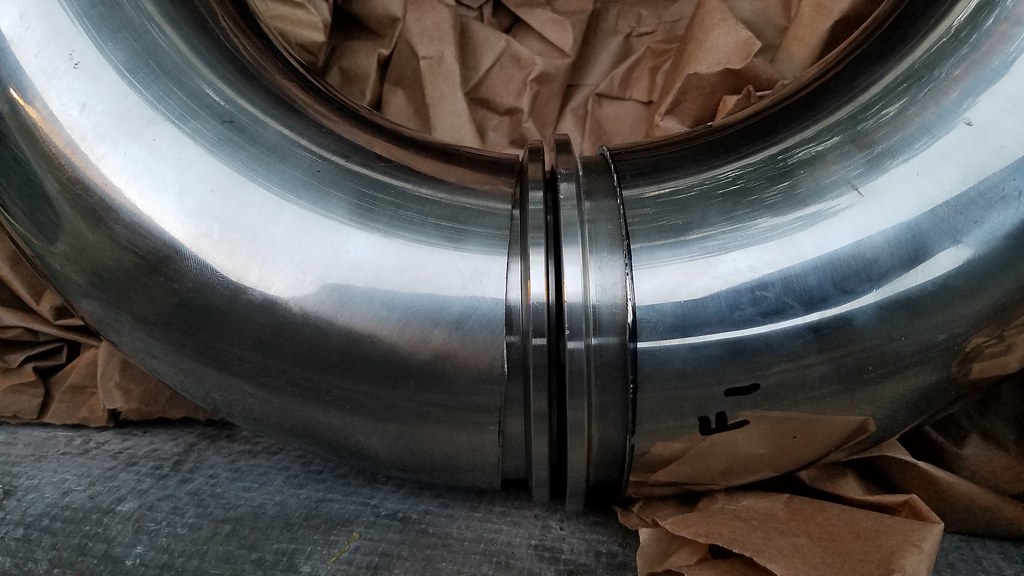 12 by Ricky Hinch, on Flickr
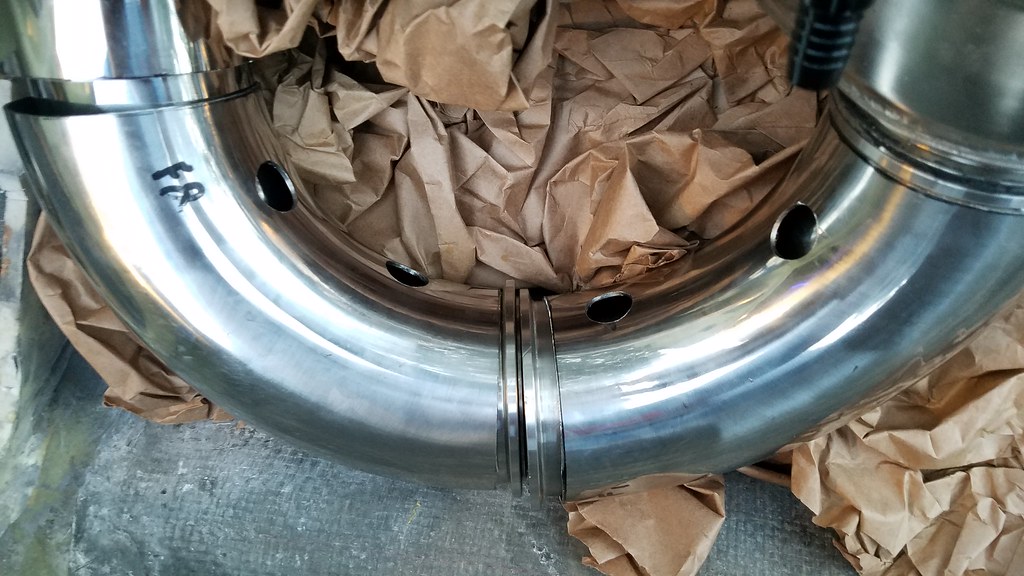 13 by Ricky Hinch, on Flickr
 14 by Ricky Hinch, on Flickr
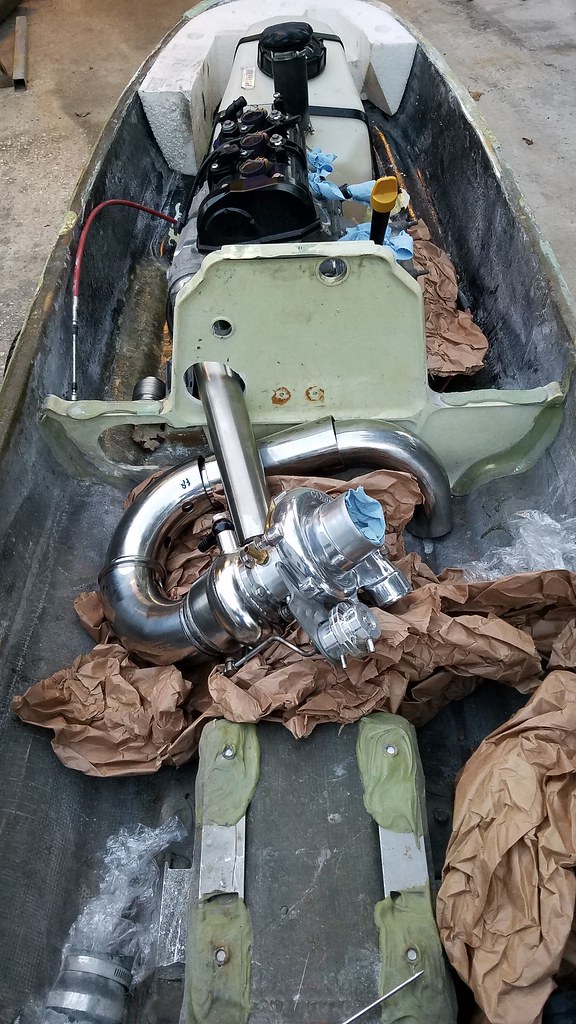 15 by Ricky Hinch, on Flickr
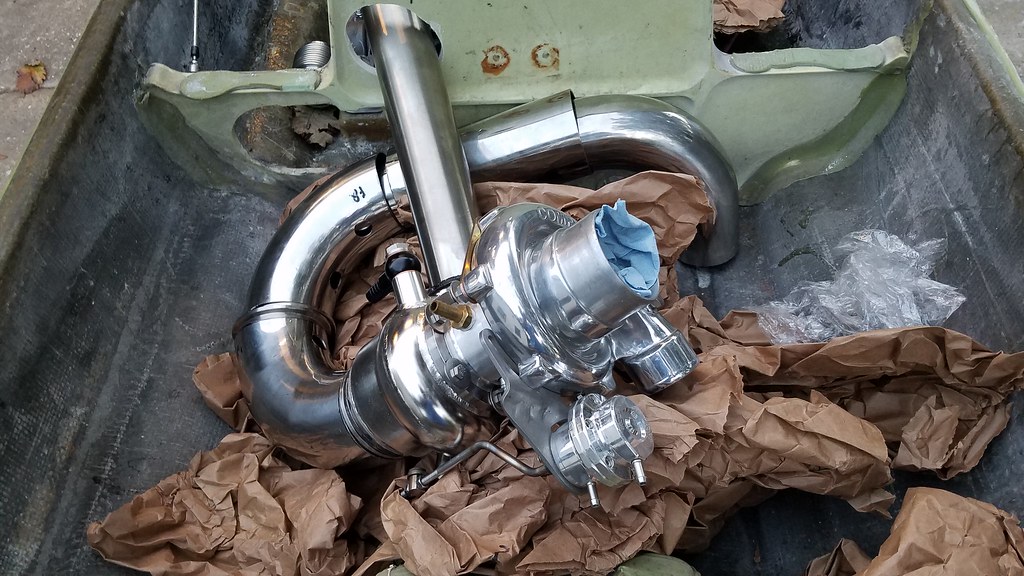 16 by Ricky Hinch, on Flickr
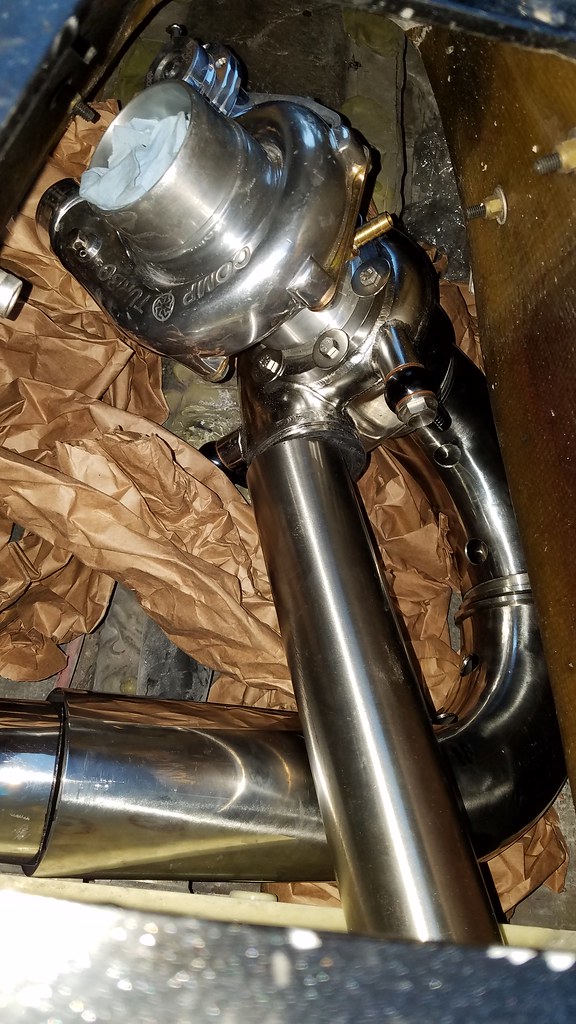 17 by Ricky Hinch, on Flickr
 18 by Ricky Hinch, on Flickr
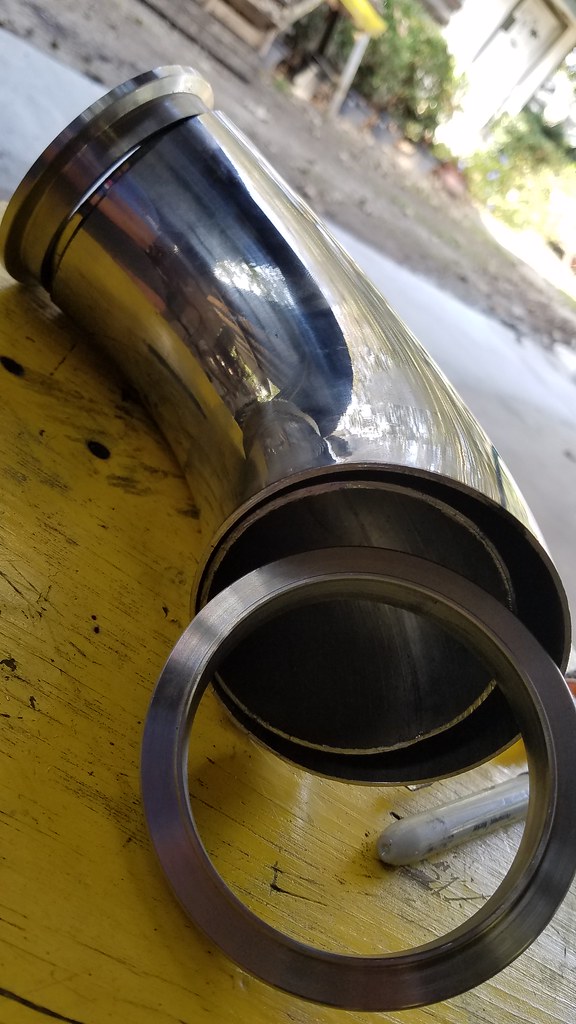 19 by Ricky Hinch, on Flickr
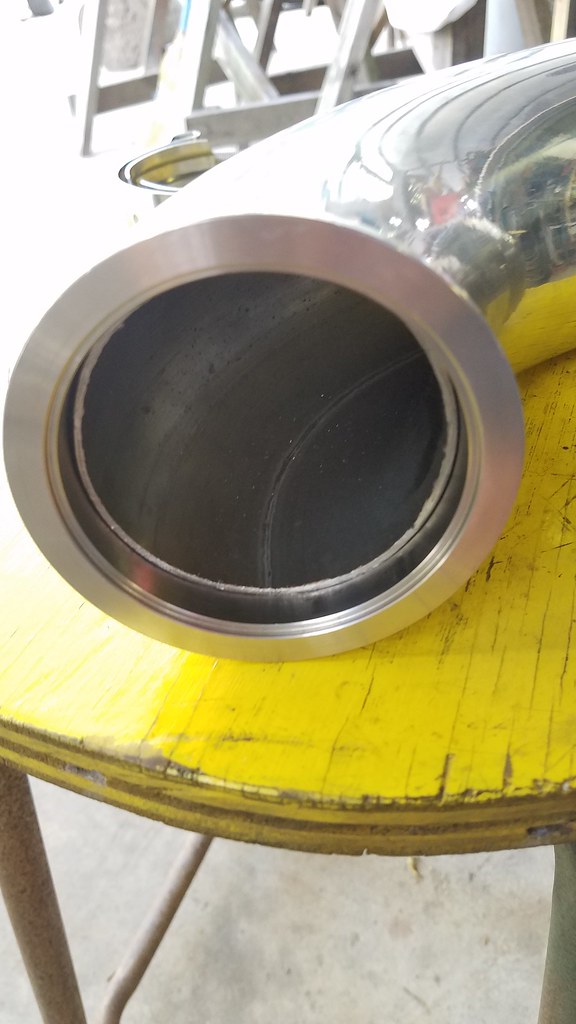 20 by Ricky Hinch, on Flickr
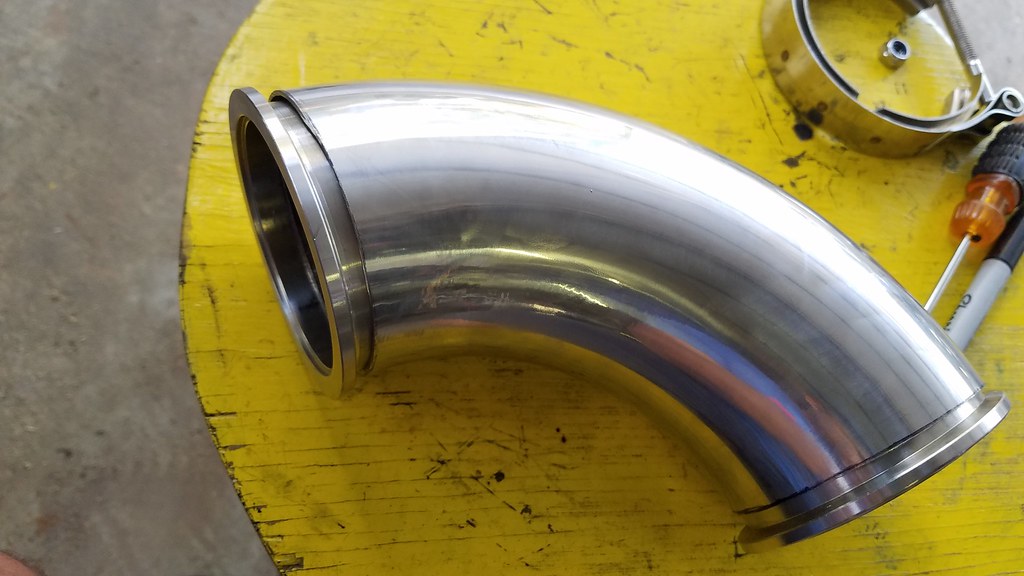 21 by Ricky Hinch, on Flickr
Yami-Rider
TigerCraft FV-PRO
- Location
- Texoma
Madness!
- Location
- Plymouth, MA
what are you doing with the pump? staying with a 144mm? that motor can push a much bigger pump. I would suggest a min a 155 mag pump. better yet why not put a later model seadoo pump in. You can get much bigger than 155 and it will be stock. My opinion is the seadoo pumps pull and run much better than the yamaha's. You can get them much cheaper than 155 or bigger mag pump.
Yes you will have to make it fit but whats the difference as you are making your own creation anyways.
Yes you will have to make it fit but whats the difference as you are making your own creation anyways.
what are you doing with the pump? staying with a 144mm? that motor can push a much bigger pump. I would suggest a min a 155 mag pump. better yet why not put a later model seadoo pump in. You can get much bigger than 155 and it will be stock. My opinion is the seadoo pumps pull and run much better than the yamaha's. You can get them much cheaper than 155 or bigger mag pump.
Yes you will have to make it fit but whats the difference as you are making your own creation anyways.
I agree, I am all about getting the most performance especially when you make it work with cheaper parts. My plan is to use a 144 solas mag first because I already have one. I want to get it going on the water and once it's tuned, I'll get some baseline data. I want to only have 1 variable at a time as I change things to try and improve. Thinking I may try a b2 155 pump in with a 155 pump shoe with stock pump tunnel also because thats fairly easy to switch around in comparison to glassing in new tunnels and setting up for different pumps. At the end of the day, it's still a stock hull b1. Would love to get this engine setup in a mod blaster hull one day.
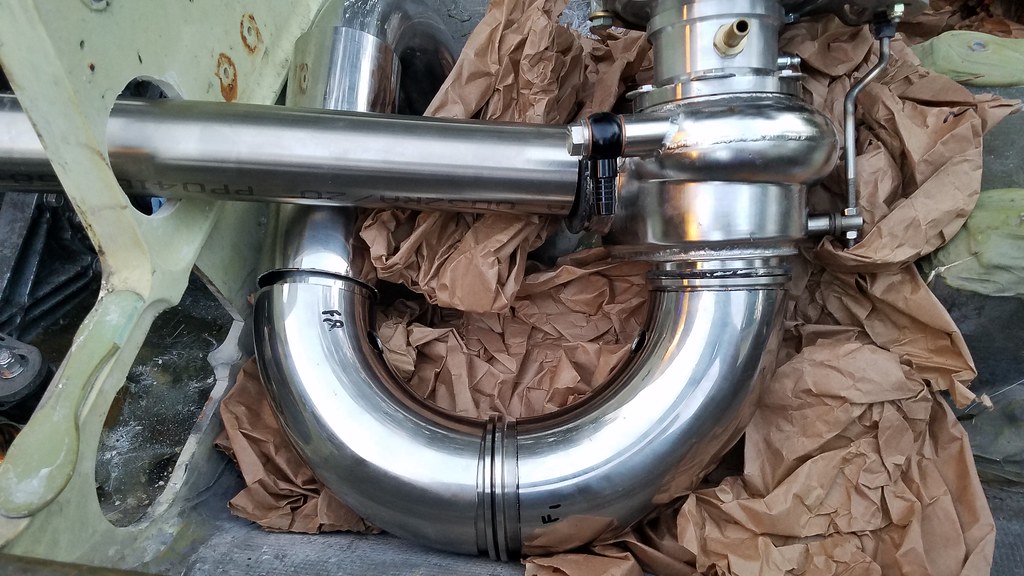
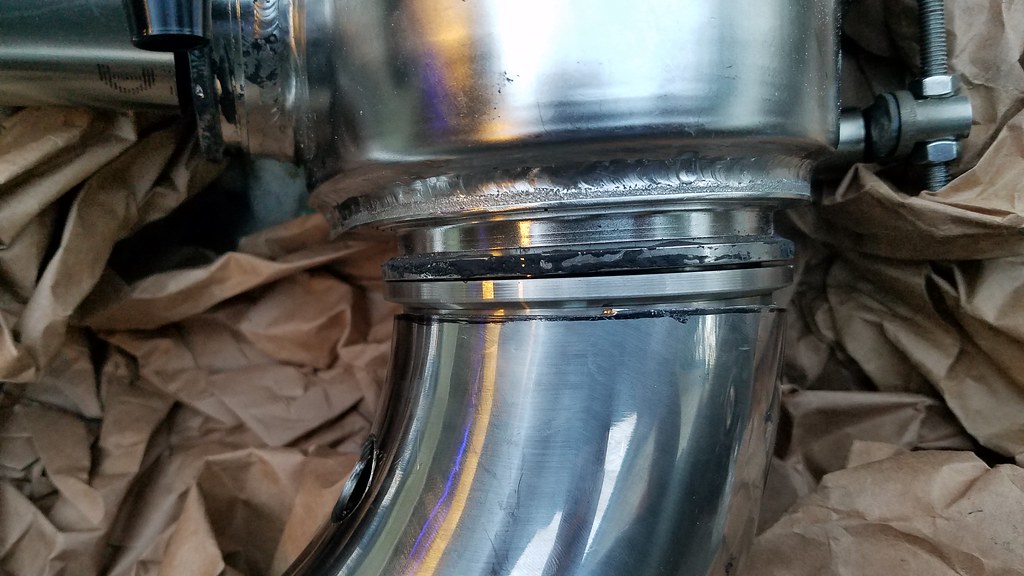
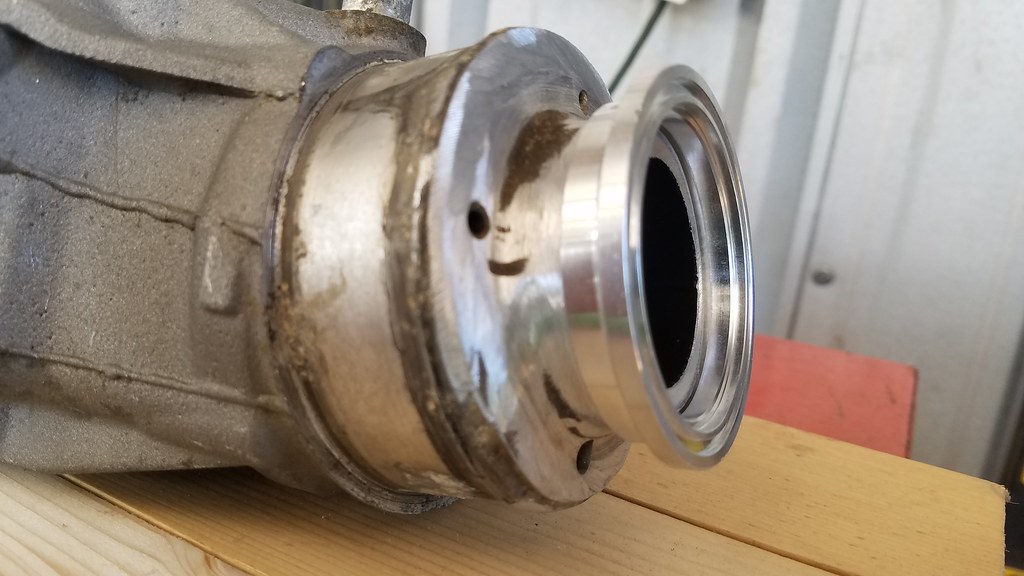
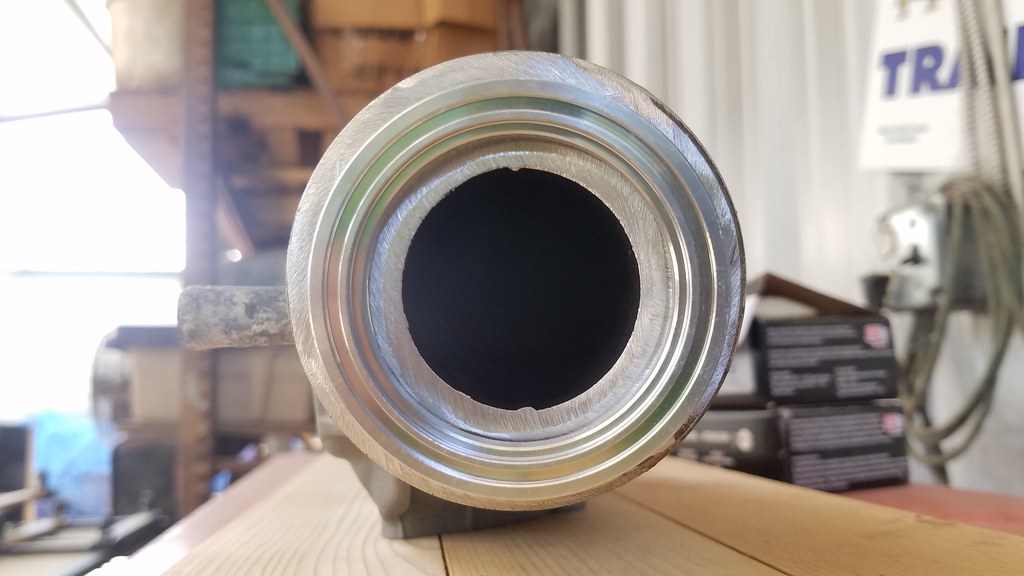
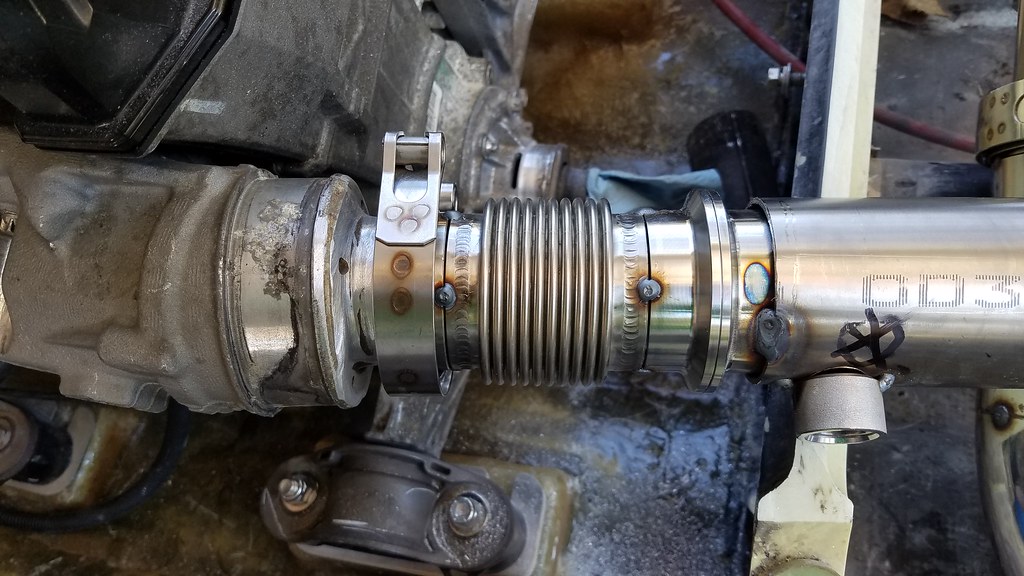
Got everything tacked up over the weekend and ready to have tigged up. Had to do some trimming to the ends of a couple pieces of pipe to get the fit just right into the flanges. Also, cut the manifold pipe down some. Instead of welding a huge piece onto the manifold and mounting the turbo right off that where some of the spark kits have shown to crack welds, I put a bellow to allow flexing. It is only 3" long and I'll probably put some heat wrap around it. I have a aluminum to stainless V-Band flange that comes right off of the exhaust manifold and there won't be any weight of the turbo supported on that.... only the pipe itself. I'll be able to get a good weld on the inside and outside of that aluminum flange.
After I got everything tacked up, I talked with Evan Kassing with GRF Racing about some intake manifold stuff and decided it would be best to have EGT's installed for each cylinder. Since I am making a custom intake manifold, I wouldn't want one cylinder to end up running leaner than the other so an egt per cylinder monitored by motec will help with that. I will have to machine a spacer out of a 2" thick piece which I didn't have on hand. So for purposes of tacking everything up and accounting for the 2" exhaust spacer, I took 2 - 1" pieces of billet and rigged it up where I had 2" total mocked up.
I ended up having to change the angle of the uppipe some due to the exhaust spacer mentioned above. Instead of being a nice clean straight piece, it has a kink to it but I had to do it like that to clear the footwell area on the top deck. I also had to shorten the uppipe a little to move the whole turbo setup forward by roughly 2".
 20170930_112957 by Ricky Hinch, on Flickr
 20170930_113002 by Ricky Hinch, on Flickr
 20170930_113013 by Ricky Hinch, on Flickr
 20170930_113059 by Ricky Hinch, on Flickr
 20170930_113130 by Ricky Hinch, on Flickr
 20170930_113338 by Ricky Hinch, on Flickr
 20170930_113345 by Ricky Hinch, on Flickr
 20170930_113854 by Ricky Hinch, on Flickr
 20170930_113903 by Ricky Hinch, on Flickr
 20170930_113912 by Ricky Hinch, on Flickr
 20170930_113949 by Ricky Hinch, on Flickr
After I got everything tacked up, I talked with Evan Kassing with GRF Racing about some intake manifold stuff and decided it would be best to have EGT's installed for each cylinder. Since I am making a custom intake manifold, I wouldn't want one cylinder to end up running leaner than the other so an egt per cylinder monitored by motec will help with that. I will have to machine a spacer out of a 2" thick piece which I didn't have on hand. So for purposes of tacking everything up and accounting for the 2" exhaust spacer, I took 2 - 1" pieces of billet and rigged it up where I had 2" total mocked up.
I ended up having to change the angle of the uppipe some due to the exhaust spacer mentioned above. Instead of being a nice clean straight piece, it has a kink to it but I had to do it like that to clear the footwell area on the top deck. I also had to shorten the uppipe a little to move the whole turbo setup forward by roughly 2".
20170930_112957 by Ricky Hinch, on Flickr
20170930_113002 by Ricky Hinch, on Flickr
20170930_113013 by Ricky Hinch, on Flickr
20170930_113059 by Ricky Hinch, on Flickr
20170930_113130 by Ricky Hinch, on Flickr
20170930_113338 by Ricky Hinch, on Flickr
20170930_113345 by Ricky Hinch, on Flickr
20170930_113854 by Ricky Hinch, on Flickr
20170930_113903 by Ricky Hinch, on Flickr
20170930_113912 by Ricky Hinch, on Flickr
20170930_113949 by Ricky Hinch, on Flickr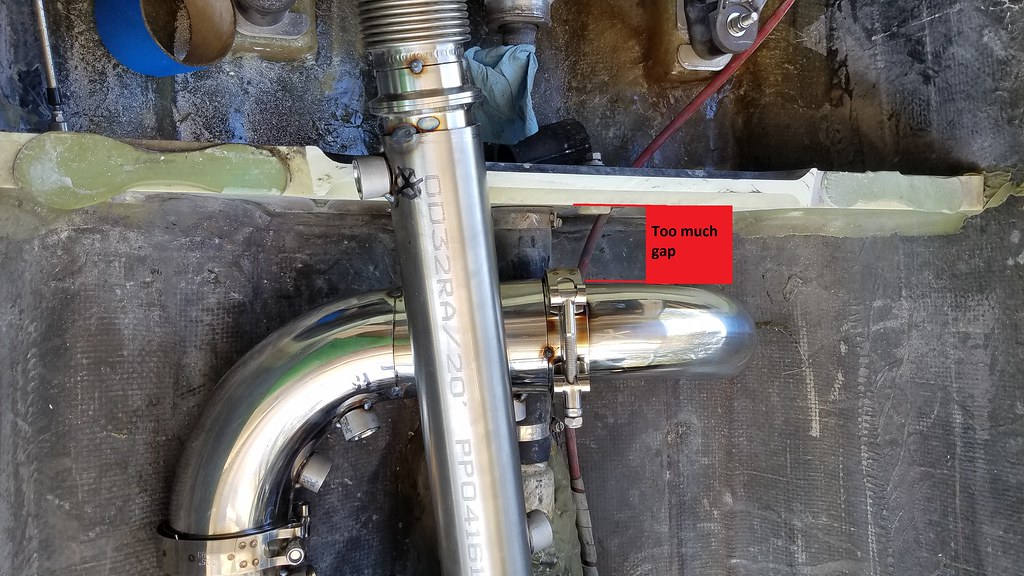 20170930_114518a by Ricky Hinch, on Flickr
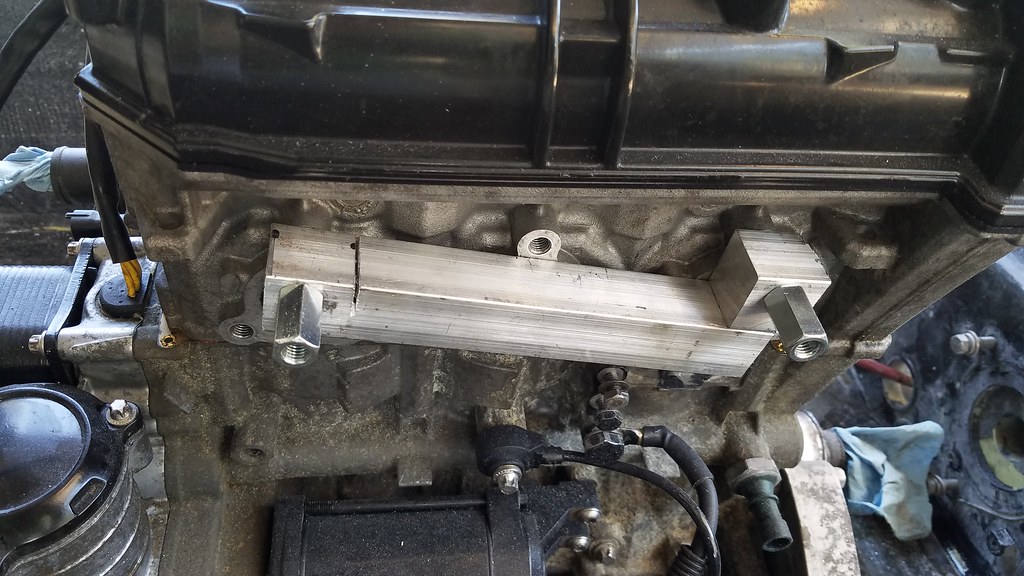 20170930_132615 by Ricky Hinch, on Flickr
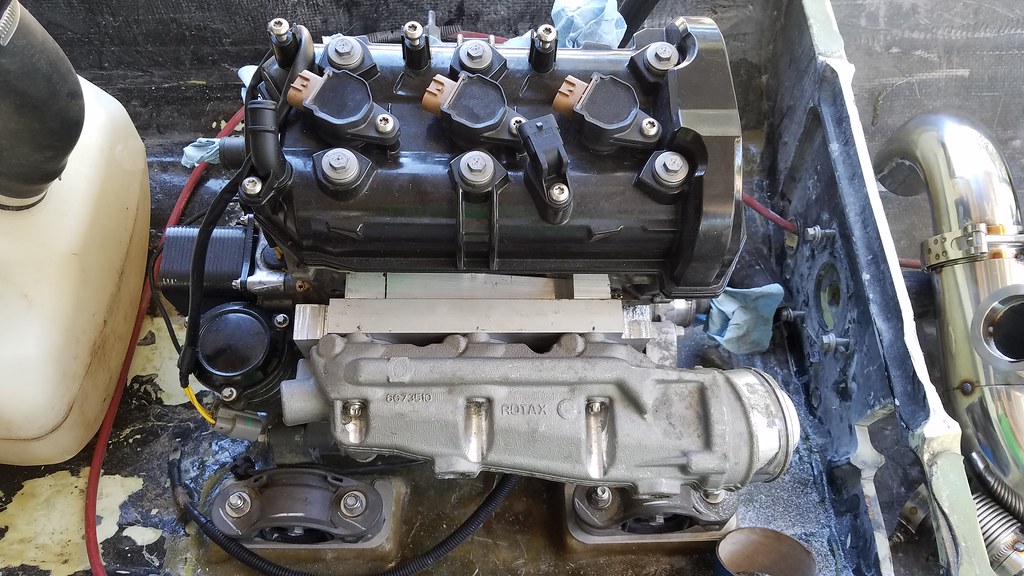 20170930_132752 by Ricky Hinch, on Flickr
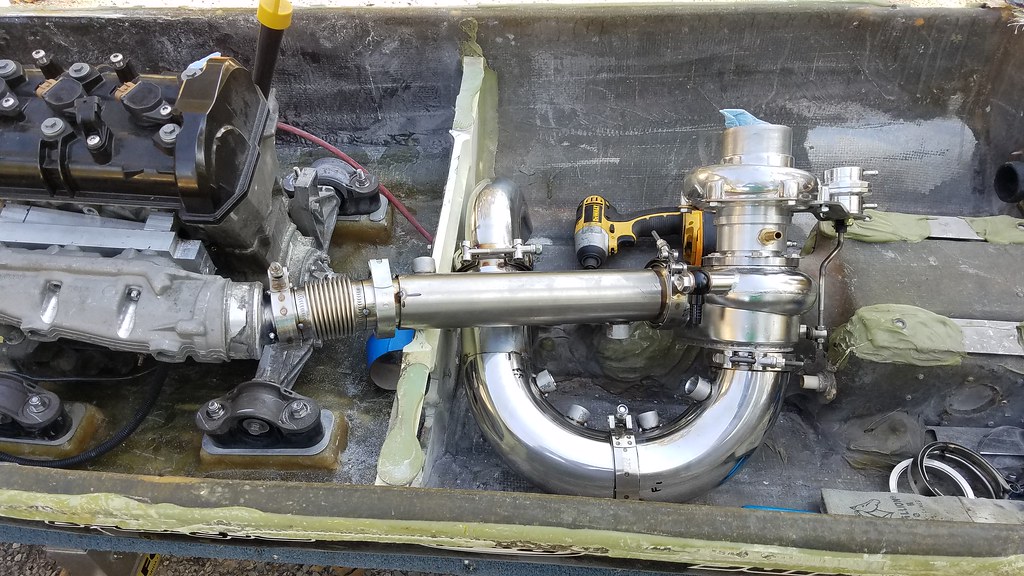 20170930_162256 by Ricky Hinch, on Flickr
 20170930_162333 by Ricky Hinch, on Flickr
 20170930_165743 by Ricky Hinch, on Flickr
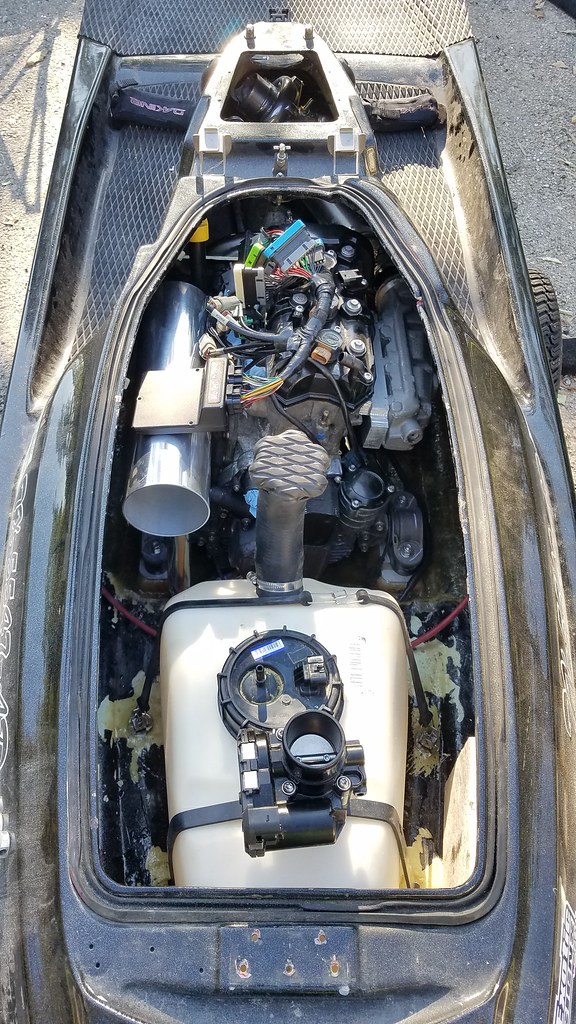 20170930_165759 by Ricky Hinch, on Flickr
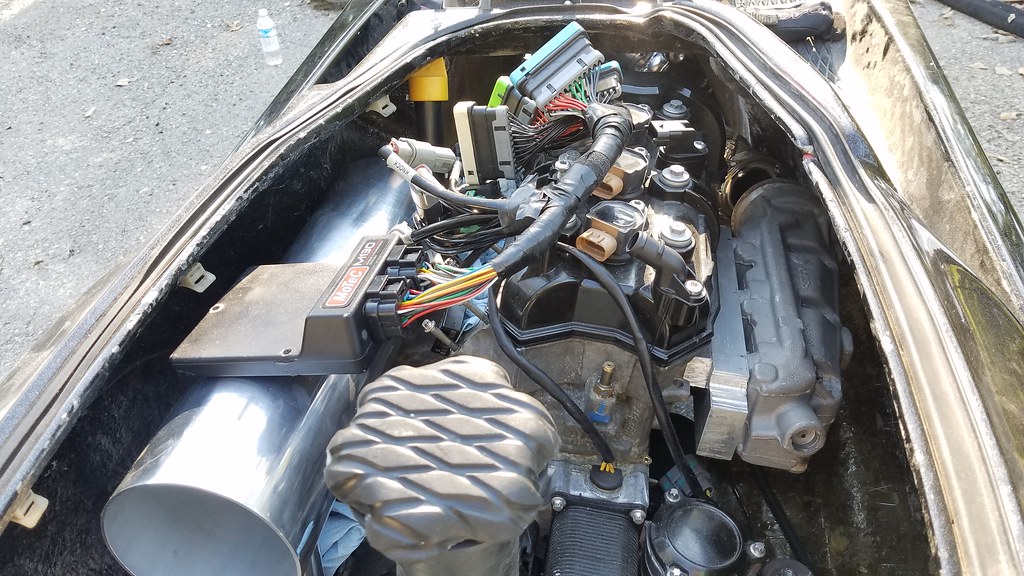 20170930_165814 by Ricky Hinch, on Flickr
 20170930_170047 by Ricky Hinch, on Flickr
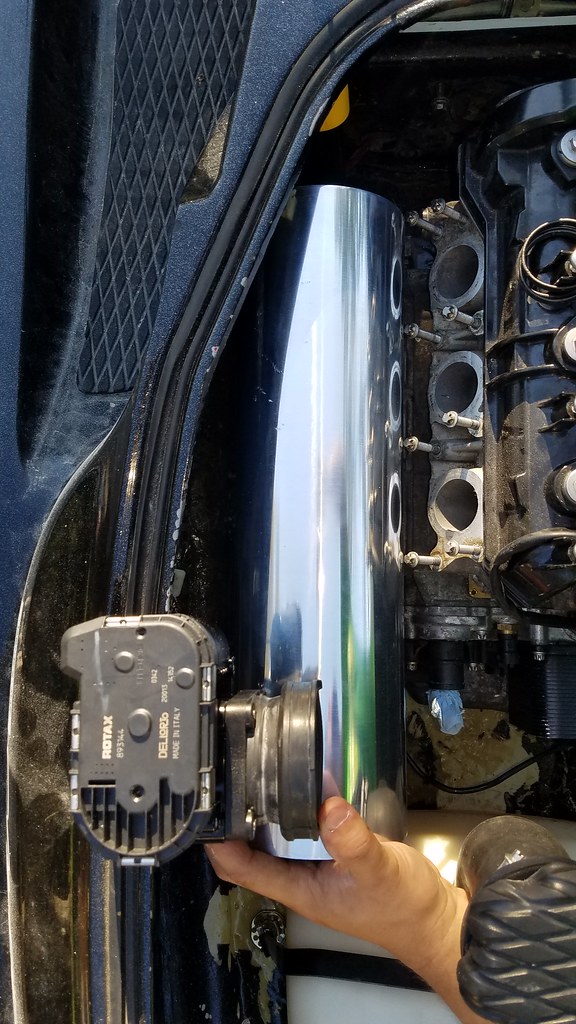 20170930_170228 by Ricky Hinch, on Flickr
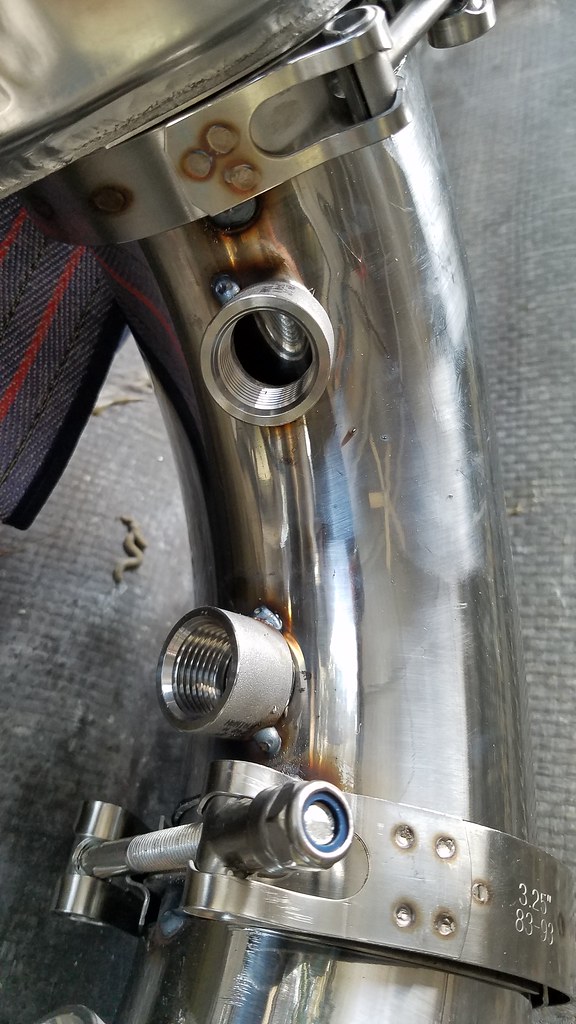 20170929_173908 by Ricky Hinch, on Flickr
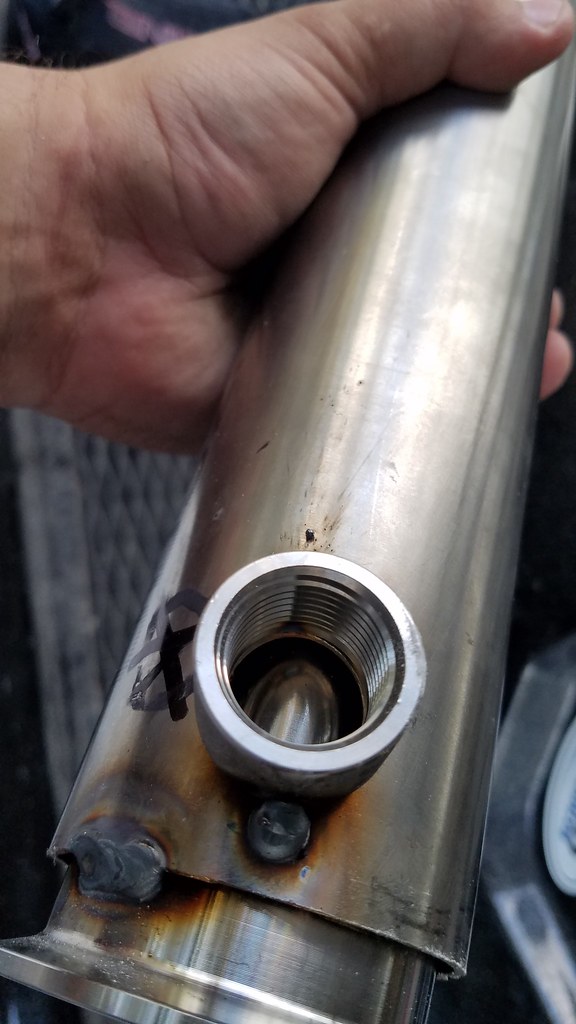 20170929_174800 by Ricky Hinch, on Flickr
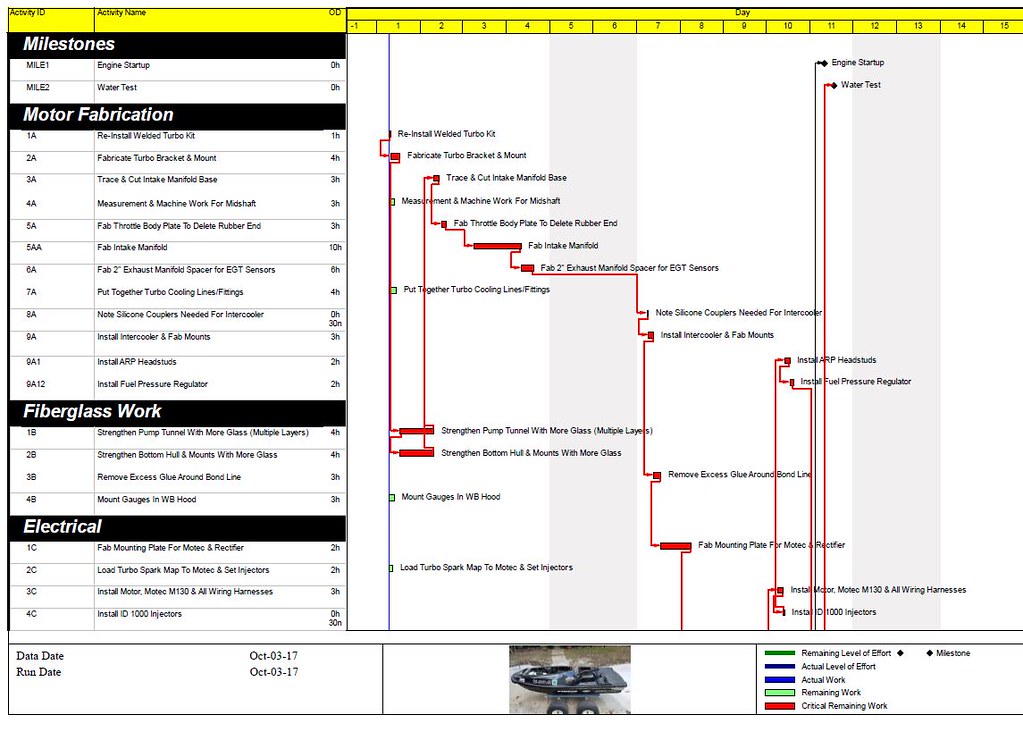
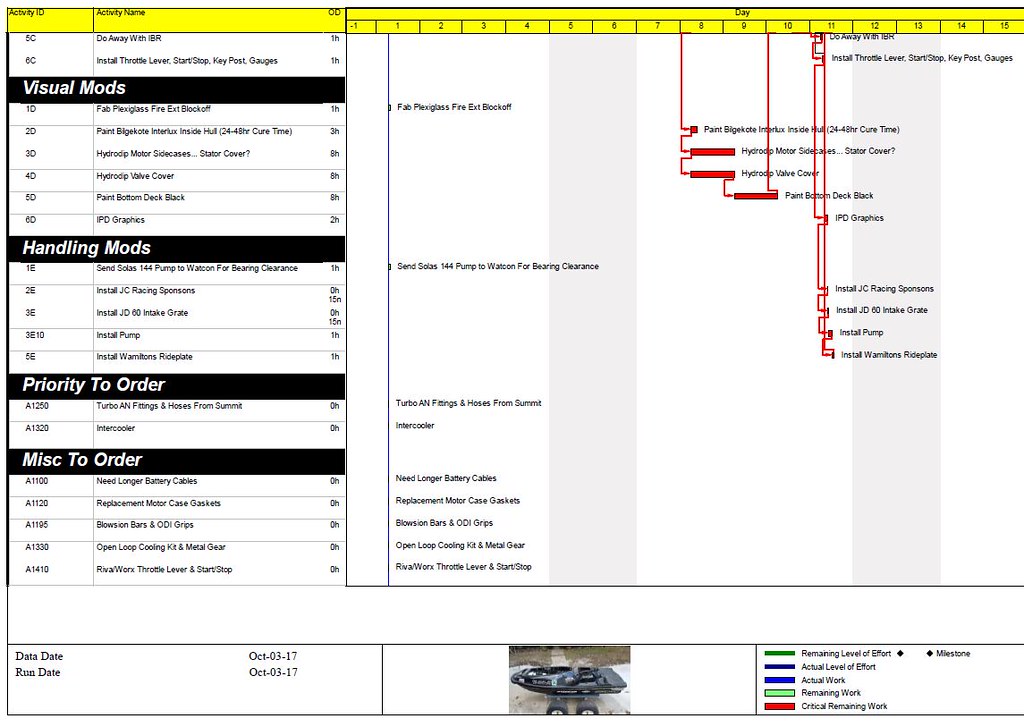
Was about time that I re-group and update my "schedule". Helps me stay focused on what I have to do instead of bouncing around between a few different things at once and taking longer to complete each thing. The list on the left is categorized on what I have to do with estimated durations for each activity and over on the right is a gantt chart showing the order things will be done in. A few of my friends ask me how I have so much time to do builds like this and the reality is that I don't have much time, I just get a good plan together so I know exactly what I need to do to hit it hard once I get an hour or two to mess around in the garage.
 1 by Ricky Hinch, on Flickr
 2 by Ricky Hinch, on Flickr
1 by Ricky Hinch, on Flickr
2 by Ricky Hinch, on Flickr- Location
- s florida
nice work!
you are a madman! lol
you are a madman! lol
- Location
- Onsted---irish Hills
Keep up the good work this thing is going to be ridiculous can't wait to get mine done