You are using an out of date browser. It may not display this or other websites correctly.
You should upgrade or use an alternative browser.
You should upgrade or use an alternative browser.
2008 Superjet "The Basketcase" Build
- Thread starter CHRISRACERX
- Start date
CHRISRACERX
Get Wet
- Location
- Galloway, nj
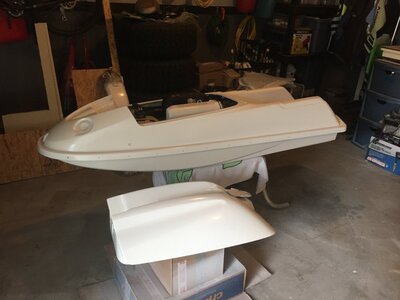
Thanks. I’ve been trying to finish it. Things keep popping up. Everything is ready for the first coat of paint. I’m getting so anxious to ride it, but I don’t want to rush it. I know it’s no super fancy AM hull with a big dasa engine but everything has been touched in this thing. It shows that it can be fixed with a little patience. Also I had a somewhat of a budget with the ski. Mainly bc I don’t know how long I’ll keep it. So lots of the parts I bought that are AM are the items the ski really needed bc the originals were toast. Once it’s finished and I’ve gotten some time on it. I’ll think about doing some other things to it.
CHRISRACERX
Get Wet
- Location
- Galloway, nj
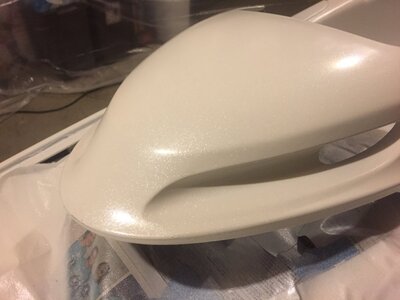
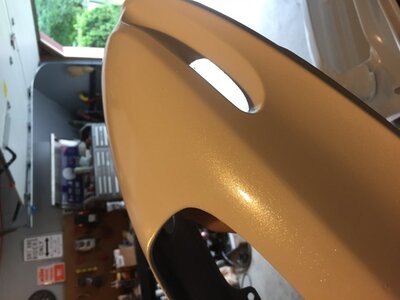
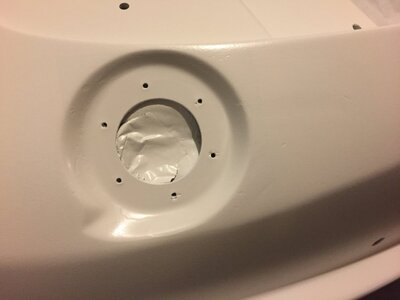
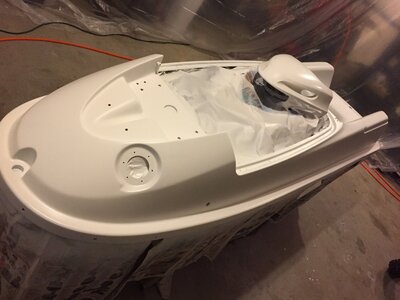
Ok finally got this thing painted. Was quiet for a little bit. Was trying to teach myself how to paint. Had to get use to a hvlp paint gun and get use to the 3 types of paint that I used. The paint i decided to use was the Duplicolor Paint shop. The paint comes ready to go. No mixing thinner or hardener to it. It’s already done for you in the can. So the base coat I did was there white. I kinda did 3 coats. I did the first 1 and let it dry overnight. Then when I went to do the second n third I had an issue. 2nd came out great. Third not so much. I gave it the proper time between coats but because of the humidity in the air it started to crack around my gas cap area. So I had to let everything dry and wet sand the area and re start. Once I got the white base coat squared away I started on the metallic clear coat as a mid coat. The clear coat seemed to be going on very nicely then my gun started to spatter the clear. I’d open the lid thinking the metal flake may be clogging so I stir it. Once I put the cap back on I would be back into business, but it would start doing it again. Once I got a full coat I was done for the day. Went to clean the gun n realized I never cleaned a specific part of my gun after I sprayed the white. It was the vent cap on the spin on lid. It had white dried paint in it that was keeping air from coming into the canister. So the second coat went on even better. The metal flake is pretty good for being basically a budget paint. Then I had to do the plain clear coat. I got 2 coats of that on the ski yesterday and now tomorrow I’ll see how much wet sanding I’ll be doing to get it to shine and be smooth. Hopefully tomorrow I get to install the pole mount, pole along with wires n cable. Hood seal, tray extension and mats. I want to be on this thing by the weekend so bad. 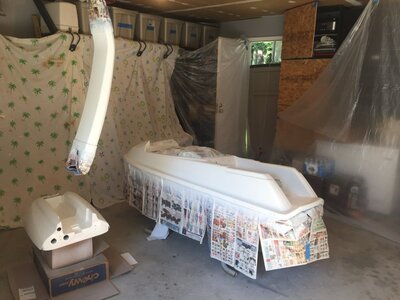


CHRISRACERX
Get Wet
- Location
- Galloway, nj
CHRISRACERX
Get Wet
- Location
- Galloway, nj
CHRISRACERX
Get Wet
- Location
- Galloway, nj
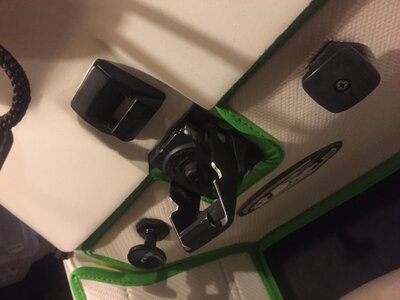
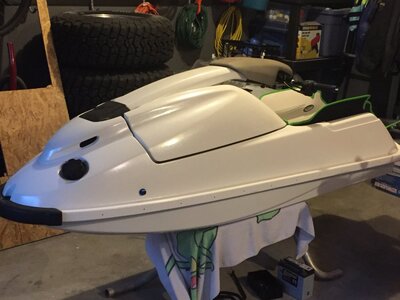
Paint is all dried. Started to put some stuff together again. Going to order my jettrim chin pad tomorrow and try to install the tray extension and glue down the mats. Had to loosen the gas tank to get the filler hose, nose cover bracket, hood brackets n pole bracket but on. Actually pole bracket is still loose. Lost the hardware. Making a trip to ACE tomorrow to secure that down. Then I can move the gas tank back into place and remount the battery tray that had to be moved also for the tank to slide. Throttle cable is hooked up n adjusted, bilge switch is ran but needs the connectors to be crimped for connection. Steering is tighten up n straight. Installed the new pole spring. Scared me at first bc it was sticking straight up. Once I bolted up the steering turn plate n bars the weight brought it down. Installed the blue anodized bilge, water pisser, n bumper Eyelit. Also installed the Watcon hood seal. The hood seal may be better than the original stocker.
So tomorrow is pole bracket hardware, mount tray extension and start to glue jet trim mats.
This thing didn’t have a pad for the cross bar for the handlebars. Any ideas what I should use? Kinda tight near the chin pad if I would use the round pad with cover.
Future parts: what to get a blue anodized gas cap. Want to hydrodip the cover on the bottom of the pole. Replace corner bumpers. Blue or black billet throttle.
Decision time: use stock side bumpers or use blue and black diamond cut hydroturf rail kit? Would buy a roll n cut out the pieces.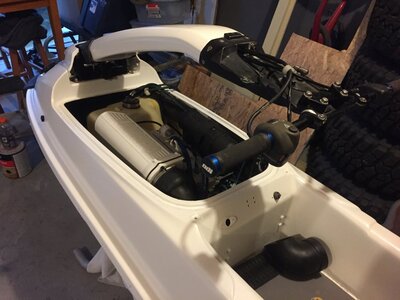


CHRISRACERX
Get Wet
- Location
- Galloway, nj
Got the tray extension done, mats, hand pole limiting rope, bilge pump connection n hardware for pole mount on. Everything looks pretty decent. Have to poke some holes through the dash mats for my primer n fuel selector knob. Have to get some more super glue to glue down the edges of the mats.
Also made some pieces of turf to glue down in a couple of spots to protect the paint and glass.


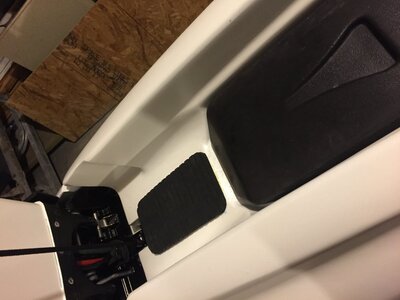

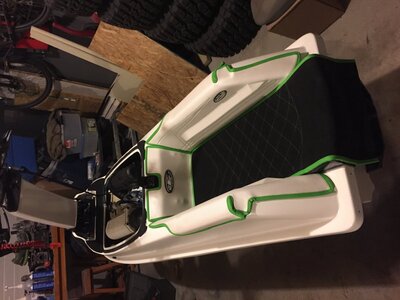
Also made some pieces of turf to glue down in a couple of spots to protect the paint and glass.


CHRISRACERX
Get Wet
- Location
- Galloway, nj
Thanks, it has come along very nicely. Little too long but things happen in life. Hoping to water test it this weekend. I’ve learned a lot on this forum reading different builds. It’s amazing all the craftsmanship that people have. I just took a little bit from everyone and turned it into this. Although it’s not perfect, it’s pretty dam good from what it was.Wow dude, ton of work - coming along real nice! Appreciate all the details in your write up!!!
Big Kahuna
Administrator
- Location
- Tuscaloosa, AL
Looks good Chris.
CHRISRACERX
Get Wet
- Location
- Galloway, nj
CHRISRACERX
Get Wet
- Location
- Galloway, nj
I got out into the water this week for the initial test run. Everything was going good up to this point. Ski sounded great as soon as it hit the water. Throttle response was right there. There were no leaks into the hull. Once I crossed the no wake area I started to throttle up. Everything was great. I was re-teaching myself how to ride a stand-up. It’s been 8years and the last one was a SXR 800. I brought the ski in after about 5 mins. Engine was cool, no leaks still, so back out I went. Was riding around for about another 15-20 then realized this is a lot more tiresome than I remember. So I started to head back to the ramp. About 50ft away the ski started to shake and rattle. I nurse it in and shut it off. Once it was on the trailer, I started it up and it sounded bad. WTF. Everything seemed to be tight. Once I got home I pulled the plugs. They look fine. Did a compression check and I have 155 in each cylinder like before. I rotated the engine and push on top of the pistons to see if the crank had some play. Nothing. With the plugs out, everything sounds fine. Once the plugs are in or the compression tester on the head the rattling comes into play. Took the couple cover off. Everything looked good down there. Back seal was still intact. So it looks like I’ll be pulling out the engine to see what is going on. Hoping it’s not the crank but I have that feeling. It’s an new sbt crank that I bought in 8-22-16. Trying not to speculate especially when people were talking up the sbt cranks. Seemed like they came a long way. Hoping my intuitions are wrong.
CHRISRACERX
Get Wet
- Location
- Galloway, nj
Well my intuitions were wrong. Pulled out the engine today. Pulled off the intake to check the reeds n inside of crank case. Everything looked good. Pulled the front cover off and there it was. The flywheel bolt came loose somehow and that is where the rattling was coming from. Flywheel was still in keyway but it wasn’t tight. If I ran it a little longer it probably would have sheered the keyway then probably bigger problems. Stator looked ok once the flywheel was off. Cleaned up the bolt (had red loctite on it) and retorque it to 50 lbs. had to wire wheel the bolts to get the paint off because it got messed up when removing the hardware.
Engine is back in the hull. Getting things back to where they were. Maybe the weather will be nice tomorrow to go for another spin.
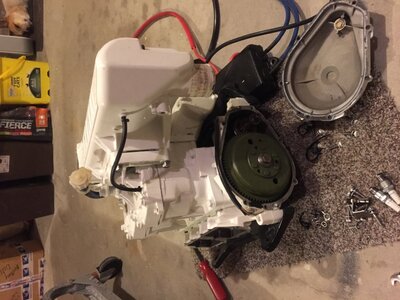
Engine is back in the hull. Getting things back to where they were. Maybe the weather will be nice tomorrow to go for another spin.

CHRISRACERX
Get Wet
- Location
- Galloway, nj
Wow, that is all I have to say for today. Went out into the garage to get things hooked up on the motor and it wasn’t good. When I opened the door all I could smell was gas. Looked into the hull and it had about 2 inches of premix in it. I pumped it out and pulled the engine but that was the easy and non frustrating part. I guess bilgekote doesn’t withstand premix for a couple of hours. All the white from the mount base down was all peeling up. It was a mess. Looks like I’m scraping off the paint on the bottom. Going to leave it original. Then sand along the sides and tape off a line to get it to not look like an eyesore. Hopefully engine will be back into place soon. Also looked on the bottom of the engine and some of the paint was bubbling there too. Looks like I’ll wore brush the loose stuff and do a little touch up.
What made it happened? When I reinstalled the engine I hooked up the fuel lines but I left off the primer lines going to the pumper. He was baking in my garage with the humidity and it must have pressurized it to where it pushed through the primer line. Gas cap is loose now so hopefully it doesn’t burp out more fuel. I think the 2 gallons I pumped out was enough.
What made it happened? When I reinstalled the engine I hooked up the fuel lines but I left off the primer lines going to the pumper. He was baking in my garage with the humidity and it must have pressurized it to where it pushed through the primer line. Gas cap is loose now so hopefully it doesn’t burp out more fuel. I think the 2 gallons I pumped out was enough.
CHRISRACERX
Get Wet
- Location
- Galloway, nj
All back together now. Inside is all painted back up. Engine is installed and everything is hooked up. 2nd test run soon
Wow, that is all I have to say for today. Went out into the garage to get things hooked up on the motor and it wasn’t good. When I opened the door all I could smell was gas. Looked into the hull and it had about 2 inches of premix in it. I pumped it out and pulled the engine but that was the easy and non frustrating part. I guess bilgekote doesn’t withstand premix for a couple of hours. All the white from the mount base down was all peeling up. It was a mess. Looks like I’m scraping off the paint on the bottom. Going to leave it original. Then sand along the sides and tape off a line to get it to not look like an eyesore. Hopefully engine will be back into place soon. Also looked on the bottom of the engine and some of the paint was bubbling there too. Looks like I’ll wore brush the loose stuff and do a little touch up.
What made it happened? When I reinstalled the engine I hooked up the fuel lines but I left off the primer lines going to the pumper. He was baking in my garage with the humidity and it must have pressurized it to where it pushed through the primer line. Gas cap is loose now so hopefully it doesn’t burp out more fuel. I think the 2 gallons I pumped out was enough.
I had something similar happen to me. I was using a non oem vent valve and it was not bleeding pressure at the right psi. I blew up my primer bulb and some seals in my carb before I figured it out. I have since removed my primer as it starts every time anyways but most of my issue was from the valve.
CHRISRACERX
Get Wet
- Location
- Galloway, nj
Yeah, I learned a little lesson from it. If the primer line was attached to the pumper, I probably would have been fine bc the fuel would have stopped at the pumper. I’ve actually been keeping the cap a little loose now while it’s in the garage so the pressure doesn’t build as much.
CHRISRACERX
Get Wet
- Location
- Galloway, nj
Got the new chin pad from Jettrim. It looks great. Had them put on the prowatercraft label on it. Wanted them to have a little recognition since the colors scheme came from there SJ they built for former Team Kawasaki Off-road racer Destry Abbott.
Also put on the stock side bumpers n corners. Still might change to hydroturf but I wanted to get it completed and try to enjoy it. Plus I’m still not sure if I’m keeping it. I enjoy building n I have another project in the line.

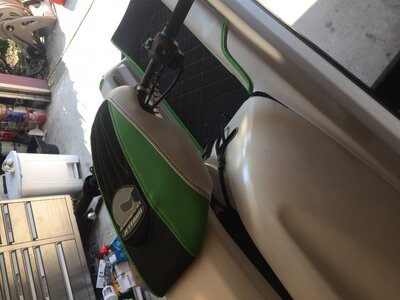
Also put on the stock side bumpers n corners. Still might change to hydroturf but I wanted to get it completed and try to enjoy it. Plus I’m still not sure if I’m keeping it. I enjoy building n I have another project in the line.


- Location
- Orange County
Great build man! Good to see another thumper talker on the site!
edit: looks like you joined the site 6 days before me too lol
edit: looks like you joined the site 6 days before me too lol

